
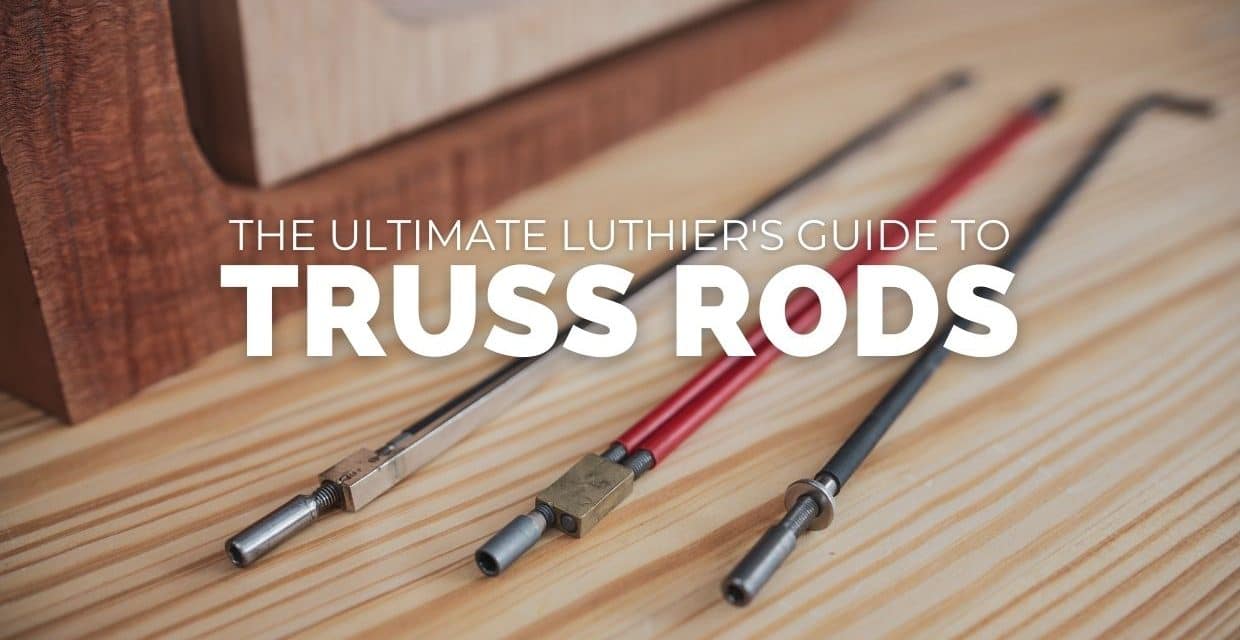
The guitar truss rod is one of the most important parts of any acoustic or electric guitar because it enables us to adjust the guitar neck accurately for comfortable playing and long-term stability. Not all truss rods are created equally, though, and having the right type of truss rod can give the luthier significant advantages in adjusting the neck while building the guitar and doing the initial fretwork and set-up.
The truss rod’s importance during the guitar’s design and building phases is essential long after the guitar-building is complete. The truss rod’s ability to fine-tune the guitar neck relief (forward or back bow) is a key to maintaining playing comfort and great tone as the guitar neck naturally responds to the changes in its environment, such as humidity, different sets of strings and playing styles.
My hope is that this guide will help you choose the best truss rod for your guitar-building projects as we look closely at each type of truss rod, how they work, and what makes each style different. I’ll also be sharing what I have learned building my handmade guitars over the years, such as how to test your truss rod and how to install it properly. And if you are not building guitars at all, but simply want to understand and safely adjust the one on your bench or in your hands, this guide is for you too. The same principles apply whether the guitar came from my bench or from a factory.
Lastly, we’ll discuss some tips, techniques and best practices for safely adjusting the truss rod of your guitar to improve or maintain its action, playability and stability for years to come.
I’ve also added sections on measuring neck relief, troubleshooting a rod that won’t cooperate, and knowing when the smartest move is to put the wrench down.
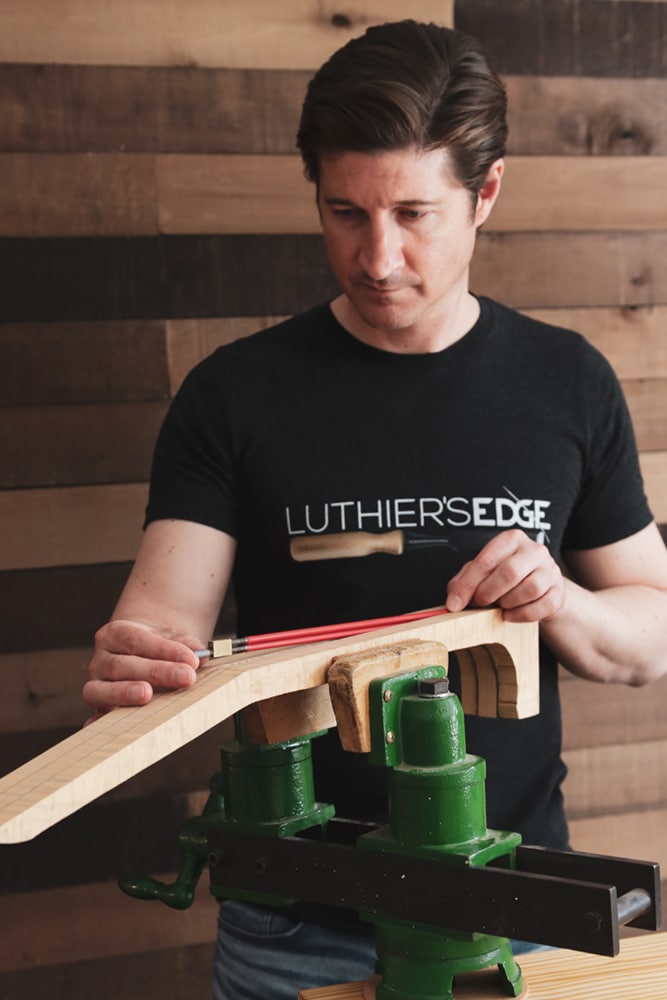
What Is a Guitar Truss Rod (and What Does It Do)?
A guitar truss rod is an adjustable steel rod (or pair of rods) installed inside the neck, running under the fingerboard from one end of the neck toward the other. Its job is to balance the pull of the strings so the neck can hold a very slight, controlled forward bow, called relief. Turning the adjustment nut changes that balance: tightening the rod reduces relief and pulls the neck back, and loosening it allows the string tension to pull a little more relief into the neck.
That is the textbook answer. Here is the part that matters at the bench. The strings on a steel string guitar pull on the neck with well over a hundred pounds of tension, constantly, for the entire life of the instrument. Wood is strong, but it is also alive. It moves with the seasons, with string changes, and with time. The truss rod is what lets us fine-tune the neck’s response to all of that instead of just hoping for the best.
One important thing to get straight right away, because it will save you a lot of frustration later: the truss rod is not an action adjustment screw, and it is not a tool for fixing every buzz. It adjusts one thing, the amount of relief in the neck. Action lives mostly at the nut and the saddle. We’ll come back to this distinction throughout the guide.
How Does A Truss Rod Work?
On the most basic level, a truss rod counteracts the pull of the guitar strings, which will cause the neck to bow forward when they are tuned up to pitch. But how it does that depends on the type of rod, and this distinction matters more than most guides let on. A dual-action rod really does bend forward or backward inside the neck as the adjustment nut is turned, carrying the neck with it. A single-action compression rod works differently: however it is installed, tightening its nut puts the wood along the back side of the neck under compression, and because the dense, stiff fingerboard on top resists that squeeze, the imbalance forces the neck into back bow. The rod supplies the force; the neck itself does the bending. (We will look closely at both mechanisms in the types section below.)
Either way, having a perfectly straight guitar neck is not optimal. Having a very subtle forward bow to the neck is optimal for low and comfortable string action (we want the strings close to the tops of the fret wire for comfortable playing, but not so close that the strings buzz against them when in motion). The truss rod helps us subtly adjust the neck bow to find a perfect balance and the sweet spot of playing comfort and a great-sounding guitar.
That subtle forward bow has a name, relief, and it is the single most useful concept in this whole guide. A little later I’ll show you exactly how to measure it and how to dial it in. And if you want to go deeper on why the shape of that bow matters even more than the amount, I wrote about that in Should You Level Frets Straight, or With Relief?.
Does Every Guitar Have a Truss Rod?
Nearly all steel string acoustic guitars and electric guitars built in the last several decades have an adjustable truss rod. The string tension on a steel string instrument is simply too high to manage without one. That goes for bass guitars too: a bass truss rod works exactly the same way as a guitar’s, and everything in this guide (the relief measurement, the turning logic, the safety rules) applies directly. Basses just have longer necks and heavier strings, so relief targets tend to run a little larger, and the same measure-first discipline matters even more.
Traditional classical and nylon string guitars often do not have one. Nylon strings pull with far less tension, so many classical builders rely on the neck wood itself, sometimes with a non-adjustable reinforcement bar inside. Some modern classical and crossover guitars do include an adjustable rod, so if you are not sure, check for an adjustment point.
I will let you in on something that surprises people: I actually install a truss rod in my own modern nylon string guitars, and my reasons are almost the opposite of why one goes into a steel string. That is a story for its own letter soon, but the short version is that it is about perfect fretwork, not fighting string tension.
Where is the adjustment nut? There are three common locations:
- At the headstock, just behind the nut, usually under a small cover plate or tucked into a recessed cavity. This is the most common spot on electrics and many modern acoustics.
- Inside the soundhole, at the body end of the neck on many acoustic guitars. You reach it with a long truss rod wrench through the soundhole, between the top braces. A dedicated soundhole truss rod wrench makes this much less of a knuckle-scraper.
- At the heel of the neck on some instruments. On many modern electrics and basses this is a spoke wheel: a knurled wheel at the end of the fingerboard that you turn with a rod, small screwdriver, or Allen key through the gap, no neck removal needed, and the same tighten-versus-loosen logic applies. On vintage-style bolt-on electrics, though, the heel adjustment can require loosening or removing the neck. If that is what you have, and you have never done it before, that is a fine moment to let a tech or luthier show you the first one.
If you cannot find an adjustment nut at any of those locations on a nylon string guitar, you very likely have a non-adjustable neck, and the setup adjustments belong at the nut, saddle, and fretwork instead.
Single-Action vs Dual-Action Truss Rods
Single-Action Truss Rod (Compression Rod)
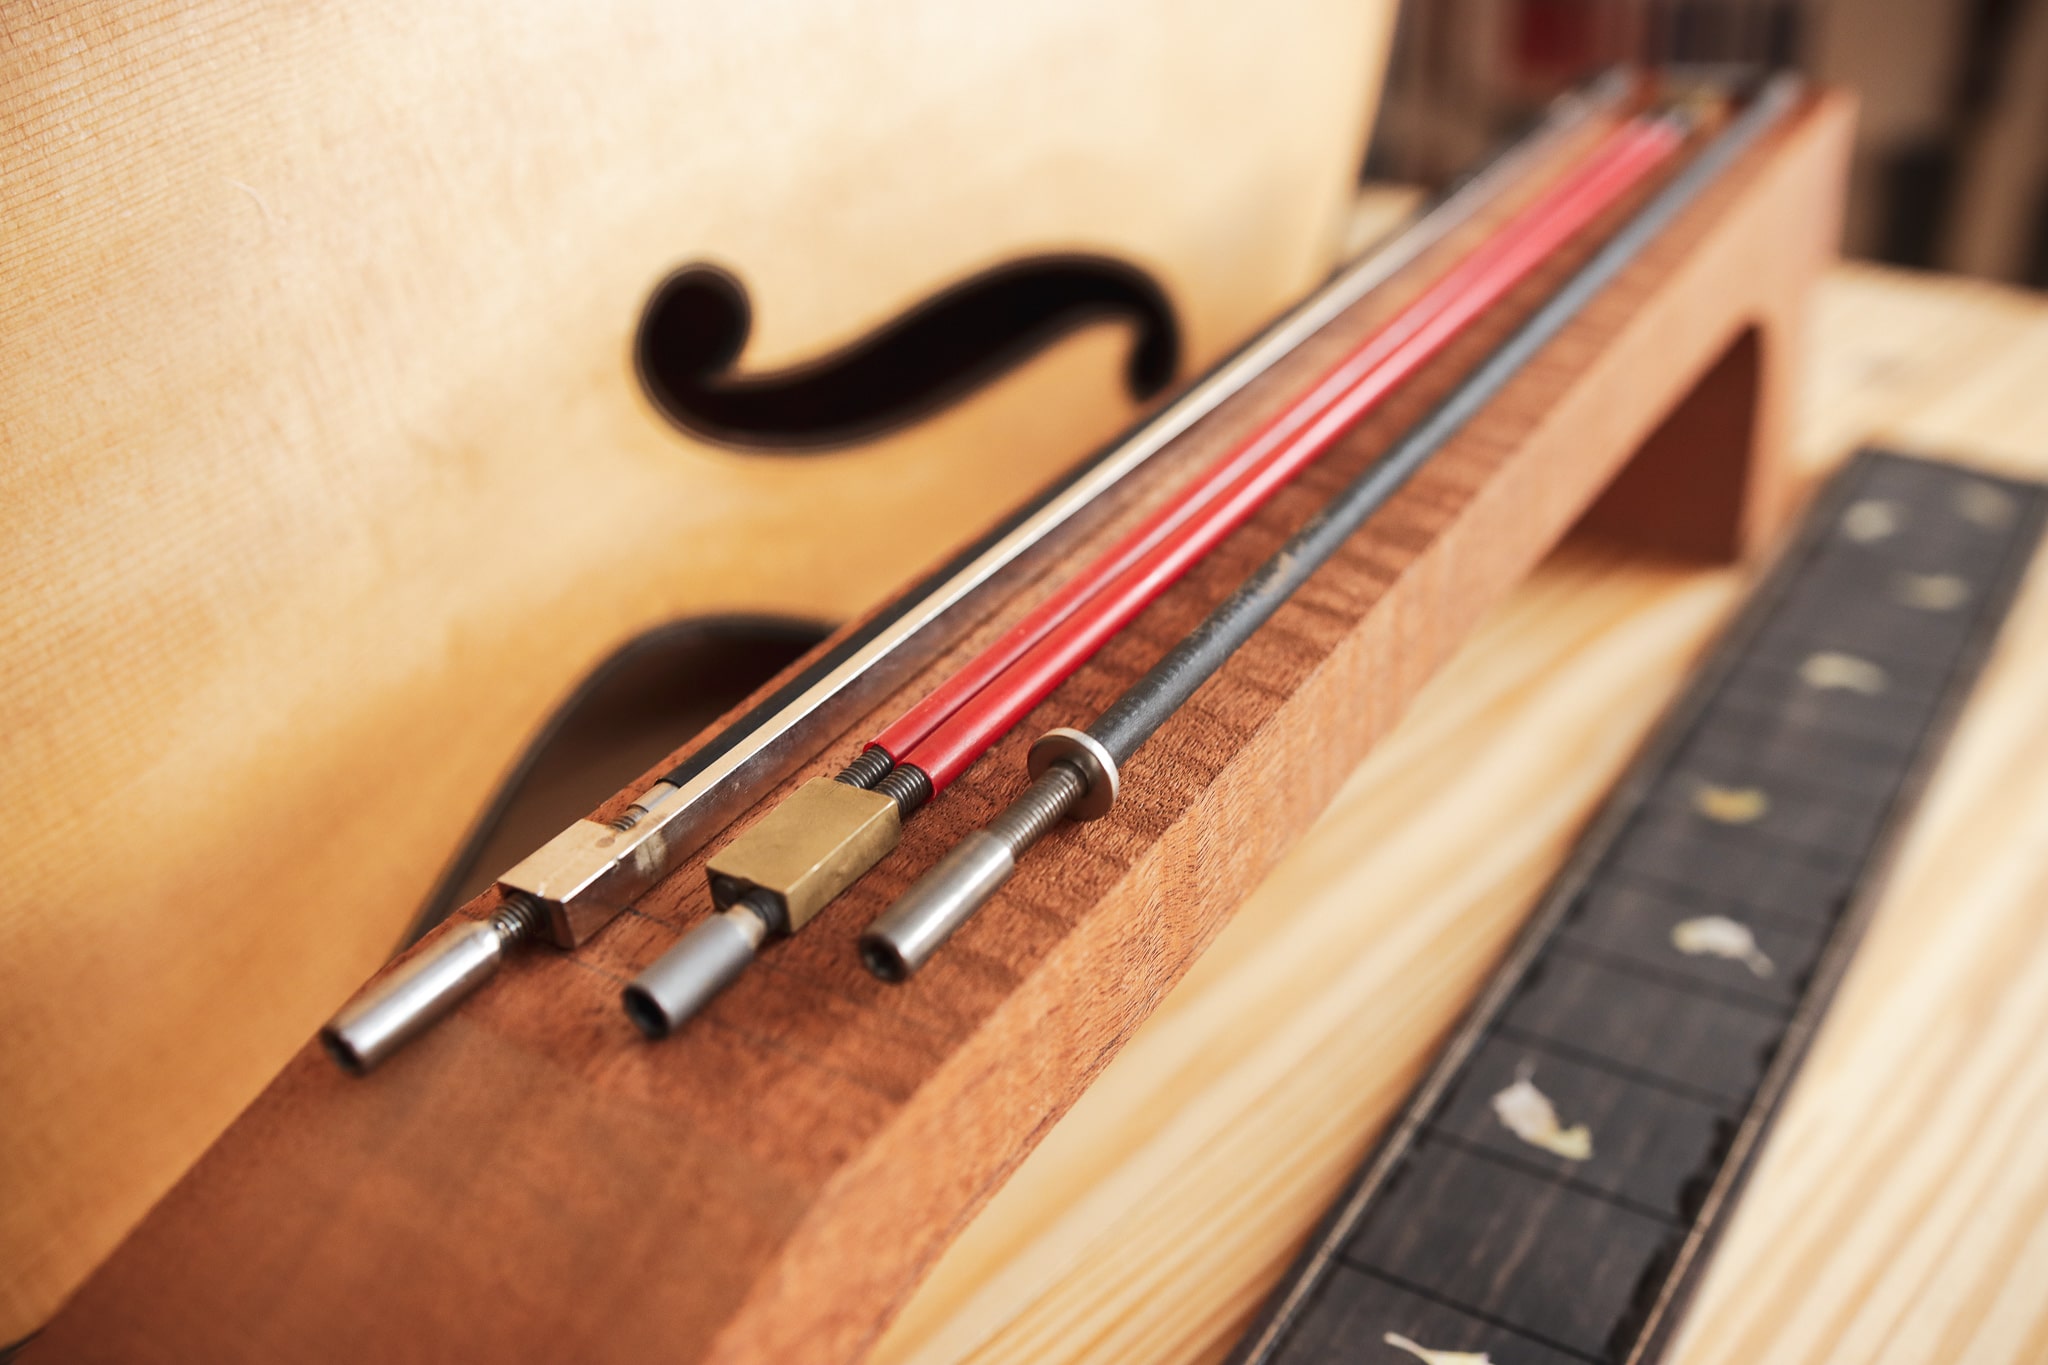
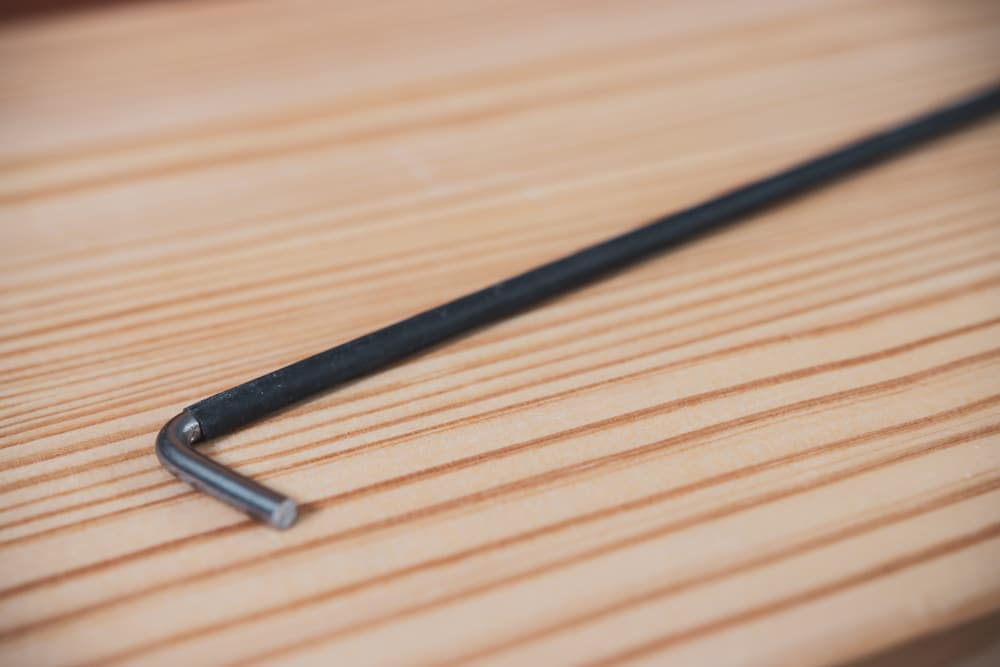
This type of truss rod usually consists of a single piece of steel that is threaded on one end to receive an adjustment nut and washer, and on the other end, it may be threaded on one side to receive an anchor bolt or bent into an L-shape.
These single-action truss rods are often inlaid into a curved slot in the neck so that when the rod is tightened at the nut, it wants to straighten out, exerting a force that pulls against the tension of the strings and helps to relieve the forward bow induced naturally into the neck by the tension of the strings tuned up to pitch. This type of truss rod can only bend the neck back and can not induce forward bow like some other types.
Notice what is really doing the work here: compression. The rod squeezes the wood between the nut and the anchor along the back side of the neck, and the dense, stiff fingerboard on top resists that squeeze, so the neck responds by bowing backward. The rod is not bending the neck by flexing; it is creating an imbalance the neck resolves by bending.
Builders install compression rods more than one way, by the way, and you will hear strong opinions about each. Installing the rod in a curved channel means that as it tightens, it also wants to straighten, which adds to the back-bow force. Other builders install the rod straight and let the offset compression alone do the work. Both live under the same principle: the rod creates a force imbalance, and the neck resolves it by bending. Either way, the wood itself is genuinely part of this rod’s mechanism, which becomes important in a moment when we talk about humidity and wood density.
Pros
- Lightweight
- More wood left in the neck
Cons
- Affected greatly by variations in wood density
- No forward adjustment
- More affected by relative humidity
Dual-Action Truss Rod (Two-Way Rod)
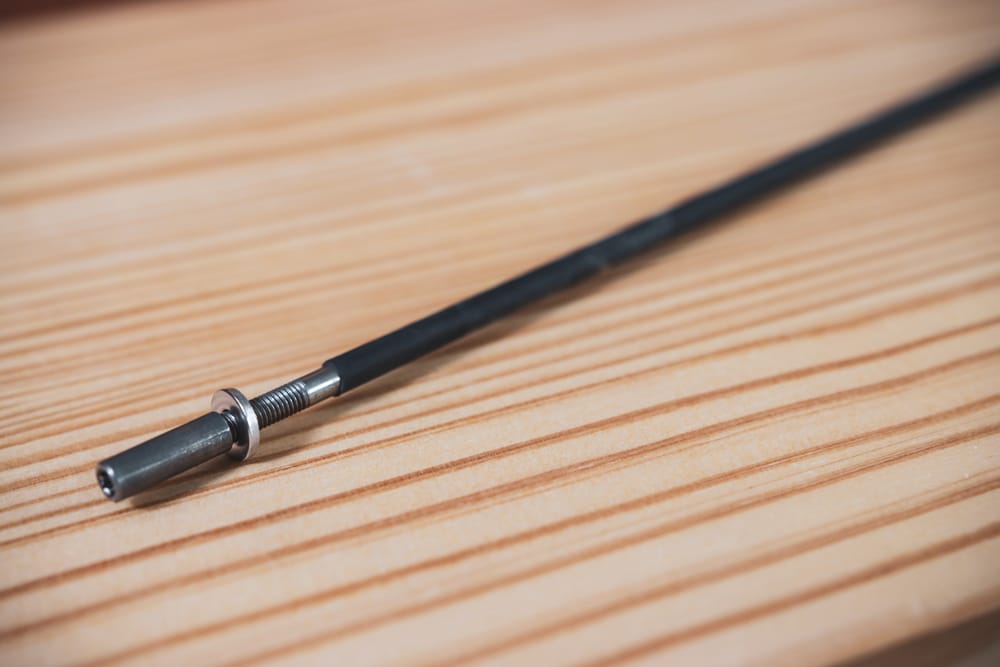
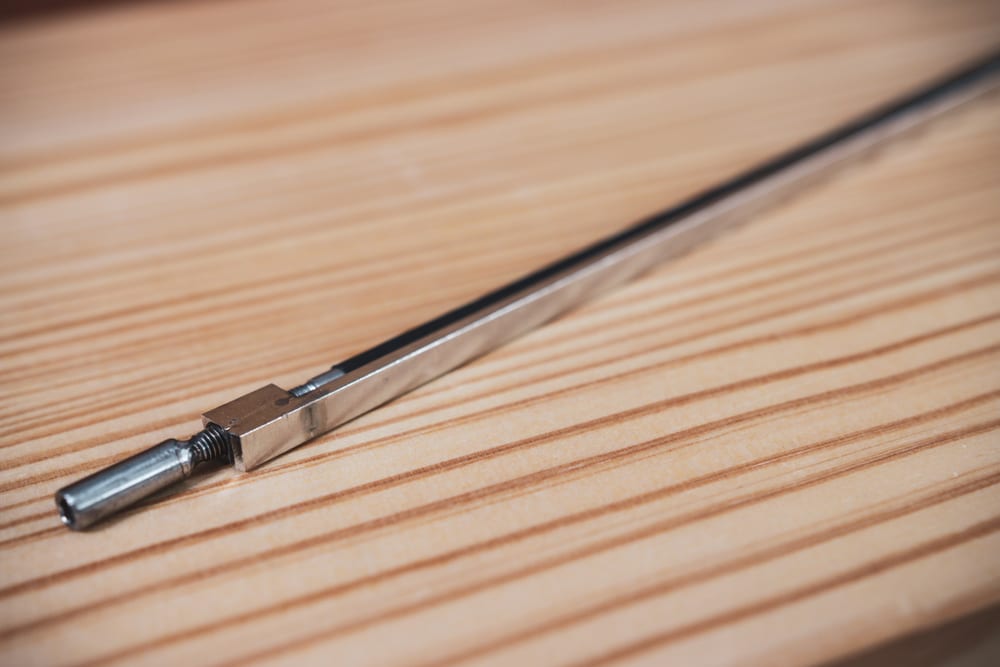
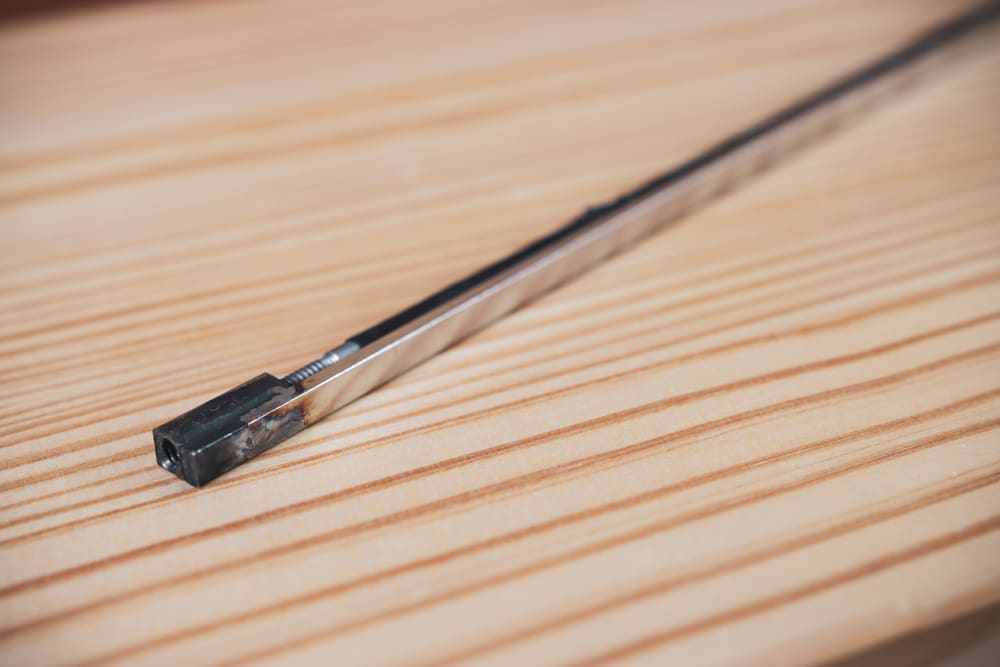
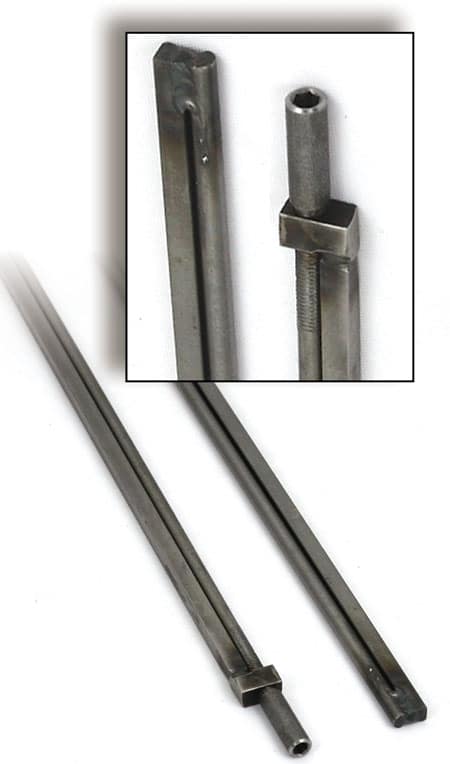
A dual action or double-action guitar truss rod comes in several different forms, all sharing one thing in common: the addition of a second rod or metal bar above the main truss rod.
The top bar is somehow fixed in length, and the lower bar is threaded on each end to allow it to expand or contract in length, based on which direction the nut is turned while adjusting the truss rod. The adjustment nut is usually welded or somehow permanently fixed to the end of the lower rod to allow for precise adjustments. Better rods have threads designed for smooth and even adjustments to help get the neck bow just right.
Pros
- Not dependent on wood density
- Two-way adjustment (forward and back)
- More stable than single compression rod
Cons
-
Weighs more
-
Requires more wood to be removed
- Adjusting nut is attached and if damaged can not be replaced
I have seen a few other variations over the years, but these are the main styles that I have the most personal experience using in my work.
Which Is Better?
| Single-Action | Dual-Action | |
|---|---|---|
| Adjustment direction | Back only (against string pull) | Both directions (back and forward) |
| Works without string tension | Yes — but can only bow backward, not forward. | Yes — it bends the neck on its own in both directions |
| Weight | Lighter | Heavier |
| Wood removed from the neck | Less | More |
| Humidity & wood-density sensitivity | Higher (the wood is part of the mechanism) | Lower |
| If the nut strips | Often replaceable | Usually not (welded nut) |
| Typically found in | Many traditional and production guitars | Many modern handmade and factory guitars |
Single-action vs dual-action truss rods at a glance. Details on each point are in the sections above.
Neither one is “the best” for every guitar. The single-action rod is lighter and leaves more wood in the neck, and it is probably in more guitars than any other type. The dual-action rod gives you control in both directions and behaves far more predictably as the wood changes. Later in this guide I’ll tell you exactly which one I use in my own builds and why, and just as importantly, where my preference has real trade-offs.
Truss Rod vs Carbon Fiber Reinforcement
This question comes up constantly, usually framed as either/or: “Should I use a truss rod or carbon fiber rods?”
It is a false choice. They solve two different problems, and they work beautifully together.
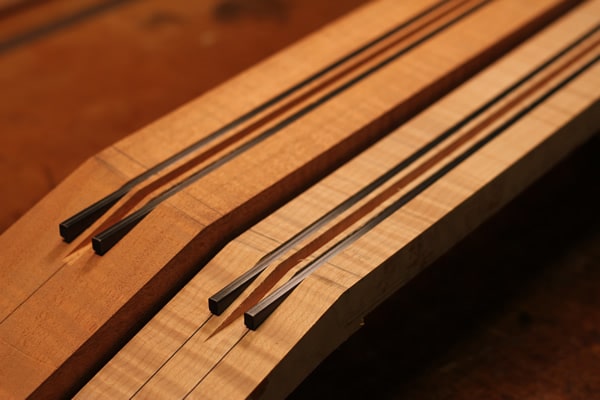
Carbon fiber reinforcement is about stiffness and stability. Carbon fiber rods inlaid alongside the truss rod dramatically stiffen the neck and make it far more resistant to seasonal movement, string tension creep, and the slow twisting that some necks develop over the years. But carbon fiber is not adjustable. Once it is glued in, it holds whatever it holds.
The truss rod is about adjustability. It cannot make a floppy neck stiff, and it should not be asked to. Its job is to give you a precise, controllable margin of adjustment around whatever stiffness the neck already has.
So the honest answer is:
Carbon fiber stabilizes, the truss rod adjusts, and neither replaces the other. In my own necks I have been using a dual-action truss rod flanked by two carbon fiber rods for over twenty years, and that combination is a big part of why my necks stay put through seasons and string changes.
If you want to go deep on the carbon fiber side, I wrote a full free guide: Carbon Fiber Guitar Neck Reinforcement. And inside the Luthier’s EDGE, my Carbon Fiber Neck Reinforcement course walks through exactly how I install them in my own builds.
The Guitar Neck Is a System
The truss rod is a big part of the neck. But the neck is a system, and every part of that system works together and affects all the others:
- The neck wood itself. Its species, its density, and its grain direction (quartersawn versus flatsawn) set the baseline stiffness that everything else works around.
- The fingerboard. A dense ebony board with straight grain adds real stiffness and stability to the whole assembly.
- The frets. This one surprises people. The fit of the fret tang in its slot changes how the neck behaves. Fret a neck with tangs that fit tightly and the compression can straighten the neck or even pull it into a slight back bow. On some of my own builds I deliberately size the tangs for a whisper of back bow that I know the truss rod can pull forward for fret leveling. The wire itself is a design decision too, and I cover it in my fret wire guide; the full method, from slot prep to sizing the tangs, is Fretwork Mastery Part 1 inside the EDGE.
- Carbon fiber reinforcement, as we just covered, adding stiffness the rod can then fine-tune around.
- And the truss rod, whose real job is adjustability: the controllable margin that makes optimal fretwork and a great setup possible.
In my own building, I don’t use the truss rod to force the neck into a shape. I build the shape I want into the neck itself, in the neck and fingerboard joint, in the surfacing of the board, and in the fretwork, so the rod’s job is simply to return the neck to its original shape as strings and seasons try to pull it away. A reader once asked me how to control where the bow rises when adjusting a dual-action rod, and this is the honest answer: mostly, you can’t. The rod changes how much the neck bows. It cannot really choose where the curve lives. That is decided by the neck’s construction, its stiffness from spot to spot, and the fretwork.
That is why, when a guitar just does not feel right, the truss rod is not always the answer. As I put it in my letter on leveling frets straight or with relief: you can change how much the neck bows, but you cannot move where the low point falls. Great playability comes from the whole system being built and tuned together, and the truss rod gives you the adjustable margin within it.
Keep that lens on for the rest of this guide. It will make everything that follows, from measuring relief to troubleshooting, make a lot more sense.
If you are working on your first builds and this systems way of thinking resonates with you, it is the heart of how I teach everything inside the Luthier’s EDGE.
What Is Neck Relief and How Do You Measure It?
Neck relief is the small amount of forward bow in the neck, measured as the gap between the strings and the frets in the middle of the neck when the string is held down at both ends. A vibrating string swings in an arc, widest near its middle, so a neck with a touch of forward bow gives the string room to move without slapping the frets. That is why a dead straight neck is usually not the goal for playing (even though, as you’ll see in the fretwork discussion, dead straight is exactly what I want when leveling frets).
Here is how to measure it. The string itself becomes your straightedge:
- Tune the guitar to pitch. Relief only means something under real string tension.
- Capo the first fret. (Or hold the string down there with a finger if you have three hands.)
- Fret the same string at the last fret with your other hand. The string is now a perfectly straight line between two points.
- Look at the gap between the bottom of the string and the tops of the frets in the middle of the span, usually somewhere around the 7th to 9th fret. Check a few frets on either side and use the biggest gap you find.
- Measure that gap with a feeler gauge. Slip leaves in until one just barely touches the string without lifting it. That thickness is your relief.
How much relief should you have? I want to be straight with you here: there is no single magic number, and anyone who hands you one as gospel is oversimplifying. It varies with your playing style, how hard you attack the strings, your string gauge, and the guitar itself. What I can give you is an honest starting range:
- Around .005″ to .010″ is a common starting zone for many electric guitars, with lighter players sometimes going even flatter.
- Around .008″ to .012″ is a common starting zone for steel string acoustics.
- If you want one safe number to start from while you learn what you like, about .010″ will not lead you astray on most guitars. I tend to prefer about .006″ for many of my steel string and archtop guitars, but it’s a matter of feel and is different from guitar to guitar.
Treat those as starting points for your own experiments, not commandments. Set the relief, play, listen, adjust. Your hands will tell you more than any chart.
A few tools make this easy and repeatable. A set of feeler gauges is the essential one. A string action gauge is what I use to measure the action itself once relief is set. And a precision notched straightedge is a wonderful addition for anyone doing fretwork, because it rides over the frets and reads the fingerboard itself, which tells you whether you are looking at a relief issue or a fretwork issue. (A 3-in-1 Tri-Beam straightedge combines the straight and notched edges in one tool if you’d rather buy once.)
One more thing before you reach for the wrench. The amount of relief is only half the story. Where the low point of the bow falls, and how evenly the curve runs, matters even more to how the guitar feels, and that part the truss rod cannot control. If you have a guitar that measures fine and still fights you, this letter explains what is probably going on.
If measuring and setting up a neck still feels intimidating, this is exactly the kind of thing I help members work through, on their actual guitars, in our monthly live Q&A sessions inside the Luthier’s EDGE, and my Guitar Physics & Design course builds the whole setup-and-care foundation from the ground up.
How to Adjust a Guitar Truss Rod (Step by Step)
 Before you begin adjusting the truss rod of your guitar, there are a few critical points to be aware of to minimize potential problems or even truss rod breakage:
- Only use the correct truss rod adjustment tool — Be sure the truss rod adjustment tool (Allen key, truss rod wrench, etc.) you are using is the proper size. If it’s close but not perfect, don’t use it. If you strip out the nut, you won’t be able to adjust the rod anymore, and it could be very difficult to fix. (A full truss rod wrench set covers virtually every guitar that comes across your bench; MusicNomad also makes a good set.)
- Mark the current location — Use a marker to put a line on the top of the nut, so you will know where you started from. This works as a reference for how much you turned the nut and also a way to abort the mission if you need to go back to where it was.
- Adjust in small amounts — A truss rod can break, so it’s important to take your time and work in small steps. Make a 1/4 turn, then wait a while because the neck may respond slowly to the new pressure from the truss rod. You do not want a shocking amount of stress suddenly applied; you want the wood to adjust to its new situation gradually.
- Do not accidentally torque the adjustment nut to the side — Only turn it gently clockwise or counterclockwise. Any torque to the side could bend or even break off the adjusting nut, if it is a welded nut double-action design.
Which Way Do You Turn a Truss Rod?
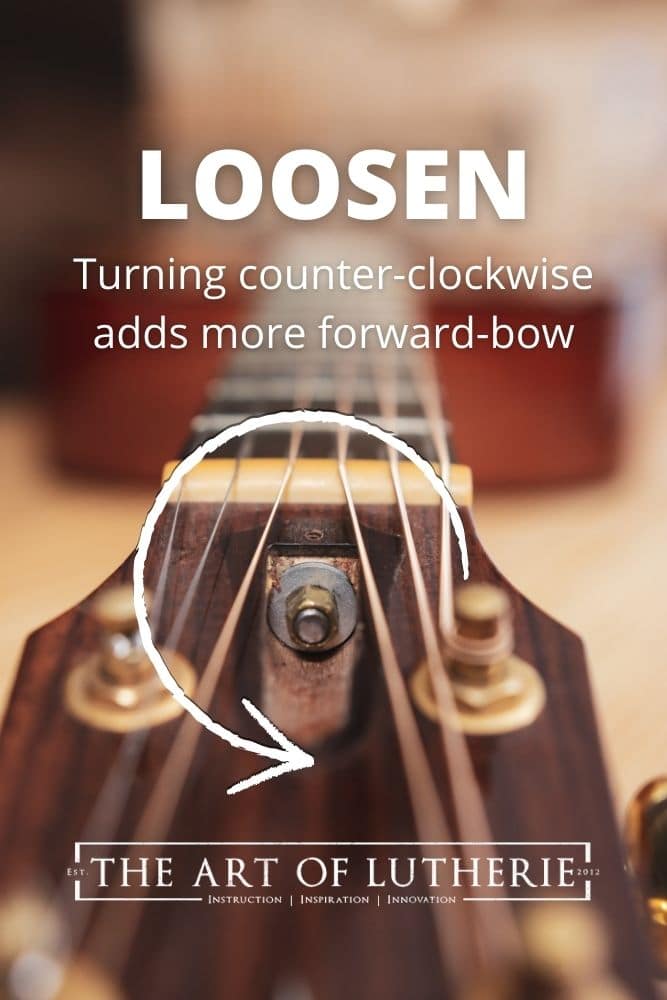
You have probably heard “righty tighty, lefty loosey,” and on most truss rods that holds true: viewed facing the adjustment nut, clockwise tightens and counterclockwise loosens. But rod designs vary, so I want you to anchor the decision to the effect, not to a memorized direction:
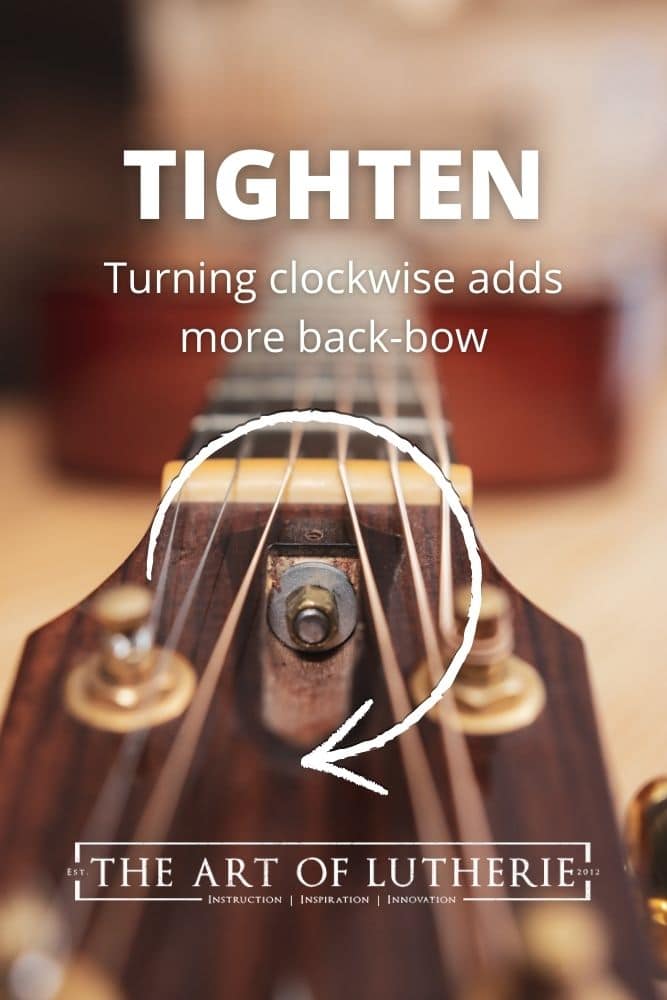
- Tightening the rod pulls the neck back, which reduces relief
- The gap at the middle of the neck gets smaller and the action tends to come down.
- Loosening the rod lets the string tension pull the neck forward, which adds relief
- The gap gets bigger and the strings gain room to vibrate.
The measurement you just learned is your truth-teller. Make a small adjustment, re-measure, and confirm the gap moved the way you expected. If it moved the wrong way, you now know exactly how your rod behaves, and no harm done.
The Procedure
- Tune to pitch and measure the relief first. Write the number down. Never adjust before measuring; you cannot navigate without knowing where you are.
- Decide what the neck needs.
- Too much relief (a big gap, high action, the neck feels like a banana): the rod needs to be tightened to reduce relief.
- Too little relief or back bow (little to no gap, strings buzzing on the frets in the first half of the neck): the rod needs to be loosened to add relief.
- Fit the correct wrench, mark the nut, and turn no more than 1/4 turn. Less than 1/4 turn can make a big difference, so start small.
- Re-tune, then give the neck time to respond. The wood responds gradually to its new situation. I like to re-check after the guitar has settled, and on some necks that genuinely means a few hours or more.
- Re-measure and repeat in small steps until the relief lands where you want it.
- Then set your action. Once relief is right, remaining action adjustments belong at the nut and saddle. If the action is still not right with proper relief, the truss rod is not the tool for the next step.
If at any point the nut will not turn with reasonable hand pressure, stop. Do not lean on it. Jump down to the troubleshooting section, because a rod that fights you is telling you something.
How Humidity Affects Neck Relief
Here is the pattern:
- When humidity rises, the neck and fingerboard absorb moisture and swell. The swelling tends to straighten the neck, which reduces relief. Less relief means less room for the strings to vibrate, and that often shows up as new fret buzz.
- When humidity drops, the wood dries and shrinks, and the string tension pulls more relief into the neck. That shows up as higher action and a stiffer feel.
Most of the time these movements are subtle. But on a guitar set up with very low action, even a subtle seasonal swing is noticeable to a discerning player, and as I shared earlier, a single-action compression rod amplifies the effect because the wood itself is part of the rod’s mechanism.
Two pieces of honest advice:
First, stabilize before you chase. If the humidity in the room is swinging wildly, adjusting the truss rod is chasing a moving target. Get a reliable hygrometer and aim to keep the guitar’s environment in the neighborhood of 45 to 50 percent relative humidity. A stable environment will do more for your neck than any amount of wrench work, and it protects the rest of the guitar too. (Humidity is a deep enough subject that I teach a whole course on it inside the EDGE: Humidity Fundamentals & Advanced Applications.)
Second, seasonal adjustment is normal, not a defect. Many well-built, well-kept guitars want a small truss rod touch-up as the seasons change, often just a small fraction of a turn in the fall and back again in the spring. Now that you can measure relief, you can do this confidently in a few minutes.
Truss Rod Troubleshooting
My truss rod is maxed out and the neck still has too much relief
Stop turning. A rod that is tight to the end of its travel and still not doing the job is a symptom, not a nuisance, and forcing it further is how rods break.
There is one honest trick worth knowing: on many rods you can remove the adjustment nut, add a small washer behind it, and buy yourself another turn or so of usable travel. It works, and plenty of good techs use it. But be clear about what it is: a way to reclaim travel, not a cure for whatever moved the neck that far in the first place. If the neck needs that much correction, something upstream deserves a look: the guitar may have lived very dry, the string gauge may be heavier than the neck likes, or the neck itself may have taken a set that calls for heat treatment or fretwork rather than more rod tension. That diagnosis is luthier territory, and there is no shame in handing it over.
The nut won’t turn, or feels stuck
First, confirm you have the exact wrench size, seated fully. A sloppy or half-seated wrench is how nuts get rounded, and a rounded nut turns a five-minute adjustment into a repair job.
If the fit is right and it still will not move with firm hand pressure, do not force it. On rods with a removable nut, you can back the nut off entirely, clean the threads, add a tiny amount of lubricant, and try again; sometimes the nut has simply bottomed out against dirty or dry threads. On a dual-action rod, there is another possibility I have observed on my own bench: as the rod tightens and arches back, the nut can end up pressed against the bottom of its slot, and a nut pinned against wood is much harder to turn (and under exactly the kind of stress that can eventually break its joint).
Either way, here is a gentler approach that works with the rod instead of against it: reduce the string tension first, then gently clamp the neck toward the shape you are asking for before you turn the nut. With the load taken off the rod, the nut turns freely, the adjustment is more effective, and both the rod and its joint are protected. Thoughtful analysis and creative solutions always beat brute force. And if it still fights you after all that, stop. A seized rod that gets muscled is a rod that snaps inside the neck, and that is one of the worst days a guitar can have.
The nut is stripped or rounded
On many single-action rods, a stripped nut can be extracted and replaced, and specialty rescue tools exist for exactly this job. On a welded-nut dual-action rod, as I shared earlier, a destroyed nut usually means the rod itself is done. Either way, this repair is about the guitar on the bench in front of you, so if it is not obvious what you are looking at, let a repair professional make the call. And if the nut is merely starting to round: stop using the almost-right wrench that got it there.
I keep turning and nothing seems to happen
A few possibilities, in order of likelihood. The neck may simply need time; wood responds slowly, so give it hours, not seconds, before you judge. Some rods also have a little slack at the neutral point, so the first fraction of a turn does nothing while the rod takes up tension. But if the nut spins freely and endlessly with no resistance at all, that can mean a broken rod or a stripped thread, and it is time for a professional diagnosis, not more turning.
Are you sure it’s even the truss rod?
This might be the most valuable question in this whole section. The truss rod adjusts overall relief. It cannot fix:
- A buzz at one particular fret. That is almost always a high or unevenly worn fret, which is fretwork, not relief (leveling and crowning done right is its own craft: Fretwork Mastery Part 2 is where I teach it).
- A hump or rise where the neck meets the body. Extremely common, and no amount of rod adjustment moves it, because the rod cannot choose where the curve lives.
- Buzzing on open strings only. Look at the nut slots.
- Action that is too high everywhere even with correct relief. That is the nut and saddle conversation.
Measure the relief first. If relief is in a healthy range and the problem persists, put the truss rod wrench down; the answer is somewhere else in the system.
When NOT to Adjust (and When to See a Luthier)
A truss rod adjustment is one of the cheapest, most reversible things you can do to a guitar, right up until the moment it isn’t. Here is my honest gate. Put the wrench down and get experienced hands involved when:
- The rod is maxed out and the neck still is not where it needs to be.
- The nut will not turn with reasonable, careful hand pressure.
- The nut is stripped, rounded, or the wrench no longer seats crisply.
- The neck has a back bow that loosening completely does not cure, or a visible twist.
- The problem is localized (one buzzing fret, a hump at the body joint) rather than overall relief.
- The guitar just went through a humidity event (a dry winter room, a hot car). Stabilize the environment first and re-measure in a week; you may find there is nothing left to fix.
- Anything structural is in question: a lifting fingerboard, a moving neck joint, cracks.
None of this is meant to scare you off. Measuring relief and making quarter-turn adjustments is absolutely something you can learn to do safely, and I want you to. The skill is knowing which situation you are in. When in doubt, measure, write down what you see, and ask someone who has seen a thousand of them. (Luthier’s EDGE members: this is precisely what the monthly live Q&A is for. We will figure it out together.)
Choosing the Right Truss Rod (For Builders)
When I began building archtop guitars, I started in the traditional way, at least in the area of neck design. I used a standard single-action truss rod. The great thing about this type of truss rod is that it is very lightweight and allows the upper part of the channel to be routed into the neck to be filled back in with wood. This not only adds as little weight to the neck as possible, but it can also sometimes keep the tone sounding more woody and natural.
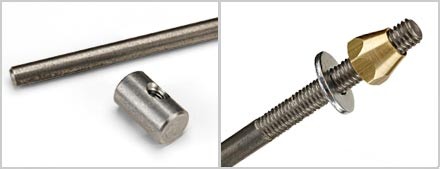
I quickly found out that this truss rod is much more susceptible to the changes in its environment’s humidity. Because this rod is compressing the wood as the nut is tightened, it is vulnerable to being affected (more than other types of truss rods) if the wood changes dimension over time due to compression or in response to its environment. Wood constantly does change dimensionally as it absorbs and loses moisture based on the relative humidity it is exposed to.
The wood in the neck itself functions as part of the truss rod system with the single-action truss rod. The nut is tightened against the wood. If the wood expands because the humidity increases, that’s equivalent to tightening the nut on the truss rod and can cause the neck to move. Most of the time, these movements are subtle. Still, when the guitar has very low action, it can be quite noticeable to a discerning player if the humidity fluctuates a great deal and could even lead to annoying fret buzz or high action, depending on the humidity level present.
Not only that, but because wood is always different in density and strength, with a truss rod that relies on the wood itself as part of the system, the neck’s stability becomes a bit of a gamble. If the wood near the adjustment nut starts to crush under pressure, it can become impossible to make any adjustments to the neck.
Obviously, the wood provides most of the strength as the neck supports the string tension, but the truss rod must be there to provide consistent adjustment and stability. Because the wood is constantly fluctuating, I began to feel like it was a bit too risky using this type of truss rod, never knowing exactly how the neck would respond over time.
I switched to using a double-action truss rod, but with one-way adjustability at first (shown above, left). This was instantly a big improvement in adjustability. But still, it only provided me with the ability to move the neck back against the string tension. And it was much heavier too. Being the crazy perfectionist that I am, I wanted control of the neck in the forward direction as well. I use this forward bow feature most during the guitar-building process to get the neck perfect for fingerboard leveling and fretwork, which I discuss in my online guitar-making course.
Many people only use and love the single-action truss rod. It’s probably in more guitars than any other type—I just wanted to point that out because what I’m sharing here is my own personal opinion and experience. You might find it’s perfect for your guitar, and that a more traditional type of single-action compression truss rod fits you and your style just fine.
My Favorite Truss Rods
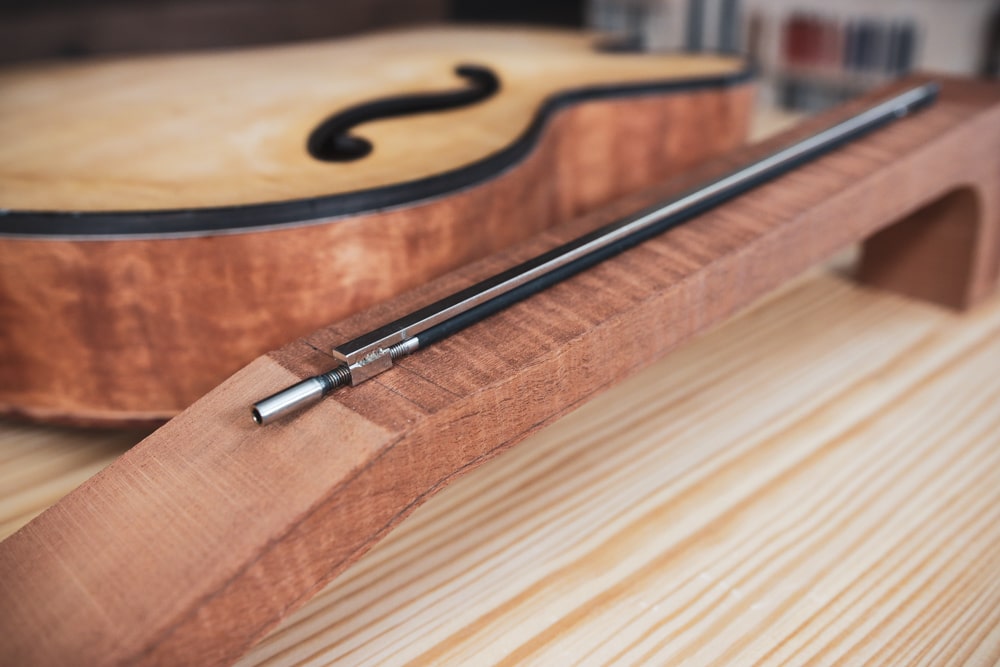
Allied Lutherie Double Action Truss Rod – Weight: 119 grams (14″ Length)
The double-action two-way truss rod is my preference (also known as dual-action truss rod). There are two specific truss rods of this style that I like very much. One design I really like is the Flex Strong truss rod from Allied Lutherie (above) and LMI—though they are slightly different, the overall design is similar. The latest version from Allied Lutherie is lovely and very high quality. The adjustment capabilities are very fine and work great, BUT it weighs a little bit more than the next one I’ll be showing you (not really a big deal at all though). I loved the design of this so much that I looked into having this rod made out of titanium to get the great adjustment AND light weight, but it’s patented, and it costs a lot to get them made out of the right type of titanium that really does weigh less and has the right strength.
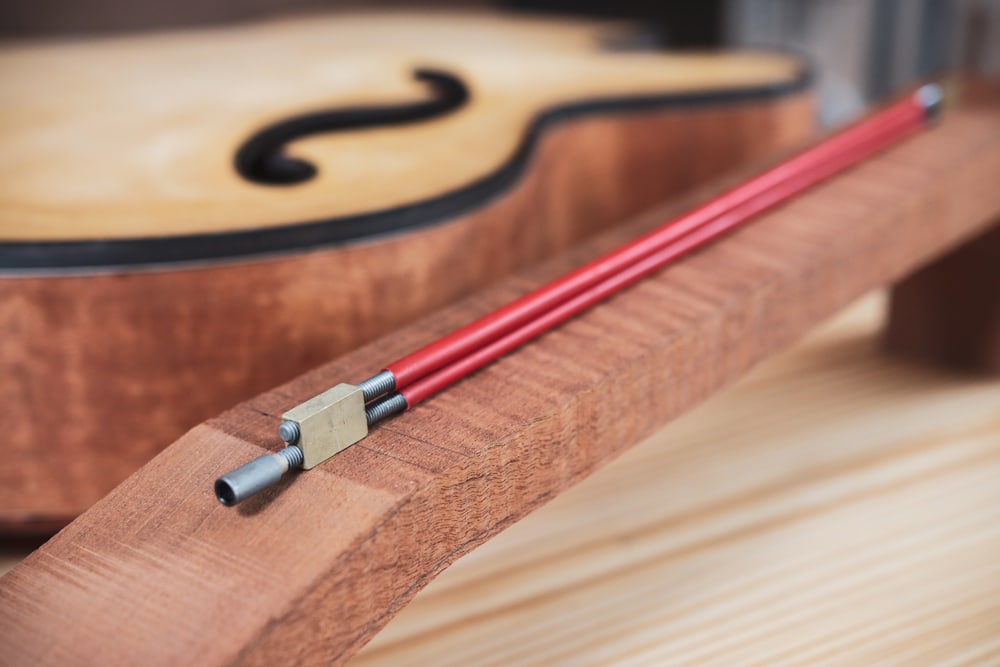
My favorite truss rod and the one I currently use is made by Stewart-MacDonald: The Hot Rod (above). This truss rod is lighter than the Allied Lutherie rod, and I also like the fact that the upper and lower bar are threaded into the nuts that connect them. I have always had a small nagging concern about the welded parts one day breaking on the other types of rods that I have seen. With the Hot Rod, I don’t have to worry about that.
So the StewMac Hot Rod gives me the best balance of great adjustability both forward and backward, plus it’s the lightest double-action rod I have used so far. I have my eye on this low profile truss rod to try soon as I think it might be even lighter. If I do, I’ll update this article so be sure to subscribe to our email list if you haven’t yet to stay informed.
An Honest Note About Welded Nuts
I owe you the other side of this recommendation. A builder who read this article wrote to tell me that the 4mm adjustment nut on one of his Hot Rods broke off, on a finished guitar. StewMac replaced the rod at no charge, but the neck was a loss, and that is a heartbreak no warranty covers. In more than twenty years of using these rods I have never had it happen, but his experience is real.
A quick word on terminology, because I have used a few different words for this over the years: the joint that fixes the adjustment nut to the rod on these designs is technically a brazed joint (a filler metal bonds the parts without melting the steel itself), though almost everyone, me included, casually calls it a weld. Whatever we call it, that little joint is the most vulnerable point on a dual-action rod.
I cannot tell you for certain why any particular rod fails. What I can tell you is what I have observed on my own bench. When you tighten a dual-action rod, it arches back, and as it does, the adjustment nut wants to press downward in its slot. If the nut is resting against wood when that happens, the joint is carrying a preload it was never meant to carry, and it stands to reason that a joint already under stress is the one most likely to let go when the headstock takes a knock or the wrench catches it at an awkward angle. Side-torquing the nut with the Allen wrench is another way that joint gets stressed, which is why the adjustment rules later in this guide keep saying gentle and straight.
None of the precautions guarantee a rod will never break, because a lot of things can happen to a guitar over a lifetime. My approach is the same one I take to everything in the shop: think the process all the way through, then take every reasonable precaution available. For truss rods that means three things. Test every rod before it goes into a neck. Give the nut room to move in its slot so it never bears against wood under tension (both are covered in the installation tips below). And adjust gently, with the right tool, square to the nut.
What I’m Testing Next
A few different rods are on my list to test soon (there is always more to learn), and I want to be upfront that I have not put any of these through my own testing yet, so consider this a preview of an experiment rather than a recommendation:
- The StewMac low-profile version of the Hot Rod, which promises the same two-way adjustment in a shallower, lighter package. Lighter is exactly what sent me chasing titanium all those years ago, so I am very curious.
- The latest version of the Allied Lutherie Flex Strong rod, which several builders whose work I respect have moved to, including the reader whose weld failed.
- The Mark Blanchard Truss rod, which I have heard about from some Luthier’s EDGE members who raved about its quality.
- Maybe a titanium rod as well… we’ll see…
I will update this article with what I find, so if you want to hear how the testing goes, subscribe to my newsletter and you will get it first.
4 Tips For Proper Dual-Action Truss Rod Installation
1 – Preventing Truss Rod buzz
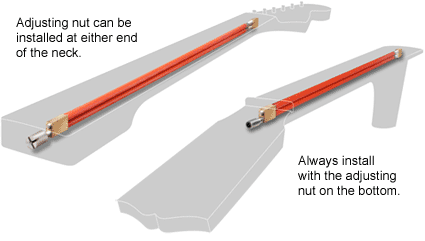 One thing to mention, though, is that double-action truss rods can buzz in the neck (vibrate sympathetically) when there is no tension on them, if not installed right. Thankfully, I have never had any problems on a finished guitar, but it is something to be sure you do properly when installing the rod. StewMac.com has some good info on how to do it right—Installation Instructions. The only thing I add to their steps is that I put some silicone in the middle of the rod slot, and in between the rods themselves in the center as well, to keep those areas quiet too, just in case.
I have been using the Hot Rods from StewMac in conjunction with two carbon fiber reinforcement rods for over 20 years. They have been great at keeping my guitar necks stable and resistant to fluctuation from string tension or changes in humidity. You can check out some computer printouts of my fingerboard and fretwork as scanned by a PLEK laser. The PLEK returned a report that the fingerboard was perfect and needed no adjustments on two of my scanned guitars. Both of those guitars used the Hot Rod truss rod. You can see the printout and learn more about how I am able to accomplish a perfect set-up in my online guitar physics and set-up course.
2 – Leave Enough Room For The Adjustment Nut
One other subtle yet important tip to add here is that when you are making the truss rod access cavity, it is critical to make sure there is some extra space around the adjusting nut, even if you are using the Allen nut version of the rod. This is because when the rod is tightened to pull the neck back against the string tension, the rod can bow just a bit. If the nut is resting on the wood in the truss rod adjustment slot, it can apply pressure to the nut and result in a buzzing sound and, in the worst case, can even break the nut’s weld, rendering the rod useless. So be sure to make some extra space below the nut so it can flex back a little bit under tension without hitting the wood.
In practice, I lower the bottom of the adjustment slot by about a millimeter or two, or whatever the neck design comfortably allows. That tiny air gap takes minutes to make and gives the nut room to move freely under tension for the life of the guitar. A pinned nut is also simply harder to turn, so this one detail pays you back at every future adjustment. And if you install the rod the other way around, adjustable from the soundhole, the same thinking applies at that end: make sure the nut is not bearing against wood down there when the rod flexes. I rarely see anyone talk about this detail, but I consider it one of the most important insurance policies you can give a dual-action rod.
3 – Testing your truss rods before use
I always test the truss rods before I install them into the guitar neck. If there is any chance of the guitar truss rod breaking, I want it to happen BEFORE installing it into the neck and finishing the guitar. All I do is route a slot into some scrap wood and temporarily insert the double-action truss rod into it. I cover it with some other scrap wood and clamp it in place, leaving the nut exposed. Then I give it a good tightening, applying about as much pressure or maybe a tiny bit more than I anticipate it would ever have in the actual guitar. If they pass this test, they are cleared to be used in upcoming guitar builds. Just as a side note: I have never had one break during testing, but I have heard tragic stories from other luthiers who did not do the testing step and had a rod break inside the neck, which is never a good thing.
4 – Make sure the rod fits your guitar neck profile
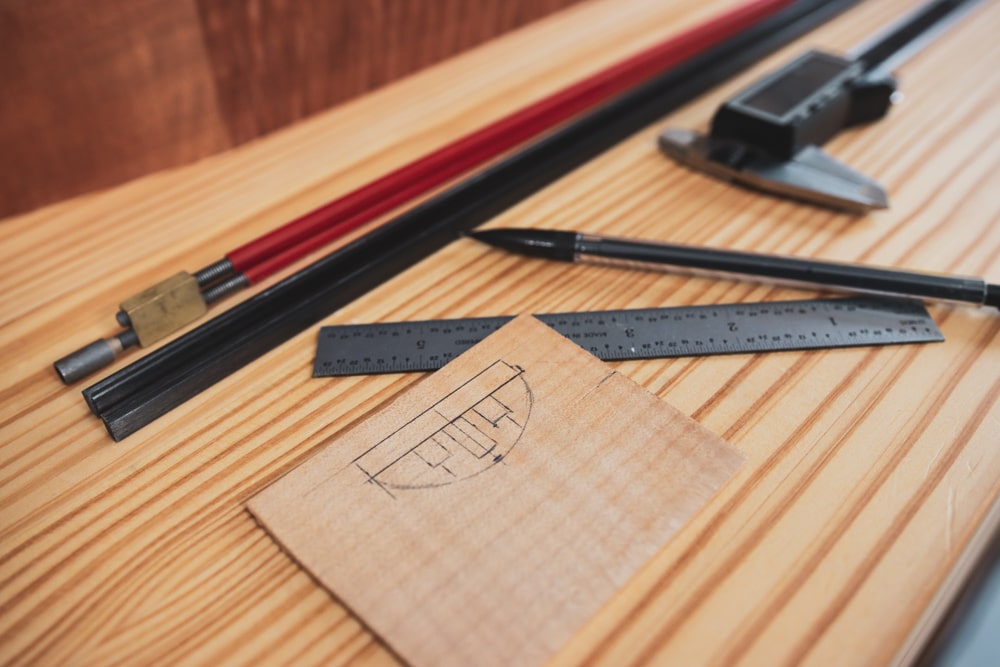
One thing I also do if I am making a new neck profile or using a new type of truss rod is to make a full-scale neck profile cross-section drawing. It is just a simple way to make sure there will be enough neck material below the truss rod cavity before I start building. It is much better to find out now on paper that your truss rod is too deep than to discover it by carving through into the truss rod while you’re working and ruin the neck. I talk a lot about the importance of, and how to make, full-scale guitar drawings in the Luthier’s EDGE course — The Art of Guitar Design.
(For routing the channels, these are the bits I use: the Hot Rod inlay bit and the carbon fiber rod inlay bit. And for every tool in my shop, see the full Luthier Tools guide.)
How To Get More Help For Your Luthier Projects
If you still need some help, consider joining the Luthier’s EDGE online guitar school, where I can help you personally with truss rods and any other luthier questions you might have.





I make my own truss rods, they are single action. But, are made like the double action. I need to find out how to make them into double action. If you folks would point me in the right direction I’d appreciate it very much.
Mike.
Hi Mike, the double action rod is threaded on both ends of the rod that turns (with opposite threads on each end). That way it can bow the neck backward to counteract string force when turned in the usual direction, but then when turned the opposite direction it will cause the neck to bow forward too.
For me this is important when I do the fret work, so that I have full control of how I set the neck before filing the frets when I am doing the setup. I like to use the frets to make the neck strong by making the tang fit tightly into the fret slots. This can sometimes cause the neck to bow backward just a little bit, but with the double action rod, I can bring it back to the perfect position to do my fretwork and set up.
Tom
Hi Tom. The problem I’ve always had with the double truss rod, the hot rod in particular is I had no way to control where the hump would bend up or down. Many times the rise would happen up around the 10th fret or even higher. Even though I used it for years when I would adjust I could never get the critical adjustment at the fret seven or around. So I went back to the single truss rod with the groove sloped in the area where I needed the rise to get exact playability on the neck.
I’m curious as to how you control where the trust bar dips or rises on your neck.
I love builders who are generous with their knowledge. As it wasn’t that long ago that everything was secret society…remember? Anyway, what you’ve written and what you’re doing for the improvement of guitars and the future builders is great.
Hey Thanks Randy,
I try to just use the rod to get the neck back to the curve I need. So I really don’t use the rod to bend the neck which makes the bump less of an issue. I build the neck so that it has the curve I want built into it already, in the main neck/fingerboard joint, sanded into the fingerboard surface, and fretwork too. So the truss rod just helps to get it back to its original shape not really bending it or shaping it further.
I know that’s not the best answer because it is tricky and can sometimes result in a bump where you don’t want it, but for me it’s been about the anticipation and pre-working the fingerboard surface to counteract those little things so they are never a problem.
Remember also that fret 12 is the point of widest oscillation for the string so it should also be the deepest point in the subtle curve of the playing surface too. You can see more about how I think about that here: https://theartoflutherie.com/guitar-care-and-maintenace-101-video-course/#a2
Thanks again! Tom
Have you ever had any experience with warmoth? I’m curious about the type of dual-action truss rod they use in their modern necks. Many people complain about its weight, so I wonder what type of truss rod they use.
Hi Peter,
No I haven’t had any experience with those, I be you could search around to find out what they use or even call them. Keep in mind, weight isn’t always bad, some people want some weight in there to help with sustain. I just prefer the truss rod a little lighter for my guitars because it helps my guitars feel more balanced overall and not so neck heavy because I build the body pretty light. – Tom
Hi Tom,
I have used the hot rod truss rods in all my guitars until recently. I had a hot rod break on a finished guitar. The 4mm nut broke off at the weld. StewMac replaced it at no charge but the neck was a complete loss. Trying the allied rod next.
Hey Matt, man sorry to hear that! I appreciate you sharing that here, it could be important to help people deciding which truss rod to use on their next guitar. Thankfully, I have never had that issue, but I have heard of rare cases where it did happen to others. Let me know how it goes with those new truss rods. (I’d love to know your take on how strong they are, how much they weigh in comparison, etc.) Maybe we need to add them to the list here on this page? As I a writing this, I think maybe I just nee to get some and do some testing myself too, now I’m curious 🙂 Anyway, I hope it goes well and turn around for you and you are able to quickly get that guitar back in proper shape. If I can be of any help don’t hesitate to let me know.
Great article Tom, thanks! One thing I would add to the “cons” of a double acting truss rod though: I’ve set up thousands of instruments, and in the real world people strip truss rod nuts. Very often, with a traditional truss rod, it’s possible to extract that nut and install a replacement. With a double-acting truss rod, you’re done. It’s a serious consideration for me.
As a newbie, and I mean newbie guitar player, the learning of what makes my instrument sound as sweet as she does and how to properly maintain her is paramount. Tom, I just have to say, “Thanks!” It means a great deal to those of us not only to play a fine guitar, but also how they are made, and how everything comes together. This has been extremely informative and taught me more than I have read everywhere else. Rock on!
Which direction is the truss rod turned when going from 11 gauge strings to 10 gauge strings? Thanks!
Hey Frank, Going to lighter strings will make the neck bow back, so you would want to loosen it to let it come forward a little now since it has less tension on it with the 10s. Some truss rods can be different, but in most cases, if you want to let the neck bow forward more, you would loosen the truss rod by turning counterclockwise. Just a little bit at a time, less than 1/4 turn can make a big difference, so take it slow. I hope that is helpful and let me know if you have any other questions.