Luthier Tools: The Ultimate Guide
Quickly find the best tools for your next guitar-building or repair project
Free PDF Version
Table Of Contents
Luthier's EDGE
Ask A Question
What Tools Do You Need To Build A Guitar?
As you might have already figured out, that's a tough question and to answer it properly
Finding the right luthier tools that match your unique needs and circumstances can be difficult and, in some cases, even overwhelming. The question I hope to help you answer here in this guide is, “What tools do I need to build a guitar?” The answer to that question, and even more so, the question of which tools are truly “essential” to your guitar-building process, is quite personal and is affected by many factors unique to your situation. Because of this, it’s nearly impossible to make a definitive list of guitar-building tools that will be accurate for every person and situation.
That is why, in this highly detailed guide, I share my notes, insights, and personal experience, both in acquiring and using these tools to give you context, as well as a solid frame of reference for how they might or might not work for you. I know how overwhelming this can be, and I hope this guide will help you to more easily find those special guitar-building tools that are the perfect fit for you, and that will help you build your best guitars possible.
Before we dive in, it is important to note that I haven’t tried every lutherie tool in the world, yet 😉. So, if you know of additional tools that others could benefit from learning about that weren’t listed, please email me and let me know. We’re all on this journey together, so your help is important and much appreciated and will ensure that over time, this guide can become an even-better resource for luthiers worldwide as they learn the art of lutherie.
* If you have questions or need a little help, just email me, and I’ll do my best to help you. – Tom Bills
Table Of Contents
Free Download
Luthier Tools PDF
Free Download
Luthier Tools PDF
Your Information is 100% Secure And Will Never Be Shared With Anyone. You can unsubscribe at any time. Here’s a link to our privacy policy

the ultimate guide to
Luthier Tools
Read each section for tips, tool recommendations, and more.
Wood Chisels
Chisels are one of the core types of luthier tools I use daily for countless guitar-making processes. Currently, I use four main types, each suited to a different purpose. Having access to these different chisels and understanding which type to use for each application can help you produce more-precise work. However, you can use one type of chisel for everything if you need to, like I did when I was starting. Chisels are used for so many different lutherie tasks that I decided to list them below based on the general chisel type, rather than by application. I will describe the fundamental differences among the chisels I use and what I found to be the benefits and best applications for each type in my lutherie work. My most used chisel sizes: 1/8″, 1/4″, and 1″. If you’re on a budget, just get one or two to start and build your set over time.
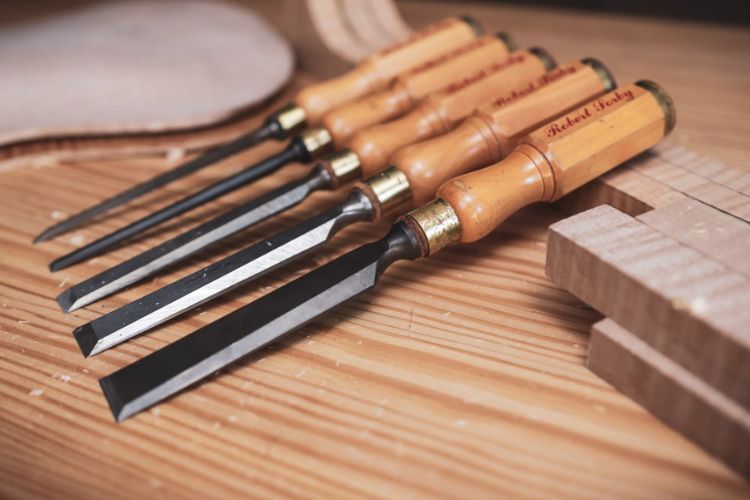
Tang-Handle Chisels
For me, these chisels are the most versatile. The tang handle design, coupled with metal rings on the ends of the handle, enables them to be used for just about anything. This design also has a more balanced feel that seems to be easier for beginners to get used to. The metal ring hurts my hand, though, when I use them for long periods doing push cuts, such as cutting a dovetail or fitting a neck extension on an archtop guitar, for example. All things considered, these chisels are a perfect option if you can get only one type, as they make a great bench chisel that can be used for everything. You can’t go wrong with the Two Cherries chisels—many of my students use them and rave about the quality and edge-holding abilities.
Recommended Bench Chisels:
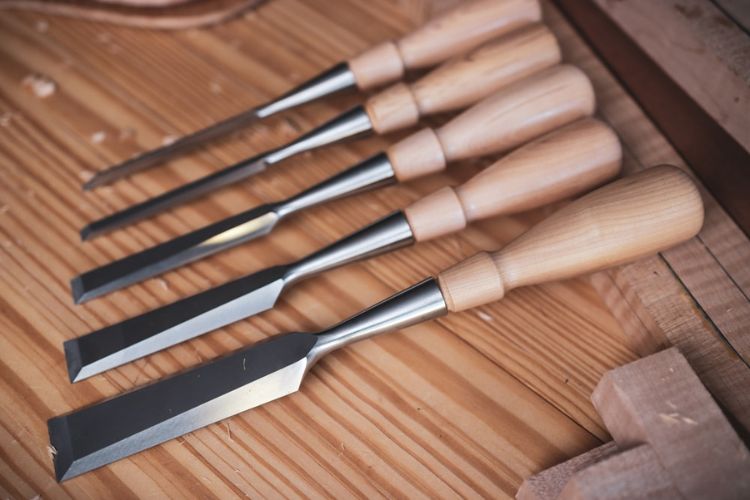
Socket Chisels
The socket chisel design is the most durable and the most expensive. The practical difference in the daily use of my Lie-Nielsen socket chisels, for example, compared to the tang handle versions, is that they have longer, thicker, and much heavier blades. Because of this, much more of the weight is out in the blade, and the handle feels almost weightless. It’s a different and less-balanced feeling, but once you get used to it, it’s a joy to use. This is wonderful for cutting or adjusting dovetail joint operations where I push the chisel for extended periods of time. The socket chisels are a go-to for most things, in part because the handle is like a little bit of heaven in your hand. They stand up fine using a wooden mallet but not a hammer.
Recommended Socket Chisels:
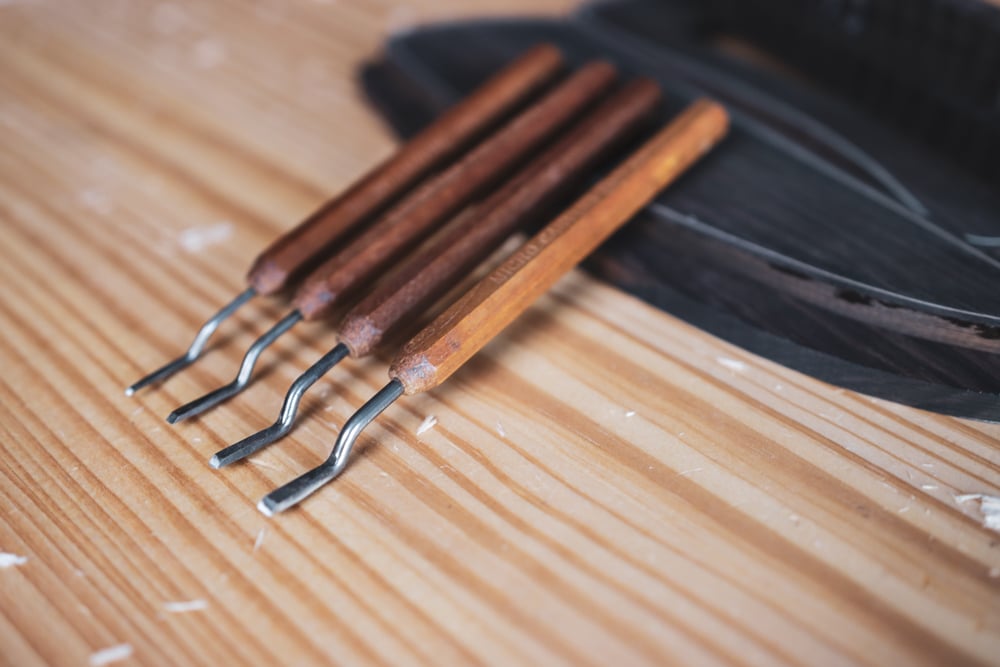
Dog-Leg Chisels
The small set of dog leg chisels I linked below is a must-have! Perfect for so many tiny, yet vital, operations. I use them almost every day. Need to clean the corner of your saddle slot, or an inlay pocket, or maybe make a slight adjustment on a 1/16-inch purfling channel or miter that’s already glued to the guitar? Little things like that are where the dog-leg chisels shine, making every project go a little smoother and with better and more precise results.
Recommended Dog-Leg Chisels:
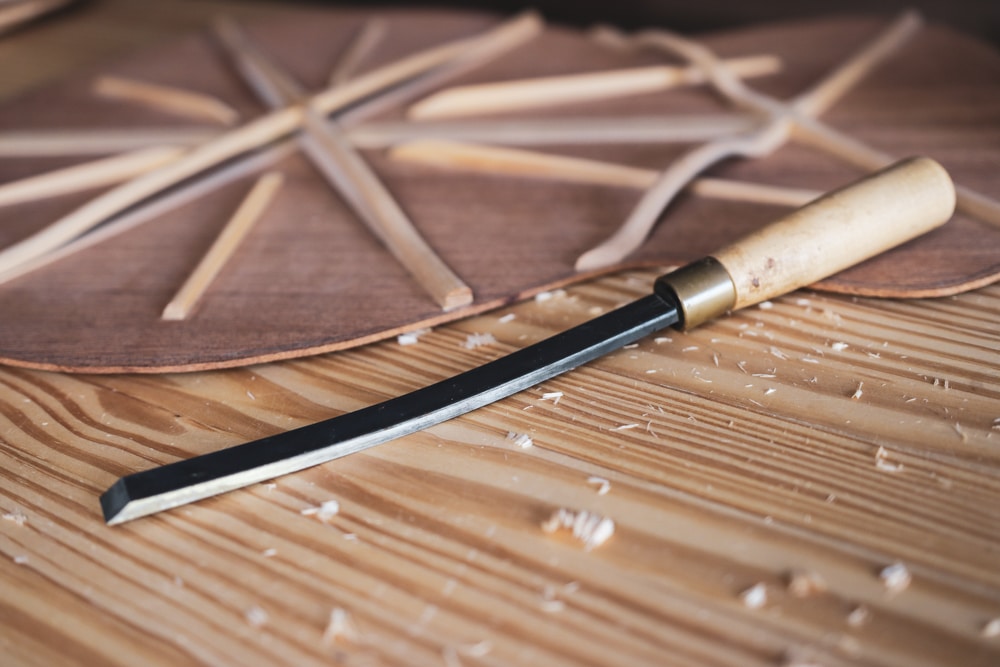
Curved Brace & Glue Chisels
The curved chisel is nice to have for scalloping acoustic guitar braces. I have one dedicated to cleaning glue squeeze-out from braces when using the go-bar deck. As long as you keep it clean as you work, and make sure it is completely dry afterward, it will last forever. It can do such a good job of cleaning that extra glue that I barely even need to sand around those braces when I’m done—not officially essential, I suppose, but an excellent time-saver and a great tool.
Recommended Curved Chisels:
Hand Planes & Finger Planes
Hand planes are some of the most-used tools in the process of making a guitar and, when properly sharpened, are some of the most satisfying to use. The core functions of this tool for us as luthiers include reducing thickness, flattening surfaces, and, in some cases—such as carving an archtop guitar top or back—shaping. I’ll divide them into four sections below and do my best to explain what I view as the key features and uses of each type. Having one of every type is not essential, but it is nice to have them all if you can. For me, the essentials are the low-angle block plane and one larger plane for jointing and thicknessing or smoothing operations. Remember to start simply and upgrade as you go.
Block Planes
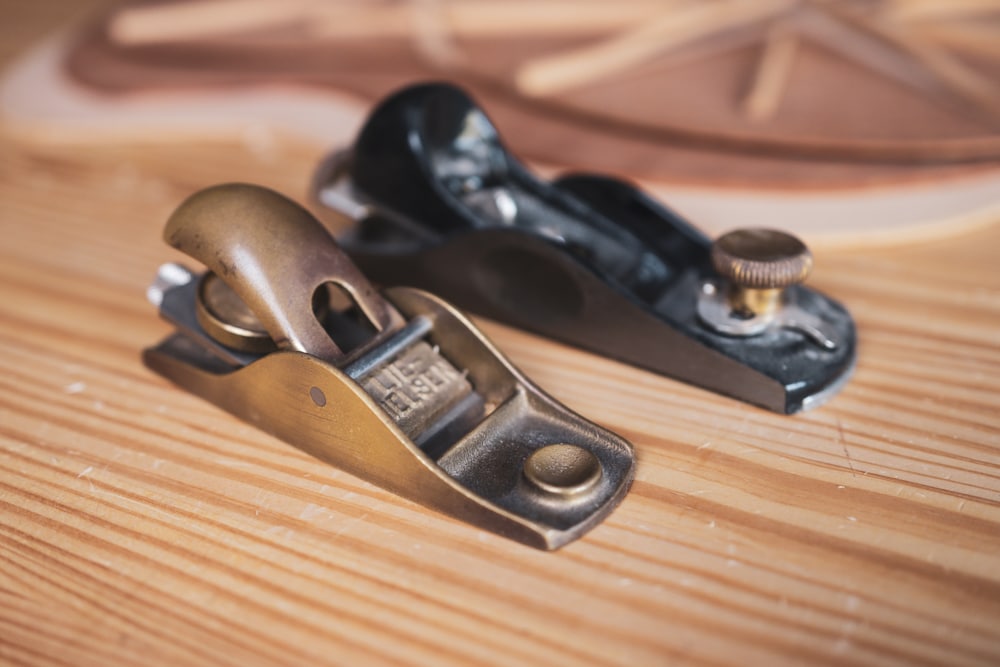
The key features I look for in a block plane are the size, the weight, and, most importantly, the blade angle. I work with a lot of highly flamed maple and having a low blade angle helps to reduce chipping and tear-out when working with those woods. I also find a less-bulky block plane works better as well. The Lie-Nielsen #102 Low Angle Plane is one of my all-time favorite tools and is essential to my work for sure. The Bridge City Min Block Plane is also an amazing tool that several of my students use a love. I have yet to try it, but I’m listing it here in case you want to check it out. I hope to try one soon, and when I do, I will be sure to write more about it then.
Recommended Block Planes:
- Stanley Block Plane
- Lie-Nielson No. 102 Low Angle Plane (*must-have)
Jointing Planes
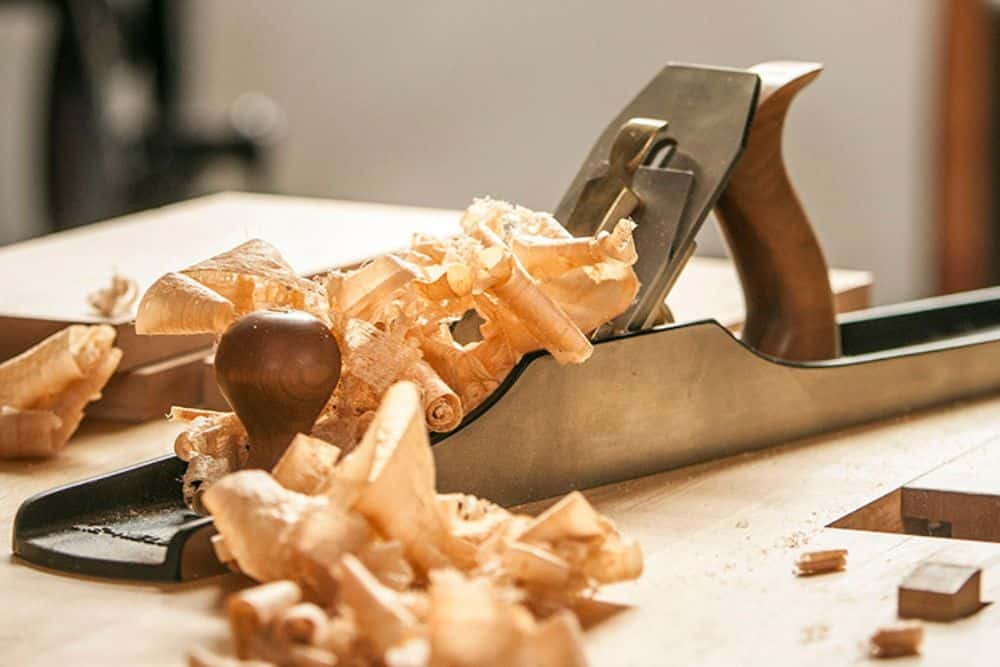
A jointer plane is an elegant tool for jointing tops and backs for acoustic guitars. For an effortless and perfect joint, most luthiers use a jointer plane around 22 inches long. The more expensive options have more accurate adjustments, better machining, and, most importantly, a blade that holds a razor-sharp edge well. I’ll list a few different options below, but keep in mind that your technique when using these tools and sharpening them will impact the results more than anything else. I still use an old plane I restored that belonged to my grandfather that’s only 14 inches long. I flattened the sole, and the blade is terrible and needs constant sharpening, but it works. One day, I will upgrade to the Lie-Nielsen jointer plane (linked below); it is simply a work of art in and of itself, and for me would be like hanging a Rembrandt painting on the wall as it sat on my tool shelf each day.
Recommended Jointing Planes:
Bench Planes (Smoothing Planes)
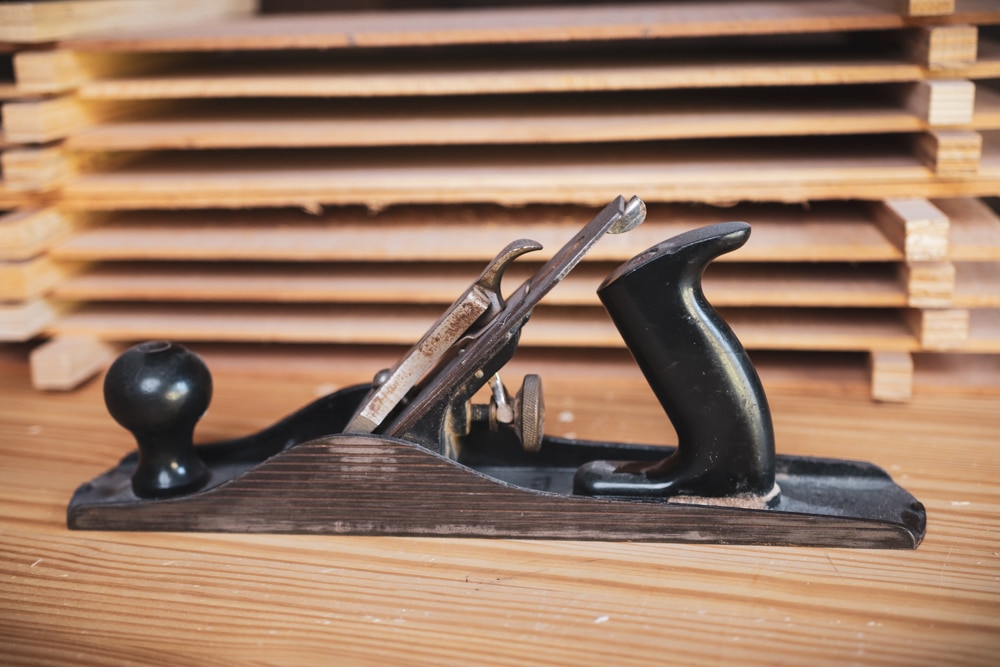
The bench plane, for me, is a medium-sized plane that I can use for jointing or general thicknessing. They are shorter than the jointer planes at around 17 or 18 inches long. As the name implies, they are a workhorse tool that can be used for many applications. If you don’t have a drum sander, you will probably be using your bench or smoothing plane for thicknessing tops, backs, and sides, and general smoothing and flattening tasks. As I mentioned in the jointer section, I am still using an old bench plane from my grandfather for jointing and, of course, other tasks as well. So if you can get only one larger hand plane, this type might be a good choice.
Recommended Bench Planes:
Carving Planes & Finger Planes
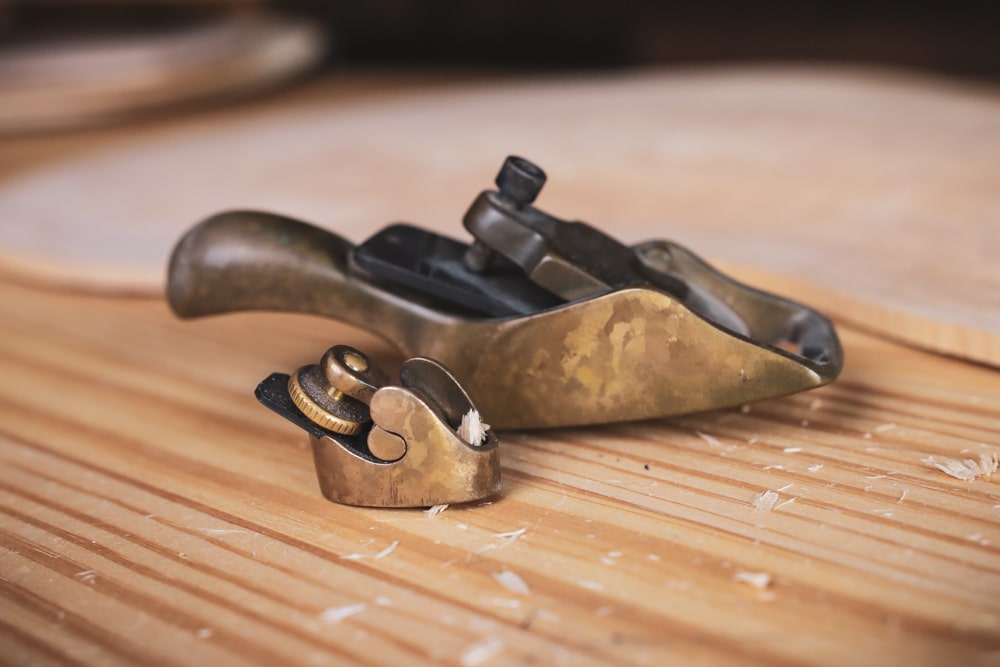
Planes with rounded blades and soles are essential for sculpting curved parts of the guitar. The elegant curves of an archtop and arched-back guitar are good examples of this type of component. I love the large-size LMI D’Angelico plane below for that type of carving or sculpting, but it isn’t available anymore. The Veritas Plane and Benedetto planes I linked below look like promising alternatives. I also use the Ibex 10mm finger plane for countless operations, from refining the subtle curves of archtop plates to trimming my guitar braces, trimming my bindings after installation, and much more. Both of those carving planes are essential tools for me.
Recommended Carving Planes:
- Ibex 10mm Finger Plane
- D’Angelico plane – (no longer available)
- Veritas Detail Palm Planes – Double Convex
- Benedetto Palm Plane
Luthier Files & Rasps
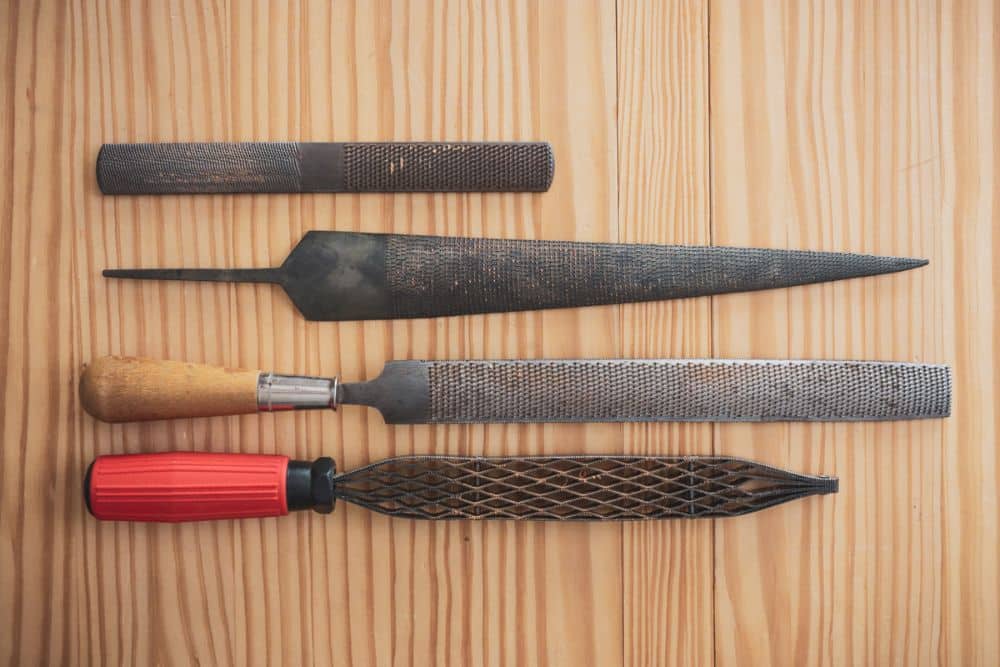
Wood Rasps
My approach to guitar-making involves clearly defined phases of work, the first of which is shaping. It’s the phase where I need to remove a lot of wood and do it quickly. But I also need control and a resulting surface that is not chipped or deeply scratched in a way that the subsequent phases can’t easily remove. You can read my in-depth article about wood rasps for guitar-making or watch my video here to learn more about which rasps I use and why. (Spoiler alert, the Dragon rasp is my favorite.)
Recommended Wood Rasps:

Nut Slotting Files
Guitar nut files are undeniably important. You could cut the string slots in the nut with something else, but with a good set of guitar nut files, the task is far easier and produces much better and more consistent results. The diamond files below are what I currently use, and they are utterly amazing. However, I started out with the other, more affordable, versions and used them for many years, and they work fine too. The big difference is that the diamond nut files cut faster and produce a perfectly smooth and round shape of the nut slot bottom that ensures a good fit to the string and minimizes string creak and friction all at once. I used to use 600 grit sandpaper to polish the nut slots after filing when I used the other type of files, and that can work great too when you get the technique down. So, as with many of these tools, start where you are, gain experience, and work your way up if you need to.
Recommended Nut Slotting Files:
- DiamondCut Nut Slotting Files (*I love these, Best I’ve ever used!)
- Music Nomad Diamond Nut Files
- Double-Edge Nut Files
- Gauged Nut Slotting Files
- Budget Guitar Nut Slotting Files
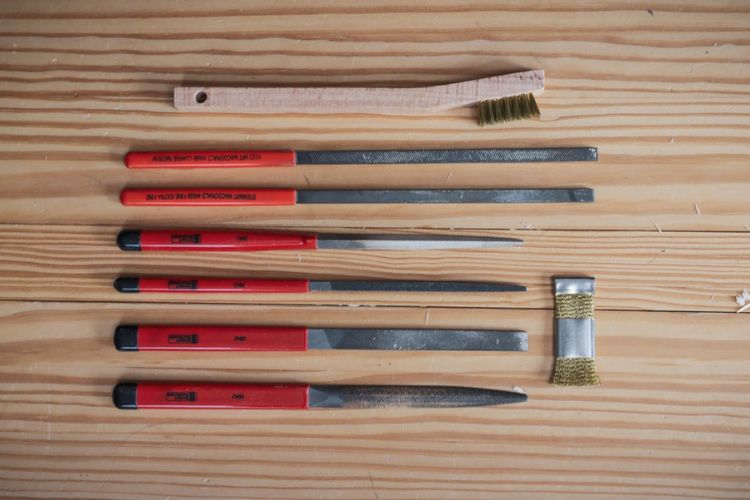
Fine-Tooth Luthier Files
A fine-toothed file is excellent for the second stage of woodworking, which I call smoothing. The StewMac Luthier’s File Set has been my go-to since day one back in 1998. I just recently got a new set after all these years. (Did you know that StewMac guarantees their tools for life?) The nut shaping files I linked to are perfect for nut and saddle work and have just the right type of cut and aggressiveness to make quick work of those tasks. The razor files are more aggressive than you may think—they remove wood very fast and, in most woods, leave a smoother surface than a rasp, but you have to be mindful of grain direction and wood type. When used with that in mind, they are a great tool that, for me, blurs the lines between a finer-toothed file and a rasp and is quite useful.
Recommended Luthier Files:
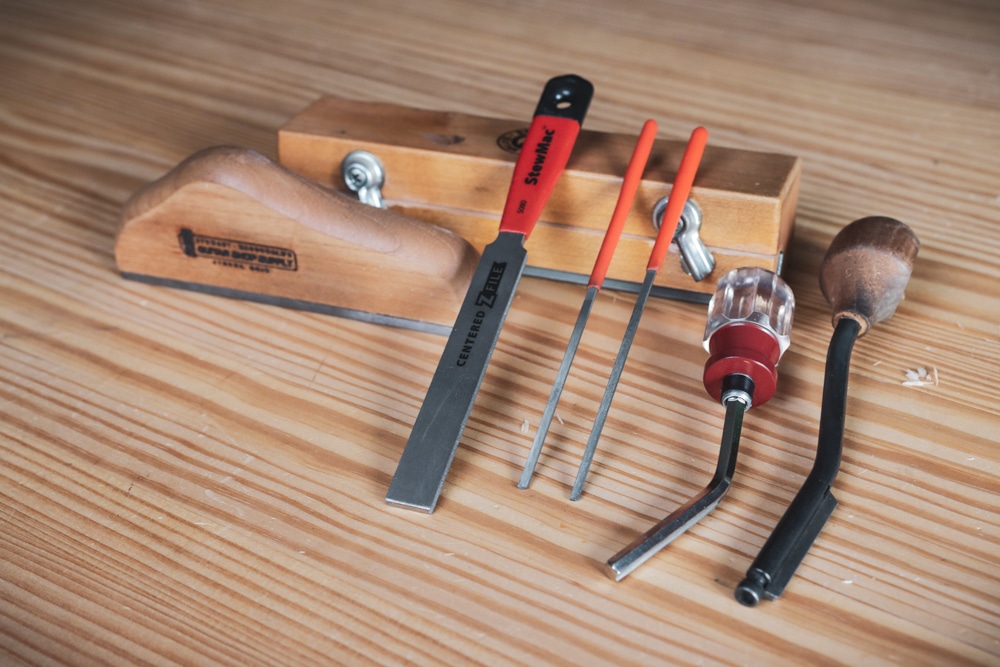
Fretwork Files
I’m listing here the fret files I use and love, but for a complete list of all the fretwork tools I use and recommend, see the fretwork section of this guide. Fretwork is a highly specialized luthier tool group that was a big obstacle for me when preparing to build my first guitar because I didn’t know which ones to get or how to get them with my limited budget at the time. Over time I slowly built up my fretwork tool set, which gave me time to learn by experience what worked and did not for work me. Sometimes, acquiring tools slowly can be a good thing. The tools below are what I still use today and what I demonstrate in my course Fretwork Mastery Part 2 and others.
Recommended Fretwork Files:
- Fret End Dressing File (*a must-have luthier tool)
- Diamond Fret End File
- Fret Leveling File
- Dual Grit Diamond Fret Crowning File (*Still my favorite)
- Z-FIle Fret Crowning File
- Stewmac Fret End Beveling File
- Music Nomad Fret End Beveling File
Hand Saws
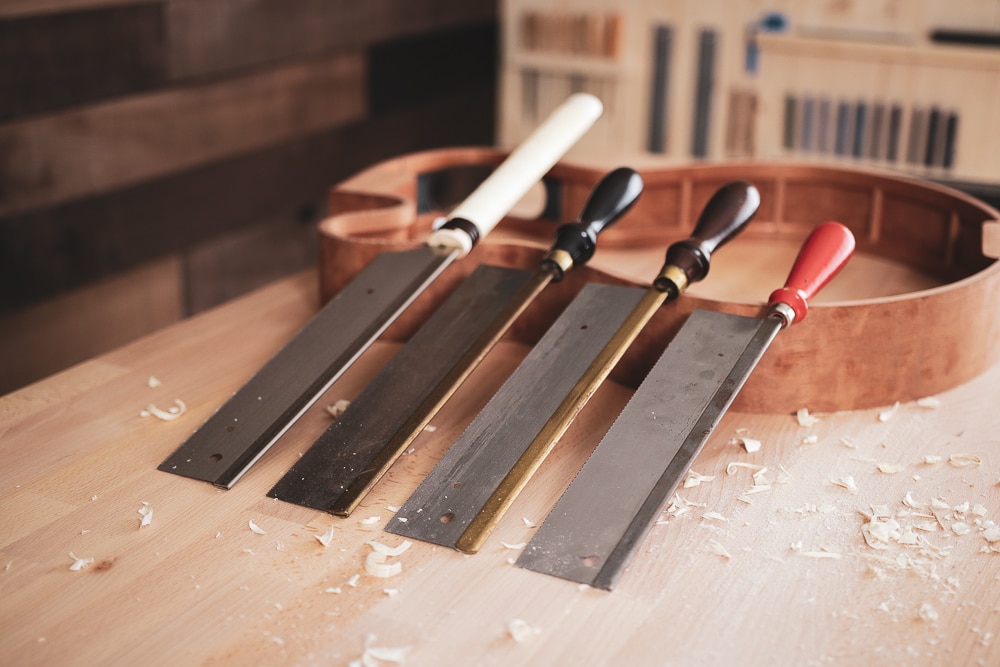
Fret Saws
Cutting fret slots in a fingerboard is one area of guitar-making that requires the utmost accuracy and consistency. A fret saw with the right kerf (width of cut), tooth design, and blade rigidity is key to getting the desired results. Check out my complete Guide To Fret Saws for a deep-dive into these ubiquitous tools.
Recommended Luthier Fret Saws:
Zona Razor Saw
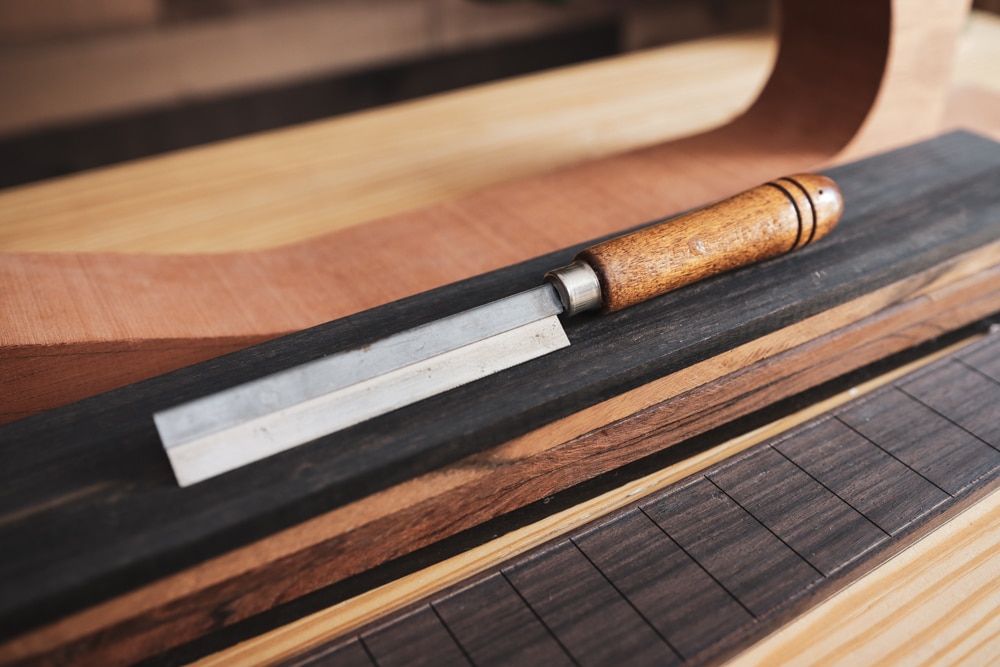
A small razor saw is fantastic for making ultra-precise and ultra-thin cuts for various tasks. A few specific tasks that I use this saw for include making the first cuts when laying out guitar nut slots. This tool makes cutting nut slots far more accurate and gives your nut file something to grip onto as you start filing the string slot, so it doesn’t wander. It can make ultra-clean cuts in purfling and binding materials without tearing or chipping. I also use it for kerfing and when making and fitting my solid guitar linings.
Recommended Razor Saw:
Hack Saw
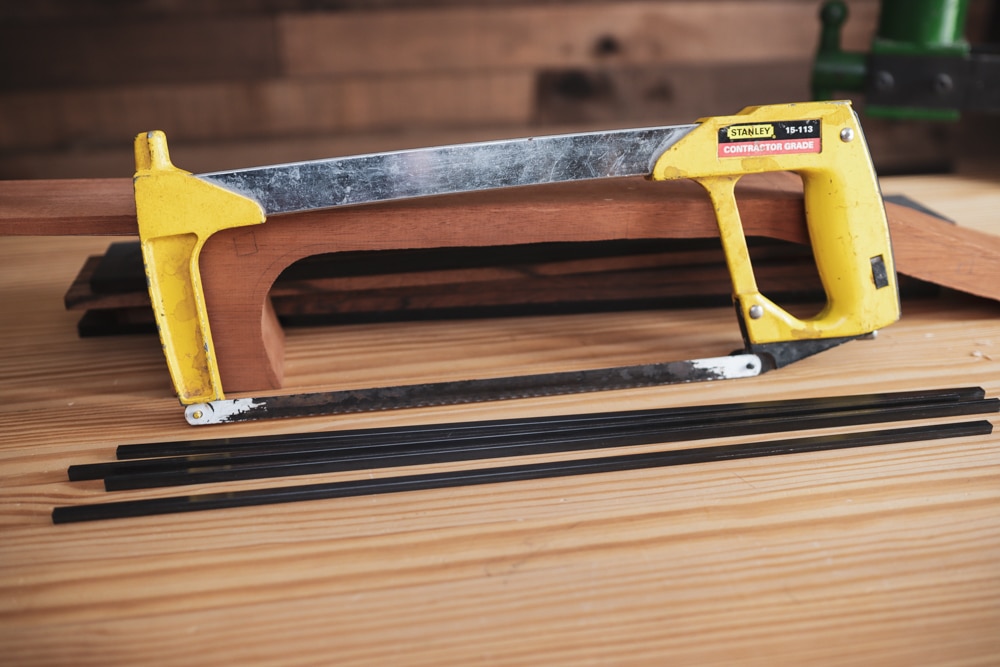
The hack saw isn’t a luthier tool per se, but it does come in handy for tasks that could dull or ruin your specialized tools—like fret saws, for example. One such task is trimming carbon fiber neck reinforcement bars to length. I always keep a hack saw handy in the shop to make the cuts I don’t want to use my expensive guitar-building saws for.
Recommended Hack Saw:
Flush-Cut Saw
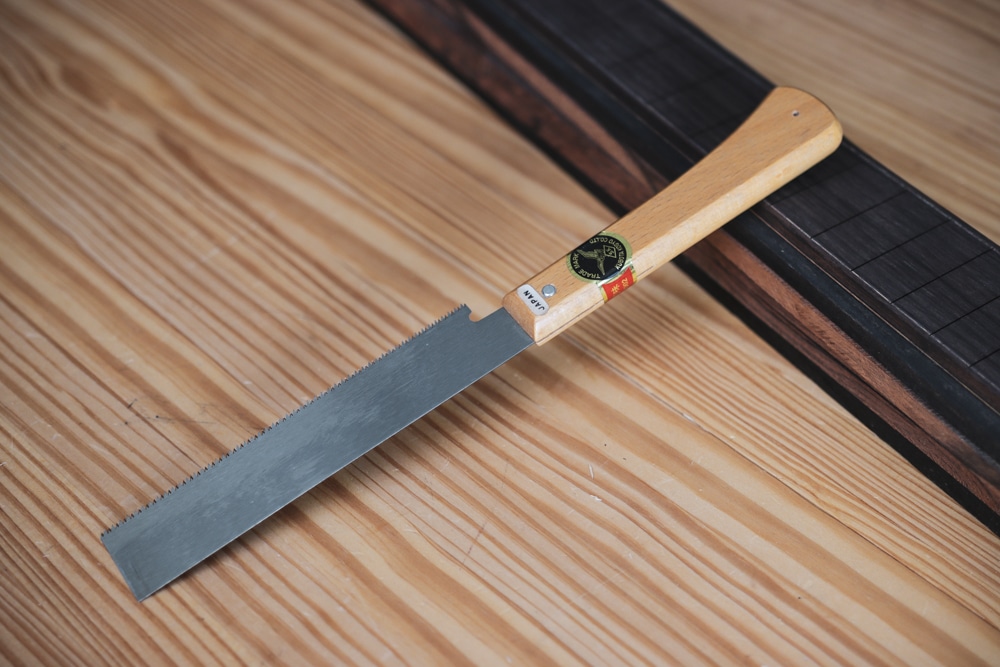
A flush-cut saw is an excellent tool for making cuts that need to be flush against the surface. Having the option to make flush cuts saves time and makes those operations easier and faster. I have also sometimes used it to extend cuts made with my other saws that need to be deeper than the saw spline will allow. Because the flush-cut saw has no spline, it can go as deep as you need and has a nice Japanese Dozuki-style tooth.
Recommended Flush Cut Saws:
Guitar Fretwork Tools
Luthier tools for installing, leveling, and polishing the frets (AKA the fretwork) are the specific set of tools that were the hardest for me to acquire when I began building guitars. I had access to decent woodworking tools to cover most of the basics, but fretting tools are much more specialized and lutherie specific. Guitar fret tools can be simple, but there are a few key features and things to look for that I have found to be essential for getting great results from guitar fret installation, fret leveling, and other parts of the process. For this type of tool, I think it makes sense to look at them sorted by the operation that they are used for in the fretwork process.
Fret Removal, slotting, and Radiusing
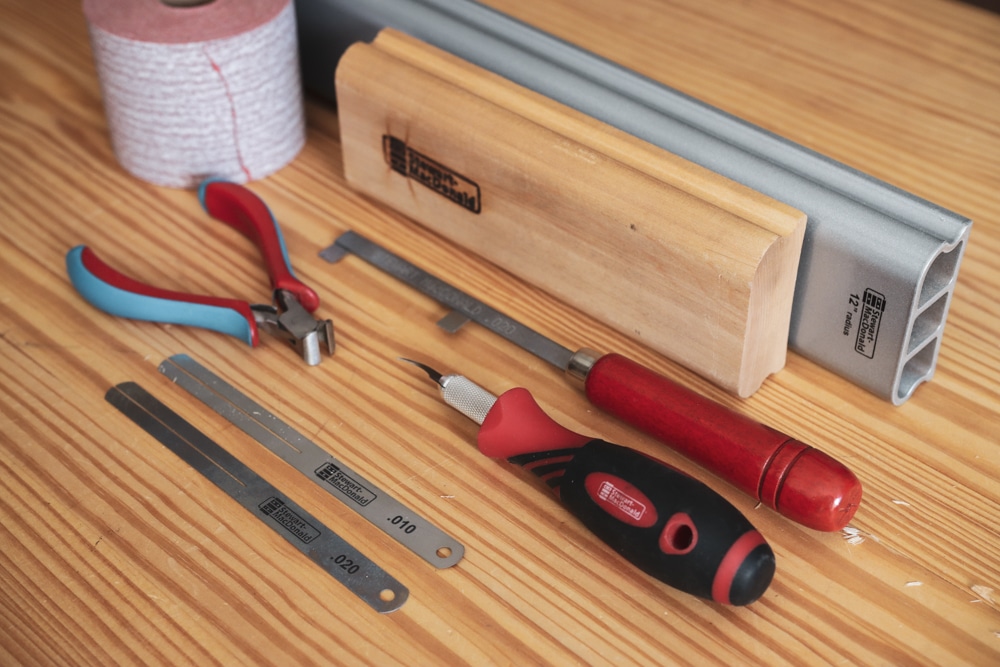
Before installing frets, we need to get the fingerboard surface and the fret slots ready to receive them properly. If this is a re-fret, you’ll need to remove the existing frets first and clean the slots. I listed the fret removal tools I use and highly recommend below. Also, the little fret-cleaning saw is fantastic for cleaning the fret slots. I use the aluminum sanding beams to put an even radius on the fingerboard surface. The wood blocks work; they just take a little more effort, so if they fit your budget better, start with those and then upgrade later when you can.
Recommended Fretwork Tools:

Fret Installation
The first step to good fret installation is properly preparing the frets. I can’t say enough great things about the new StewMac Fret Tang Nipper—it’s essential for sure if you build bound fingerboards. I use the little fret end file to clean the fret overhang after nipping the tangs, and it works great. I like to press the frets in using the fret press system linked below. I also use the dead blow hammer to be sure the fret is fully seated from end to end. You can learn my complete fretwork installation system in my course Fretwork Mastery Part 1.
Recommended Fret Installation Tools:
- Deadblow Fretting Hammer (I love this tool!)
- Fret Cutters
- Fret Press Caul with Inserts (I use this on every guitar)
- Refret Saw and Fret Slot Cleaning Tool Set
- Stewmac Fret Beveling File
- Music Nomad Fret Beveling File
- Jaws Fret Press
- Diamond Fret End File
- Deluxe Fret Tang Nippers (The GOAT!)
Fret Leveling
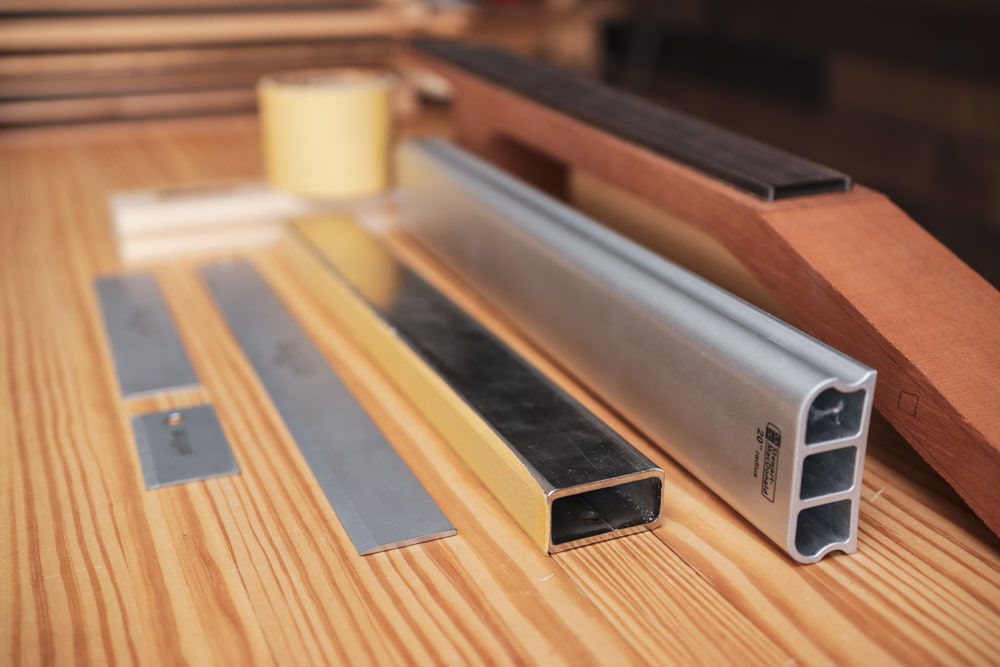
For leveling the frets, there are also a few essential tools to consider. The first is a reliable straight edge, like the one listed below, to get your guitar neck properly adjusted before leveling. Some luthiers love the Erlewine Neck Jig to get the neck bow just right before leveling. For the fret leveling operations, I use a level sanding beam, because I like to add a compound radius to the fret tops by leveling along the string paths. Some luthiers prefer a radius fret leveling approach, which can be done with the same radius blocks you used for the fingerboard surface. For touchups and minor adjustments, the Fret Kisser tool is great (it isn’t essential, but for most guitar techs, it’s darn close). You can learn my fret full leveling system in my course Fretwork Mastery Part II.
Recommended Fret Leveling Tools:
Crowning & Polishing
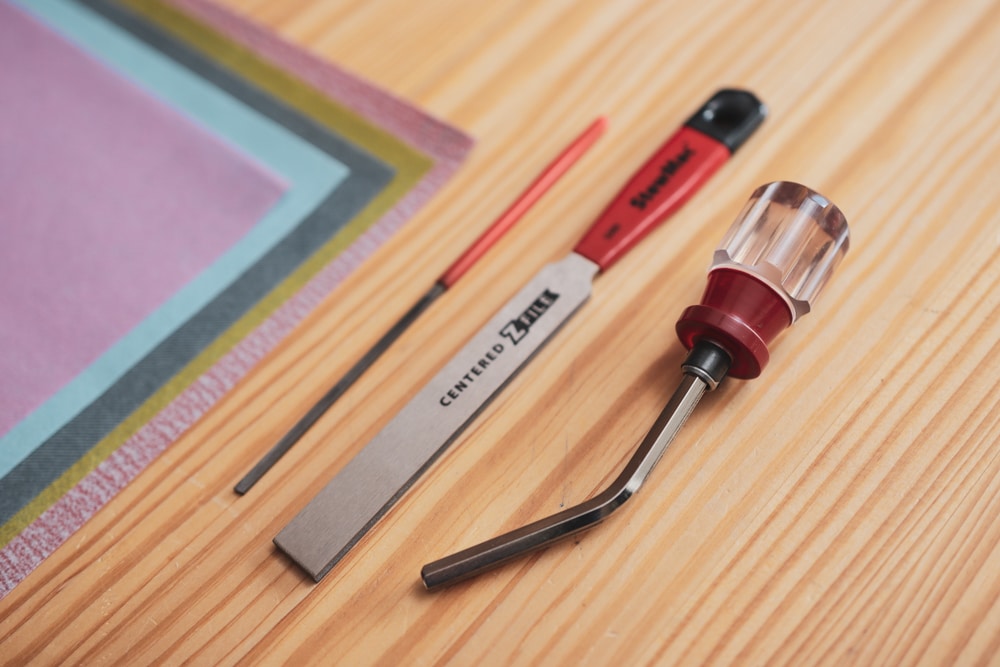
The last step is to accurately crown the frets and bring them to a comfortable and beautiful scratch-free shine. These tools are also in the essential category, and it’s up to you to determine which tools fit you and your needs the best. They all can work, but it’s one of those personal preference things. I have been using the diamond fret crowning file for almost 20 years (Learn my fret polishing system here). I hear from my students and other luthiers that the Z file is fantastic, and I plan to test it soon. For polishing, I use the sandpaper and polishing papers listed below. You can also ready my full Luthier’s Guide To Fret Crowning Files for more on how to choose the perfect fret crowning file.
Recommended Fret Crowning & Polishing Tools:
Guitar Set-Up Tools
Achieving the perfect guitar set-up is more of an art than a science. You take an average-playing/sounding guitar, and with the proper fine-tuning and subtle adjustments, transform it into an exceptional guitar as you adjust the intonation and the action, and dial in the feel of the instrument. In the process, if done correctly, you bring out the guitar’s authentic and best voice. Having the right luthier tools at your disposal can make this less daunting, faster, more consistent, and more enjoyable.
Workspace
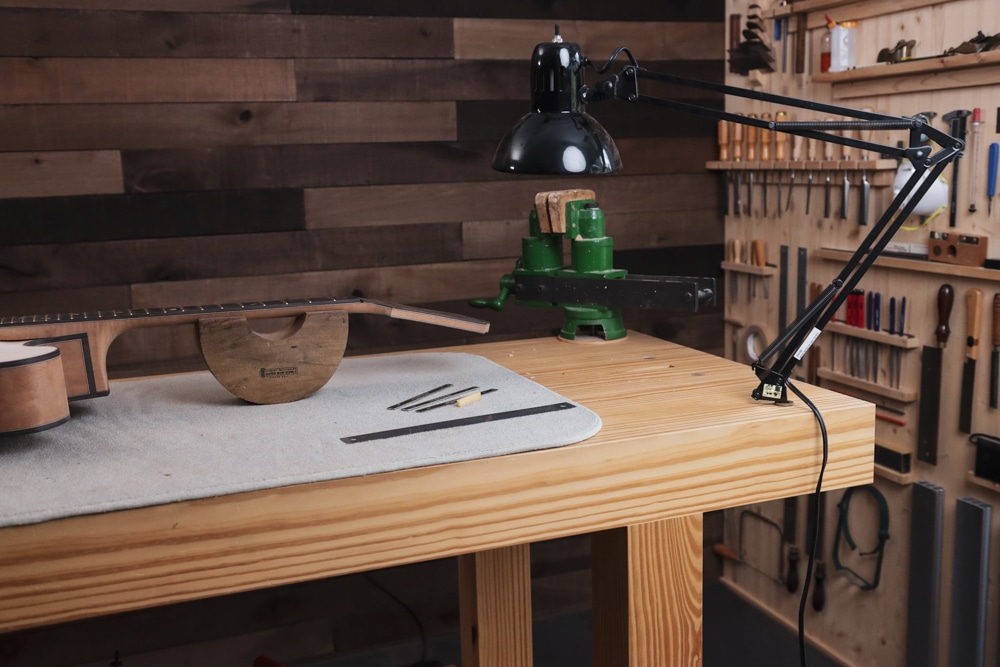
Your workspace needs three basic things to do your best guitar set-up work. First, you need a stable and sturdy surface to work on. I use a special luthier’s workbench that I built (blueprints are available in the Luthier’s EDGE Workbench Course). Second, you need a clean and safe workspace. If your bench is full of tools and hard surfaces, the chances of things going wrong are much higher. It’s best to use some kind of pad on your bench top to protect the guitar and its delicate finish. Last, you need good lighting to clearly see and complete your work on the many fine details involved in guitar set-up, such as nut slots, action, neck bow, etc
Recommended Luthier Workspace Tools:
- Luthiers Inspection Light Bar Kit
- Luthier’s Vise
- Pattern makers vise
- Pattern Makers Vise Upgrade Kit
- Stewmac Workbench Pad
- Ultra Light-Weight Magnification Visor
- OptiVISOR Headband Magnifier
- 60” Workbench
- Build Your Own Luthiers Workbench
- Guitar Neck Rest
- Deluxe Rock-n-Roller Neck Rest
- Music Nomad Workbench Pad & Neck Rest
Measurement & Adjustment
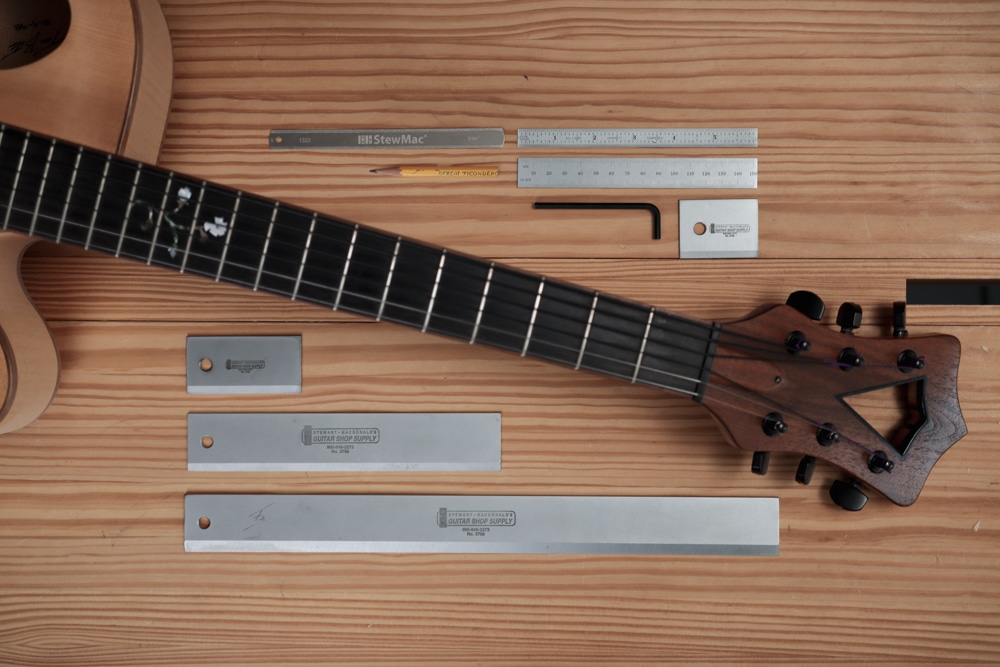
Before making adjustments, we need a way to accurately measure and assess the current state of the guitar’s set-up. A straight edge is essential for checking the fingerboard bow and measuring how it changes as we make adjustments. The string action gauge below is a handy tool. And be sure to use only the proper wrenches for adjusting your truss rods, to avoid damaging them.
Recommended Luthier Tools For Measurement & Adjustments:
- Precision Straightedges (been using these for over 20 years)
- Precision Notched Straightedge
- 2-in-1 Precision + Notched Straightedge
- 3-in-1 Tri-Beam Straightedge
- Full Truss Rod Wrench Set
- MusicNomad Guitar Tech Truss Rod Wrench Set
- Guitar Tech Screwdriver Set
- MusicNomad Guitar Tech Screwdriver & Wrench Set
- 6” Luthier’s Rule
- String Spacing Rule (a must-have tool)
- Stewmac String Action Gauge
- FretGuru 8-in-1 String Action Gauge
- MusicNomad String Action Gauge Bundle
Files & Saws
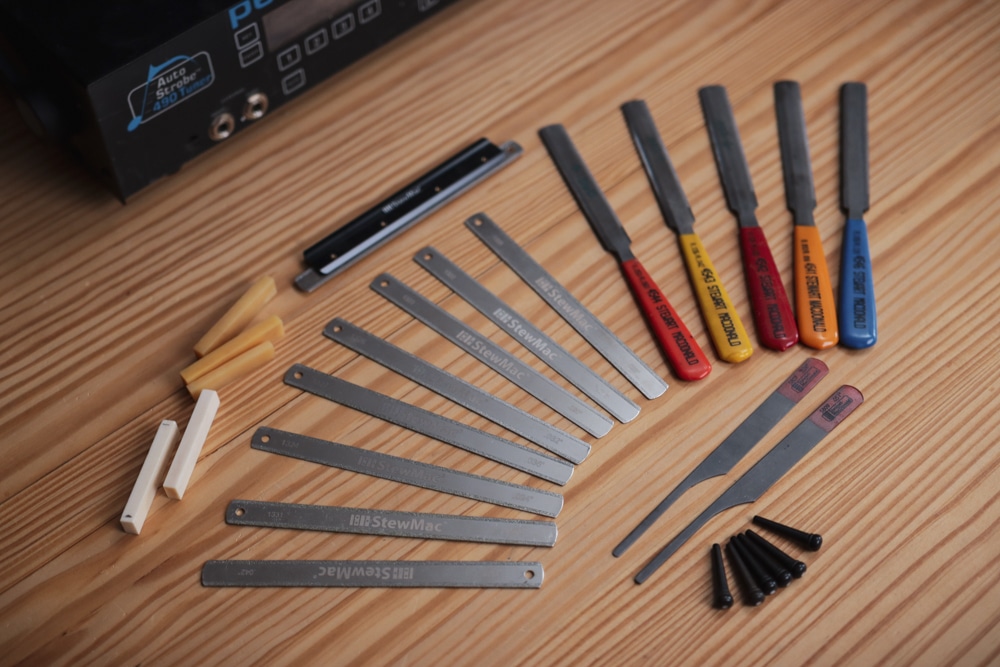
You’ll need specialized files and saws when doing a guitar set-up. The first files that come to mind are nut slotting files, which are undoubtedly essential for ensuring the sting slots have the optimal depth, size, and shape. String ramp saws are another specialized tool that can make a big difference in tone quality. For level touchups, the StewMac Fret Kisser is very handy. If you need tools for fret replacement or more serious fretwork, check out the section on fretwork tools.
Recommended Files & Saws For Guitar Set-Ups:
Tuning & Intonation
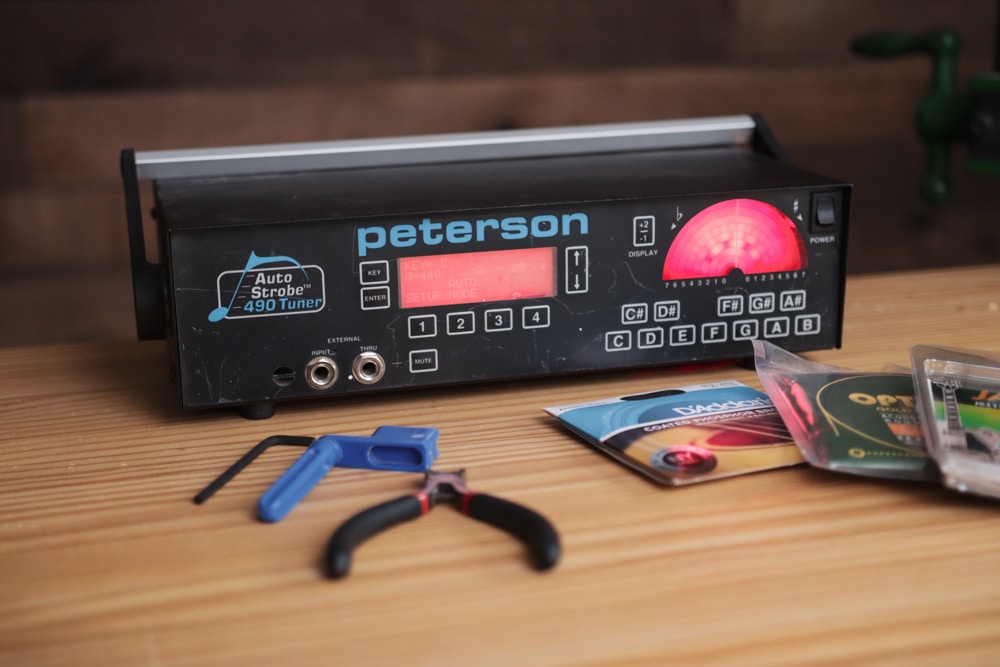
Tuning and intonation are topics we often discuss in The Luthier’s EDGE. Having the scale length and compensation at the saddle just right is vital for the guitar to sound its best and play perfectly in tune. I like the files below for making saddle adjustments for intonation. If you are doing set-ups on electric guitars, check out the toolset I listed below to make bridge and saddle adjustments faster and easier on those types of bridges. Also, string winders are so cheap and so handy, and to me, they are essential tools in their own unique way.
Recommended Curved Chisels:
- Peterson AutoStrobe 490 Strobe Tuner (still my favorite after 22+ years of use)
- Peterson StroboPlus HDC
- iStroboSoft (works in a pinch)
- Waverly Anniversary String Winder
- Quick String Change Set
- DIY Guitar Service + Setup Tool Set
- Guitar Tech Tool Set + FREE Peterson StroboStomp HD
Guitar Side Bending
Bending Irons
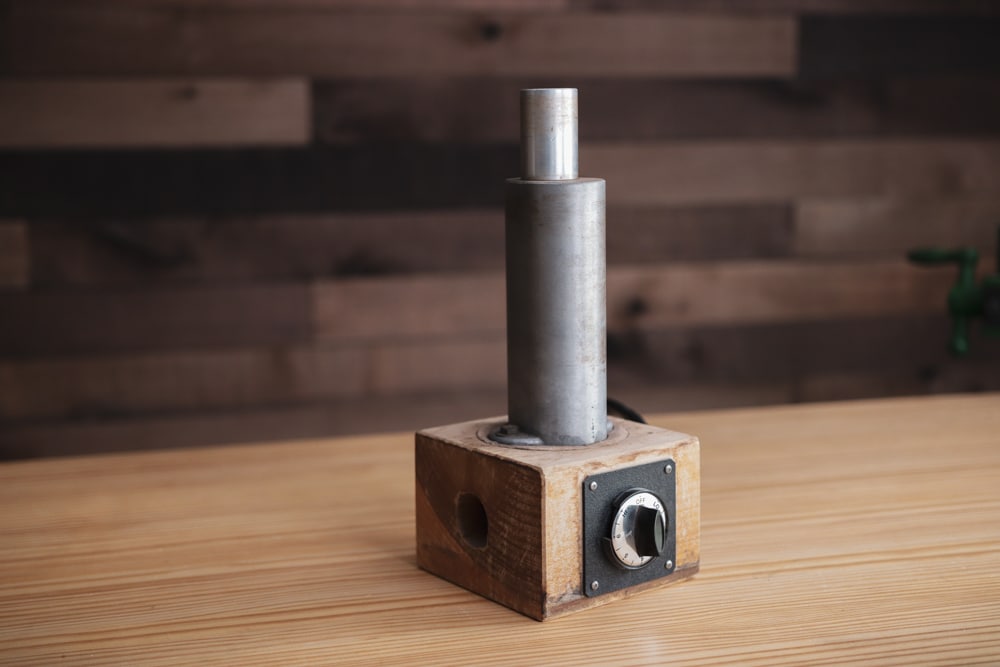
It’s hard to imagine a more essential guitar-building tool than a side-bending iron. Bending the guitar sides is a core skill that all luthiers need. The obvious thing here is that we need to bend the sides, but I love that it also forces us to gain an intuitive sense of the wood and how it sounds, smells, and feels as you work with it. In extreme cases, that applies to how far you can push it before it breaks, what it feels like as it approaches that point, and what it feels like when it is still too stiff. This intuitive sensibility is vital for nearly all parts of making a guitar and, of course, in all aspects of side-bending, even when using a bending machine. The bending iron is your teacher if you will take the time to listen and explore this more deeply. Start on practice wood at first, if you can, and have fun with it. Learn to master the art of side bending in our guitar side bending video course here.
Recommended Side Bending Irons:
Side Bending Machines
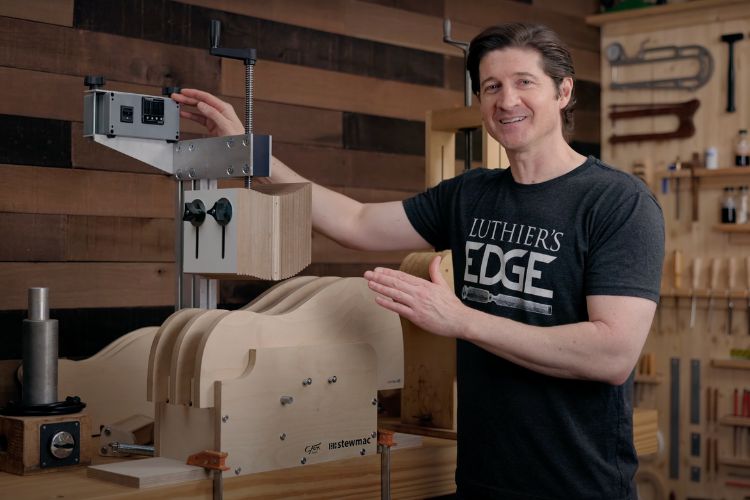
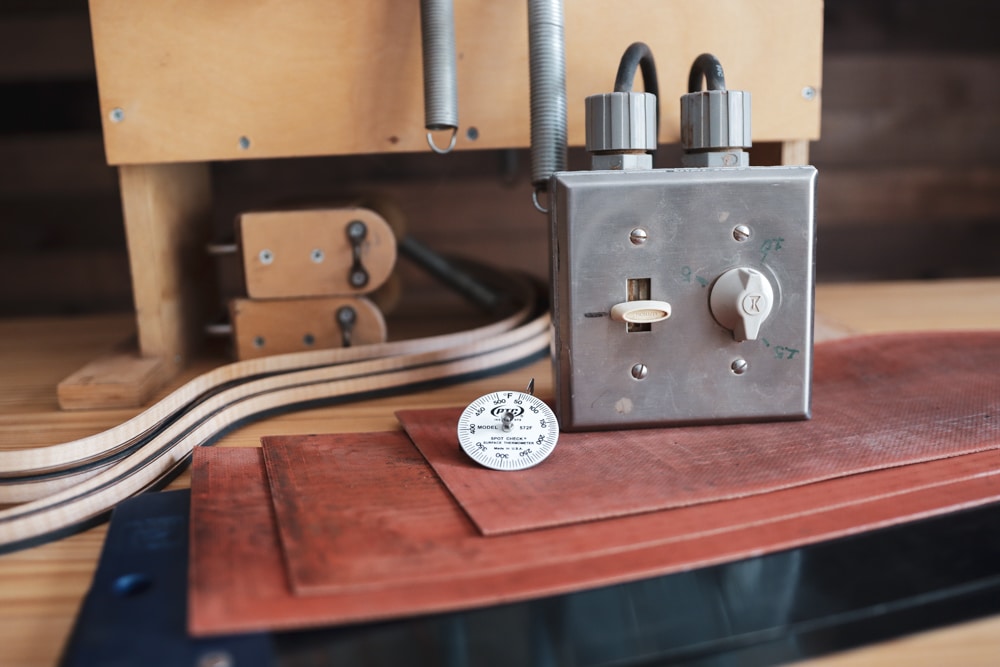
Using a machine for bending your guitar sides can be a great way to reduce some stress and improve the consistency of your guitar bending results. Even though we call them machines, there is still an art to getting the best results when using them, and it does help if you know how the steam bending process enables the wood cells to become plasticized, and to bend and hold the shape. You can check out my guitar side bending course here. I cover the wood cell structure, its reaction and behaviors regarding moisture, and much more in my course Guitar Shop Humidity. For the bending machine setup, I use a solid bending mold, and I also prefer a setup with a heating blanket on the top and the bottom of the guitar side. You can check out my full step-by-step demo in my Stewmac bending machine video here.
Recommended Guitar Side Bending Machines:
- Stewmac Side Bending Machine (Amazing tool, I love it!!)
- Blues Creek Side Bending Machine

DIY Kits & Plans
In some cases, you might find it best to build your own side bender from a kit to save money or to help you modify it to your specific needs. I’ll list a couple of kit and blueprint options below and in the next section, I’ll include a few accessories and parts that might also be helpful to this process.
Recommended Side bending Machine Plans:
Side-Bending Accessories
In the previous sections, we covered different tools and side-bending options. Here I thought it might be helpful to list a few other miscellaneous items that may or may not be essential but can be beneficial in certain situations and guitar side-bending set-ups.
Recommended Guitar Side-Bending Parts & Accessories:
Guitar-Building & Repair Clamps
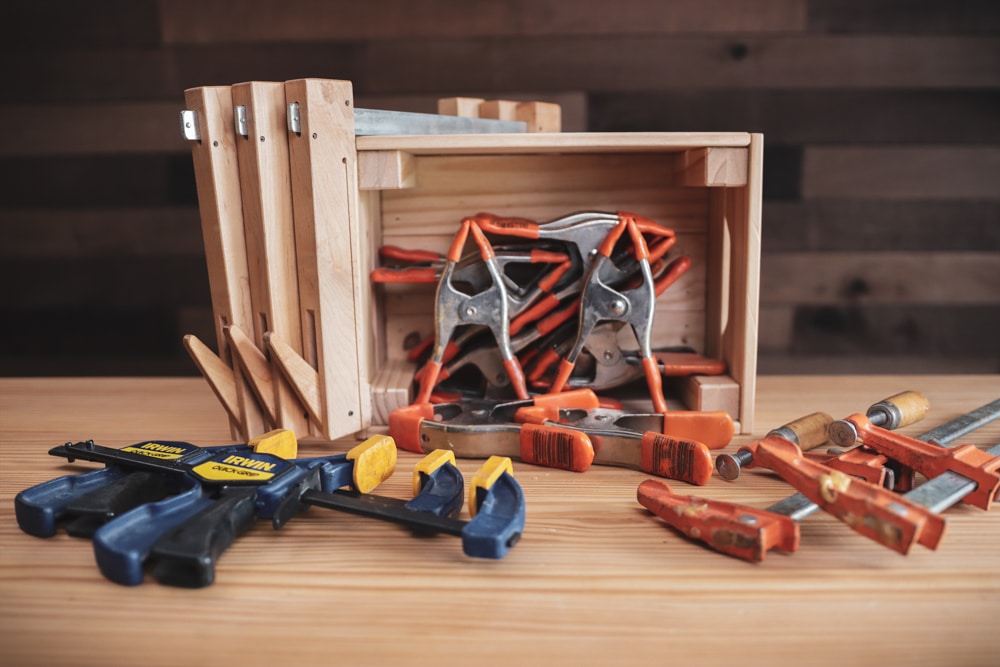
When I started out making guitars, I didn’t understand the subtleties of clamping and how it can affect the quality and strength of the glue joints we create. I will also admit that I am a recovering Chronic Over-Clamper 😉 I used to just crush the wood, trying to be sure it was clamped tight enough. Over time, I developed a sense of how much pressure is enough and which clamps work best for each part of the guitar-making process. Having a good set of clamps is essential for building guitars—that’s obvious—but the trouble comes in when it’s time to decide which types to get. Click below to see which clamps I found best for my work, and why.
General-Purpose Clamps
When it comes to general-purpose clamps, the IRWIN QUICK-GRIP Clamps are my most-used clamps because they’re so lightweight and easy to use. F-style clamps can apply more force when required, so I use them when I need extra pressure. Cam clamps are perfect for delicate things like gluing on guitar braces. Spring clamps are great for operations that don’t need tons of pressure, or when you just need to quickly get some pressure on a joint temporarily before adding other clamps. Smaller spring clamps make great kerfing clamps too. F-style clamps are probably your best bet if you can get only one type.
Recommended Clamps:
- Quick-Grip Clamps (my most used clamps)
- Jorgensen Steel Bar Clamp Set
- Heavy Duty 12″ Steel Bar Clamp
- Cam Clamps (I use 7 of the large size)
- PONY Heavy Duty Spring Clamps Set, 2 inch
Specialty Guitar-Building Clamps
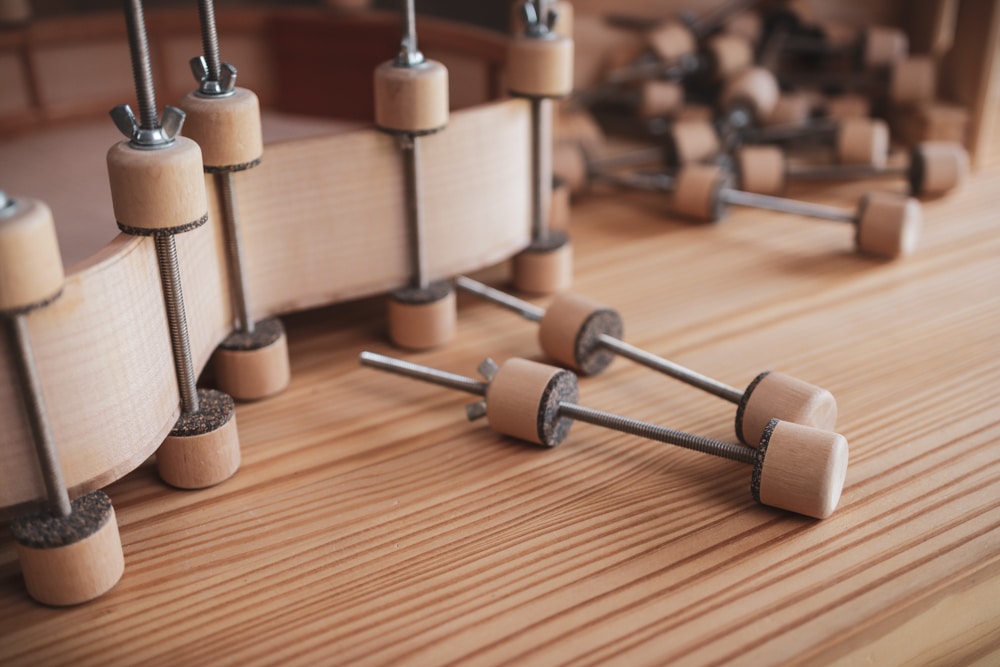
Some operations can be accomplished more easily with specially designed clamps. Bridge clamps are a great example of this. However, it’s important to be sure you have cauls for the inside and outside of the guitar when using these. Spool clamps are great for gluing up the guitar body. This next type is more of a dedicated tool than a specialty clamp, but I am including the clamps I use for jointing archtop plates here, even though they aren’t designed specifically for that operation (and they work great). The LMI jig is excellent for gluing top and back plates for classical and steel string guitars (you can buy it or make your own, like I did).
Recommended Guitar Luthier Clamps:
- Soundhole Clamps
- Lightweight Soundhole Clamps
- StewMac Bridge Clamp Caul
- Kerfing Clamps – “Super Klamps”
- StewMac Kerfed Lining Clamps
- StewMac Spool Clamps
- Plate Joining Jig for instrument tops & backs
- Plate Joining Clamps I use for Archtop/backs
- Aluminum Bar Clamp (nice lightweight option)
- PONY Pipe Clamps (I used these for years too)
- Triden Panel Clamp
Vacuum Clamps
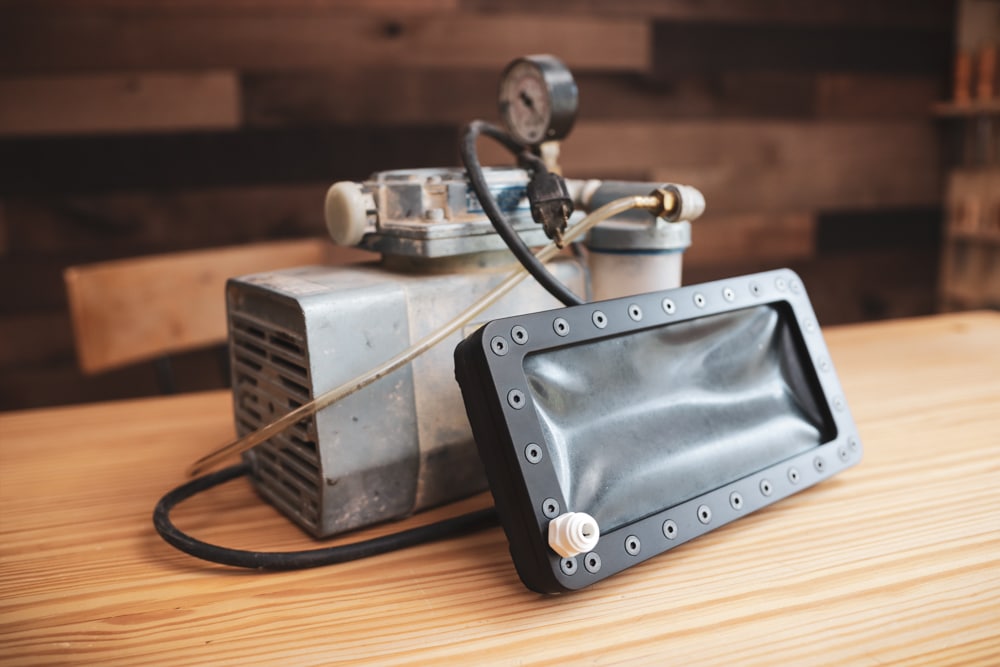
I use a vacuum clamp for gluing the bridge in place because my guitars (link to the site) have no front sound hole, and I cannot use a traditional bridge clamp. Other nice things about this kind of clamp are the fact that it doesn’t need clamping cauls inside the guitar. Vacuum is also great for making guitar-holding fixtures and even for gluing guitar braces to the top of the guitar in place of a go-bar deck.
Recommended Vacuum Clamps:
Go-Bar Deck
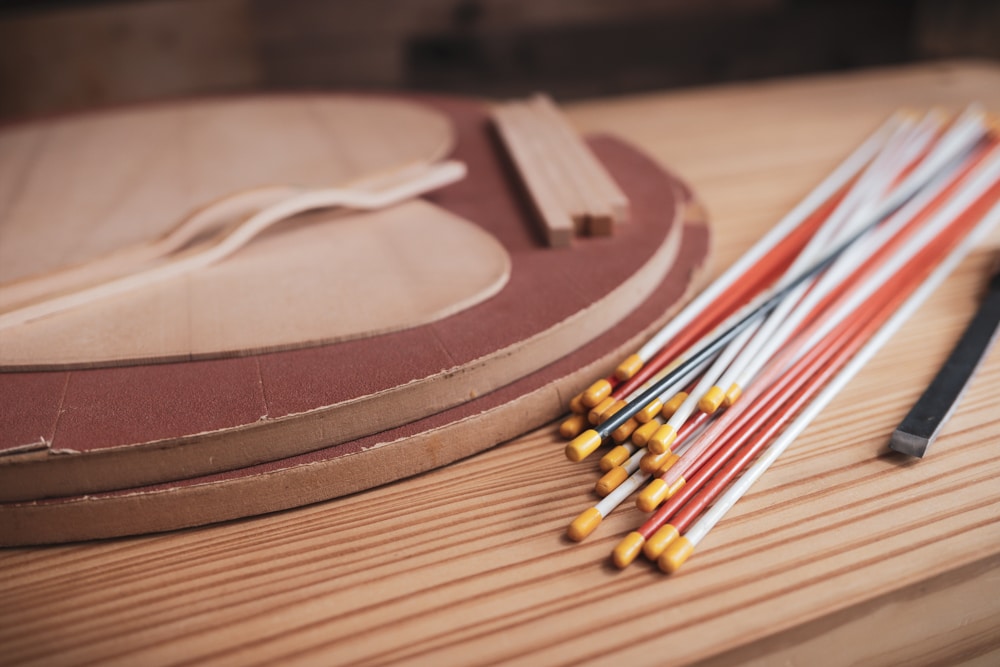
The Go-Bar deck is my favorite way to clamp the braces in place while gluing them to the guitar top, and back, for steel string and nylon string guitars. Both types linked below are great. The main difference between them is the round vs. flat go bars. The round bars are more delicate and feel more precise to me, but you need to flex them to find the spline/spine before placing them. You can do this once and mark it, so it’s not a big deal but worth noting. The flat go bars don’t need that step and are a touch faster to get in place. Which one to use is simply a matter of personal preference. I still use and love the round type for my go-bar decks. Many luthiers also use the go-bar deck to glue the top and back plates onto the guitar sides, with good results.
Recommended Go-Bar Decks:
Wrenches & Screwdrivers
I mentioned some of these luthier tools in previous sections but decided to include this section anyway, at the risk of being too redundant. Not only are some of these wrenches and screwdrivers handy to have, but in some cases, they can prevent accidental damage to the truss rod nut, screws, or the surrounding areas of the guitar. While many of the tools in this section aren’t technically essential, they are very handy to have in your luthier tool kit and can make your work go a little more smoothly with less risk of damage.
Guitar Electronics Wrenches
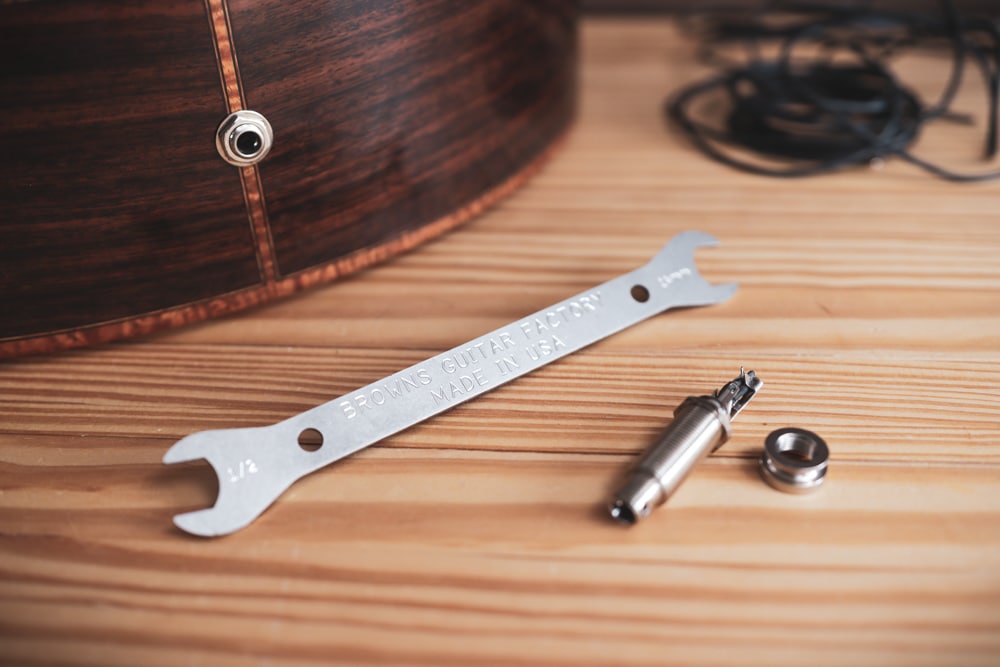
One of my most-used specialty guitar-making wrenches is the endpin jack wrench from StewMac. It might seem like a small thing, but having the right size and, in the case of the endpin jack wrench example, the right thickness, prevents accidents, slips, and damage to finishes or delicate electric components. Many of these tools just make the process faster and a little bit easier.
Recommended Electronics Wrenches:
Truss Rod Wrenches
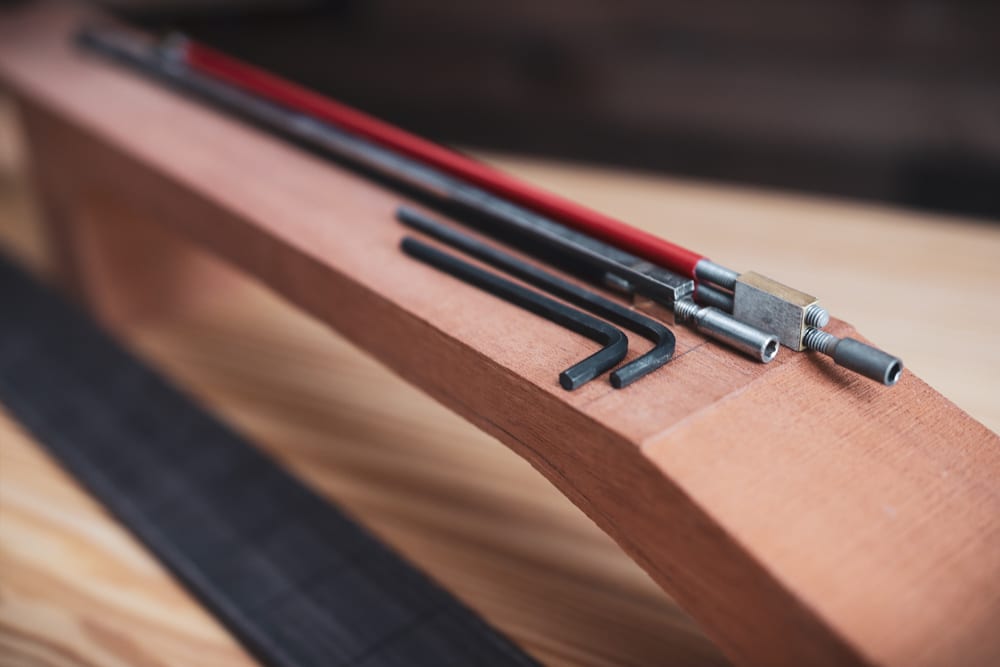
The truss rod adjustment sets are probably the most essential wrenches on this list. Having the proper truss rod wrench is vital to safely adjust your truss rod while minimizing the chances of damaging its nut. I’ll list a few options. As you might have noticed I use a ton of StewMac tools because they are high quality and they have a lifetime warranty too. Another aspect of making truss rod adjustments safely is having the right screwdriver to safely remove the screw holding the truss rod cover in place.
Recommended Truss Rod Wrenches:
Miscellaneous Luthier Wrenches
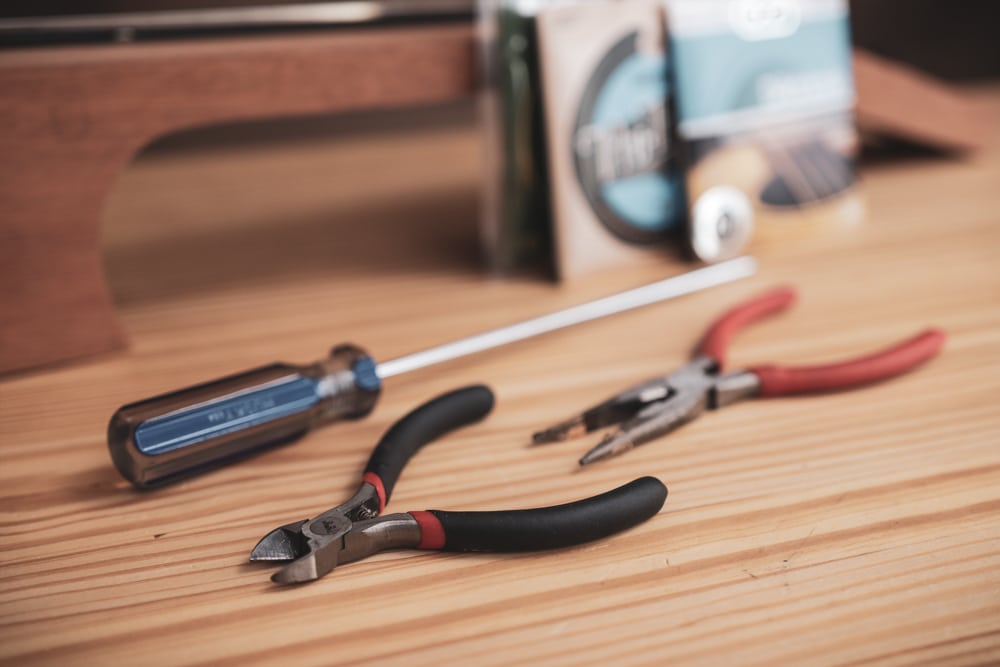
This last section is included as a catch-all for other excellent wrenches, screwdrivers, and tools that I think are certainly worth looking at and knowing about, even if you don’t find them an essential part of your luthier tool kit at this point. They could come in handy and save the day at some moment in the future.
Other Recommended Wrenches:
- 6″ Needle Nose Pliers
- StewMac Guitar Pliers Set
- Socket Set (technically not pliers but still handy)
- Long Blade Slotted and Phillips Screwdriver Set
- Small Cutters for strings

Online Training & Support For Luthier’s Of All Levels
Shorten your learning curve & avoid costly mistakes with the training and personal support you need to build your first guitar or take your current guitars to the next level.
Workshop Furniture & Fixtures
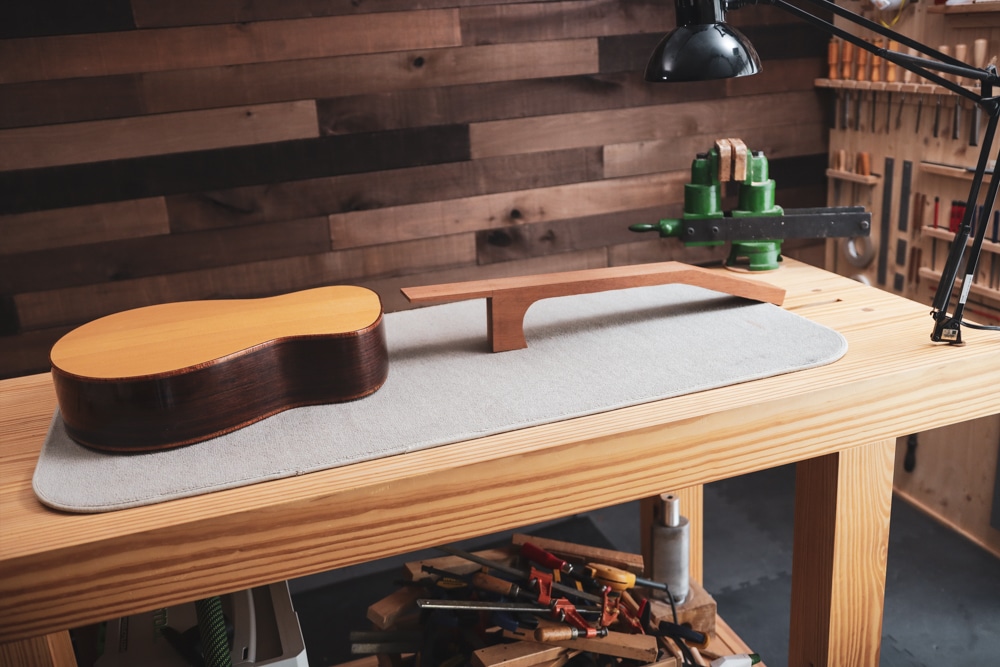
Luthier’s Workbench
A luthier’s workbench might be the most essential part of the guitar shop. The workbench needs to be stable and large enough for your guitar work, but there is one thing I found to be equally as important. That is the height of the bench. I worked for many years on a bench that was too low, resulting in lots of back pain. I caught this early enough and made changes before it became chronic. I find that the bench top should be about level with the center of your belt buckle. There aren’t many workbenches I can link to for you here, so it will be up to you to find or build a workbench that fits your needs. If you decide to build one, I have a course where I show you my workbench and every step of how I made it, along with downloadable blueprints that you can build or just use as a starting-point for your workbench: How To Build A Luthier’s Workbench.
Recommended Workbenches & Resources:
- Build A Workbench Like Mine
- 60” Workbench (seems like it might be a good option)
- Do you know of another we could add here?
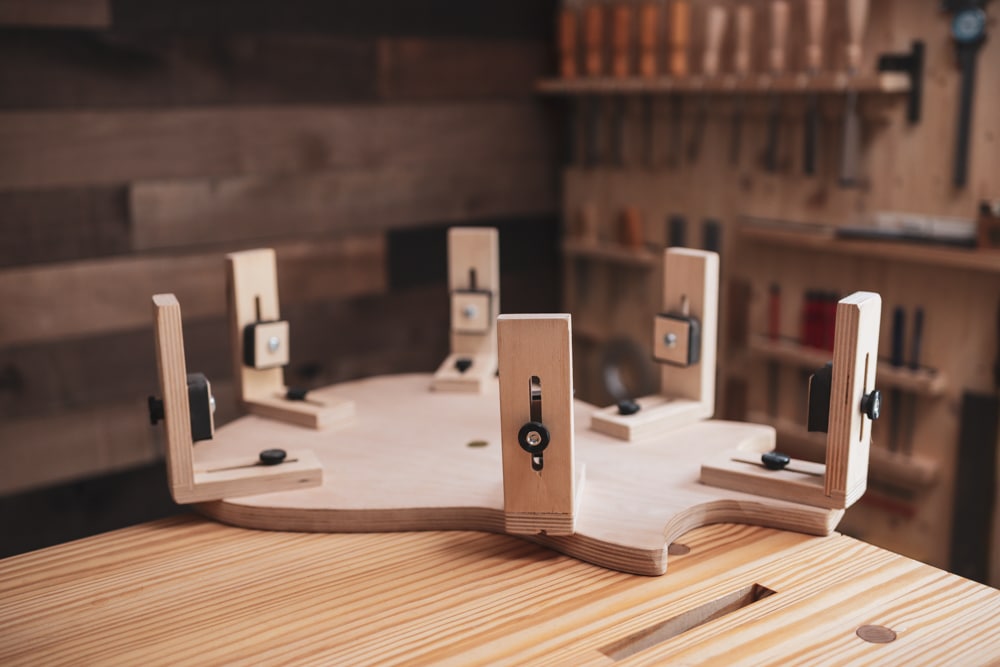
Miscellaneous Fixtures & Tools
There are a few other items that can be considered essential or at the least very useful in this category. First, we have the luthier’s vise. The StewMac version is the best I’ve found, but I still use an older version that I modified. I’ll link to both below. It is also wise to invest in some floor pads to cushion your feet—you’ll thank me later. If you use the pads from Harbor Freight Tools, I recommend you cut open the packages and let them air out either outside or in your garage so they can gas-off a little before putting them in your workspace. Not sure if the gassing-off is toxic, but it stinks like crazy, and it’s better to be safe. You also need a soft mat for your workbench to protect your guitars as you work.
Recommended Luthier Workshop Fixtures:
- Pattern Makers Vise
- Pattern Makers Vise Upgrade Kit
- Luthier’s Vise
- StewMac Workbench Pad/Mat
- MusicNomad Instrument Work Mat
- Floor Pads I Use (I love these!)
- Rockler Anti-Fatigue Mat (I also use these at my main bench)
- Cork Guitar Neck Rest
- StewMac Go-bar Clamping System
- DIY Go-bar Deck Hardware Kit
- Guitar Holding Cradle
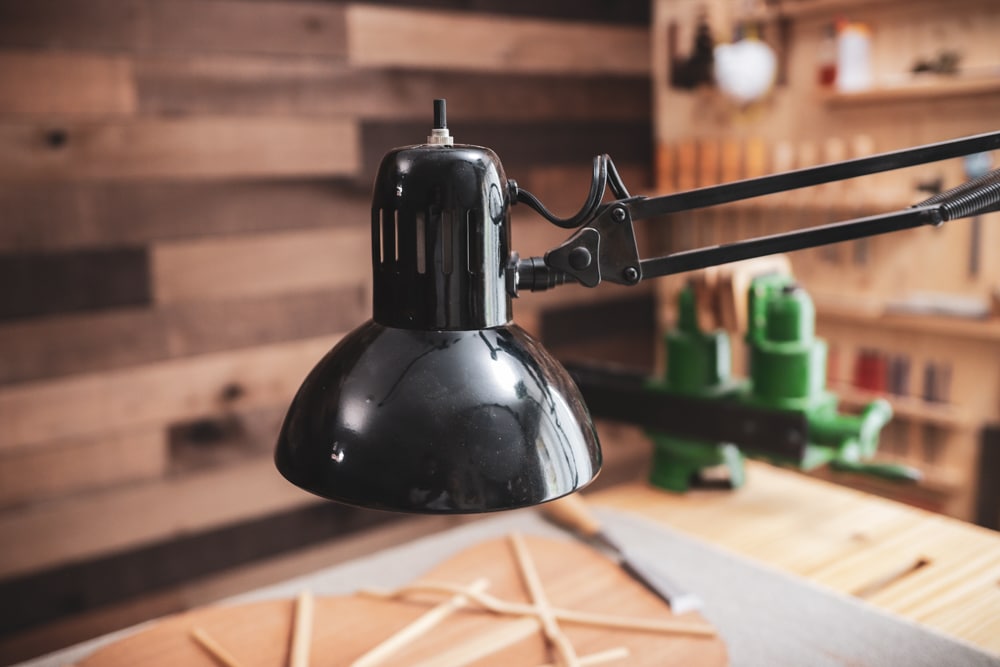
Lighting
Lighting is another crucial part of creating a healthy and pleasant workshop. Not having enough of the correct type of light could harm your eyesight over time. Not only that, but the right light sources are needed to see the subtle details and contours of your guitars, which for me is absolutely essential to doing my best work. Nothing beats fluorescent and led tubes for spotting flaws in finishes and seeing contours.
Recommended Luthier Shop Lighting:
- Workbench Lights (I use two on my main bench)
- Florescent Fixtures
- Can Lights (I prefer Halogen or incandescent)
- Luthiers Inspection Light Bar Kit
- LED Tube Light
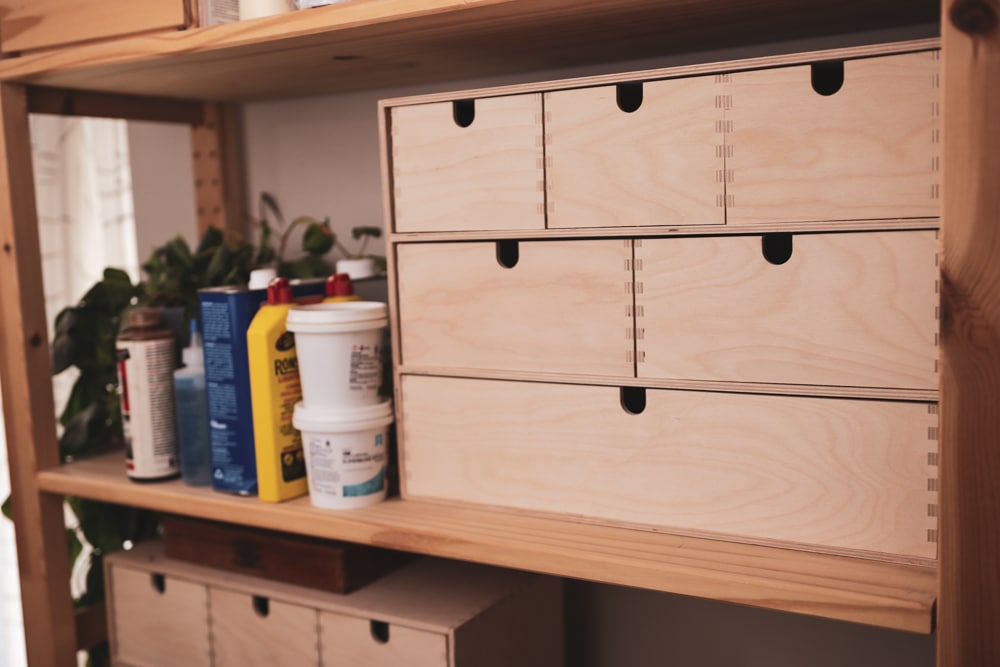
Wood & Tool Storage
Regardless of the size of your luthier workshop, storage is key to keeping your space clean and efficient. Don’t underestimate the importance of a clutter-free space. Clutter adds to cognitive dissonance and even leads to the probability of accidents increasing. A few years ago, I moved into a new workshop less than half the size of the previous space, where I had worked for 20 years. It was not easy to downsize, but it forced me to get serious about organization and storage for my workspace. The first key is to protect your guitars. I’ll link to the special luthier’s cabinet I built to do that below. I found it cheaper to use the IKEA IVAR shelving, with some simple modifications, than to make them myself. I also love the little IKEA storage drawer chests, which I will also link to. Sure, they need a little glue in the joints and some other TLC to work their best, but they are still an excellent way to keep things organized and dust free.
Recommended Wood & Tool Storage Solutions:
Humidity Control
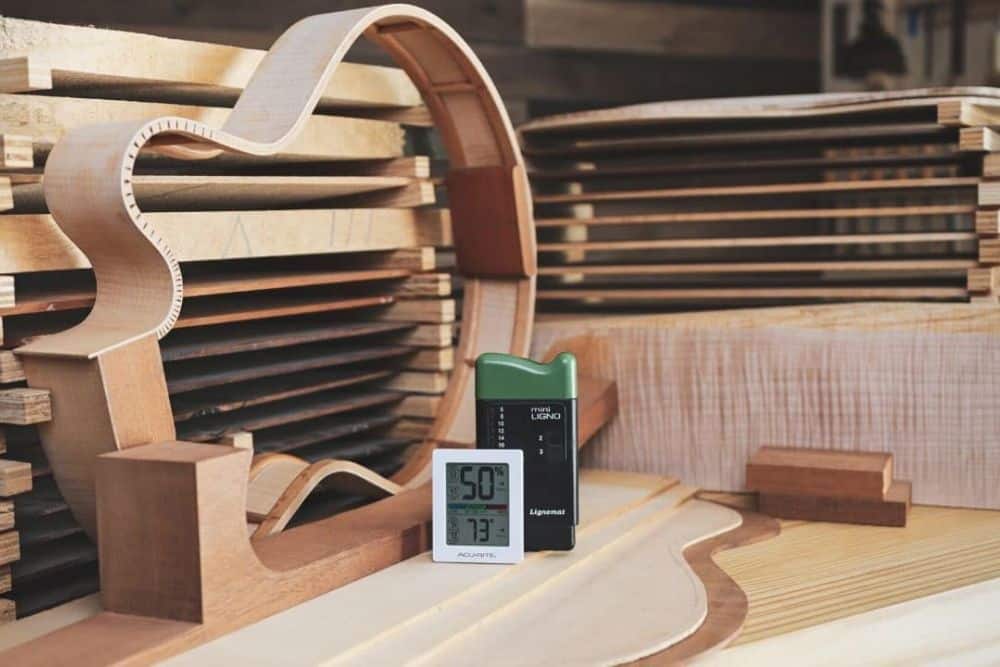
Controlling the humidity of your guitar-making shop is essential to stabilizing your tone wood and preventing the guitars you build from cracking or having other long-term structural problems. To maintain the proper humidity, you need a few basic things: 1. A hygrometer and thermometer to measure the relative humidity and temperature of your workspace. 2. A humidifier to add moisture into the air when it gets too dry. 3. A dehumidifier to remove moisture from the air when it gets too humid. 4. A heater to keep the air warm enough to hold moisture and maintain the proper humidity your guitars and expensive tone-woods need. The safe range in which I like to build my guitars is 45%-55% RH at 72 degrees Fahrenheit. Check out my video and guide to guitar shop humidity to learn more HERE.

Humidifiers
At least where I live, here in Missouri, a humidifier is essential during the winter months when the RH can go down to 20% in my workshop as the temperature outside drops below zero degrees Fahrenheit. I use and recommend a warm steam humidifier. It is the healthiest option and the easiest to clean, and it makes the space feel comfortable. My second choice is an evaporative-type humidifier. It does the job but feels cold, and it is hard to prevent bacteria from growing in it over time. I never use, and do not recommend, a sonic or cool-mist humidifier because, along with the water, it also vaporizes the minerals in the water, which will result in them settling on every surface of your shop, leaving a hard-to-clean white, sticky film. Check out my video about Guitar Shop Humidity Control right HERE.
Recommended Guitar Shop Humidifiers:
Hygrometer
Having a trustworthy and reliable hygrometer is the starting point and the key to properly maintaining the humidity levels in your workshop and ensuring your guitars do not crack and that they remain stable. I have four of the type I linked below, and I use them inside my luthier cabinet and in each part of the workshop. Learn more in the video here.
Recommended Hygrometers For Luthiers:
Dehumidifiers
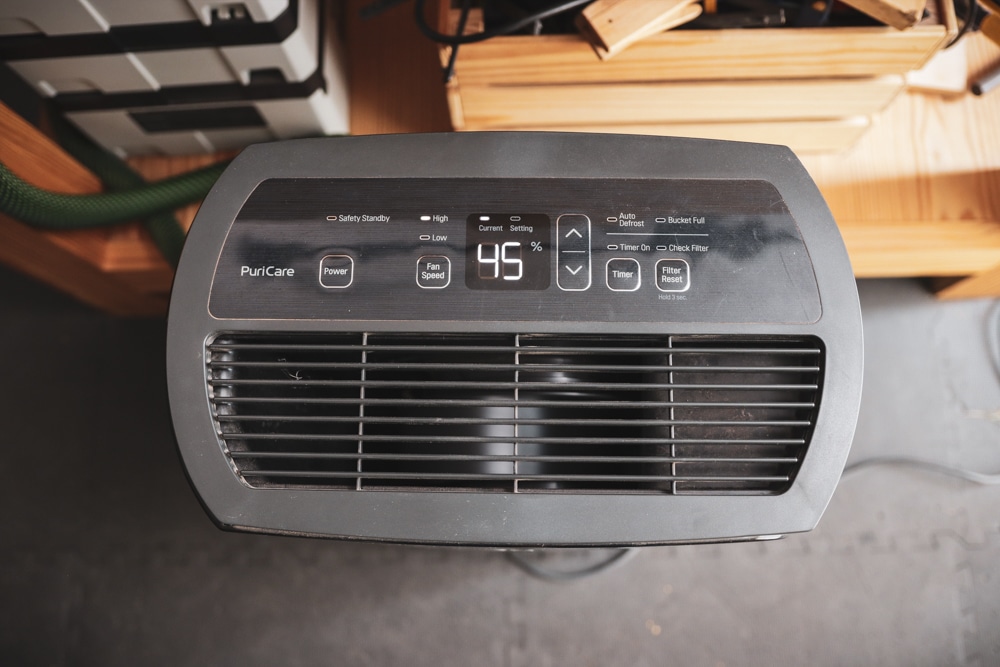
In the summer months here, where I live, the humidity levels outside can reach 80%. If I built a guitar at that level, it would surely crack during the first winter when the RH dropped down into the 30% range. That being the case, a good dehumidifier is another essential part of my toolset. (Tip: I turn off my dehumidifier while doing dusty sanding operations or carving. I turn it back on when I’m done, and I let it run overnight. This will drastically extend the life of the machine by years and will save you lots of money in replacement costs—I learned that the hard way.)
Recommended Guitar Shop Dehumidifiers:
Heaters
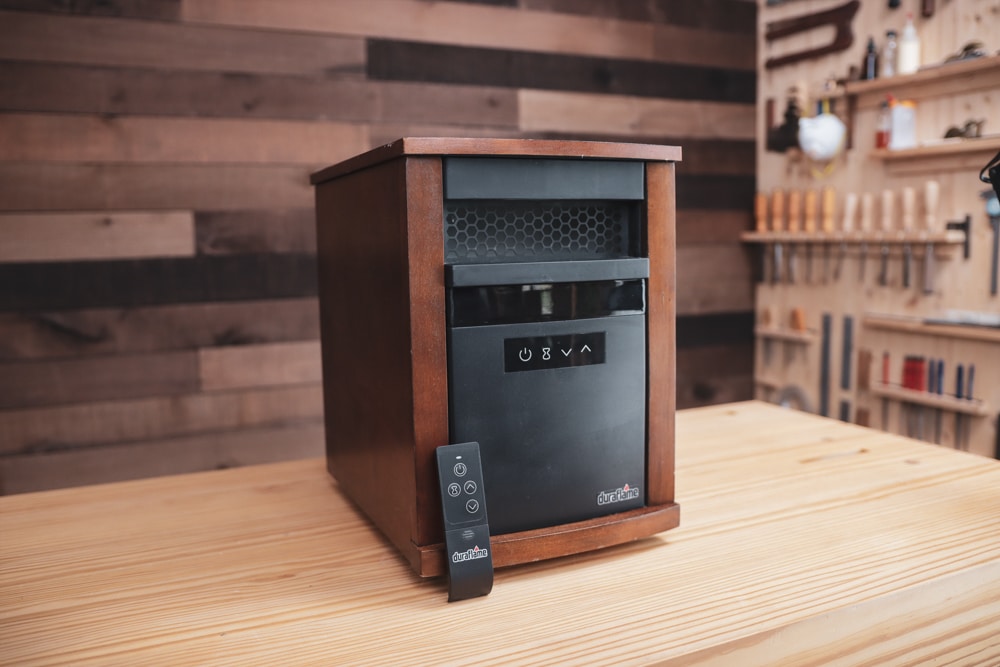
You might have noticed that when I mentioned the safe RH range in which to build your guitars, I included the temperature in the equation as well. That’s because the humidity measurement is relative to the temperature. On top of that, the air can’t hold moisture when it is cold. So depending on where you live, having a heater in the shop can be essential for sure.
Recommended Heaters:
Dust Collection & Control
Dust collection, even in its simplest form, is something I consider essential for guitar-making, and it’s vital for maintaining your health too. What can be more important than that? To effectively control the dust in your workshop, you need three things: 1. A dust extractor or shop vac to collect dust at the source while working with hand tools at your bench. 2. A dust collector for your power tools, preferably a cyclone separator because they work so much better than just a standard dust collector. 3. An air cleaner to capture the fine dust particles that are floating in the air. Check out my complete guide to dust collection for more on my specific dust collection systems and how they are made.
Shop Vacuums & Dust Extractors
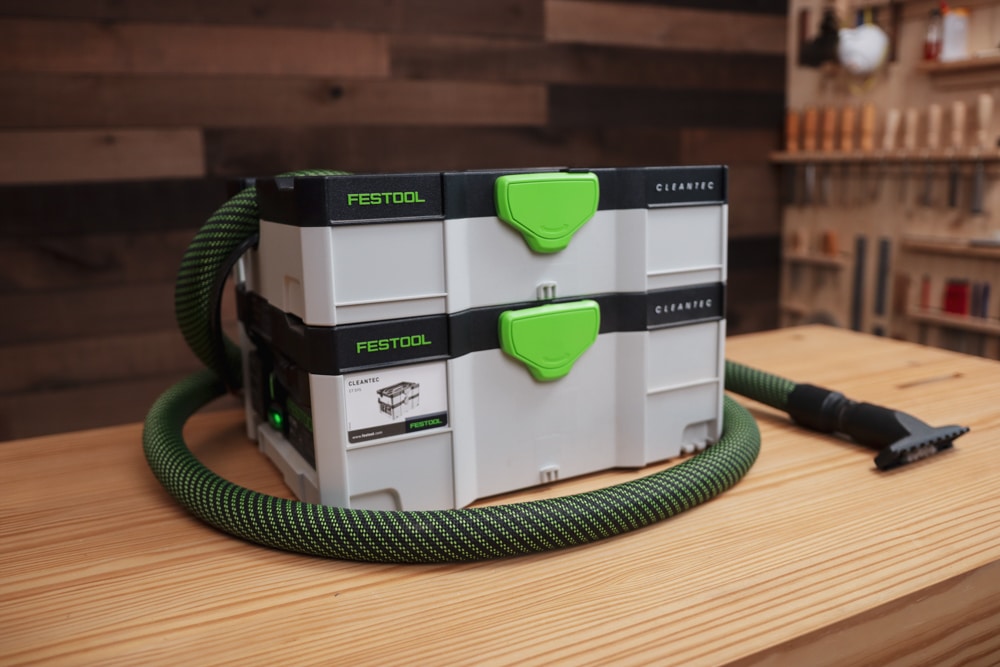
A shop vac is great for capturing the dust we make from our hand tools. I use a Festool vacuum system linked below, and though it seems expensive, I can tell you from years of experience that it’s been one of the best purchases I have ever made. Even when doing random orbital sanding on spruce tops, almost no dust gets into the air. It’s much healthier than what I did before (using a cheap sander and letting the dust float everywhere and trying to clean it up later). Start where you are, do what you can, and then eventually go for the Festool—you won’t be sorry, and your lungs with thank you.
Recommended Shop Vacuums:
- Basic Shop Vac
- Festool 575280 CT SYS HEPA Dust Extractor (I use this every day – love it!)
- Festool CT SYS Battery Version with Bluetooth (The new version of the one I use)
- Festool 574837 Ct Midi I Hepa Bluetooth Dust Extractor
- Reusable Bags For Festool (Money saver)
- Dust Deputy Plus Anti-Static Retrofit Cyclone Separator Kit (great if you don’t have a dust collector yet)
- Dust Right Dust Separator
- Dust Deputy Low-Pro Deluxe Lid Separator Kit
- Micro Vacuum Hose Kit
Dust Collector
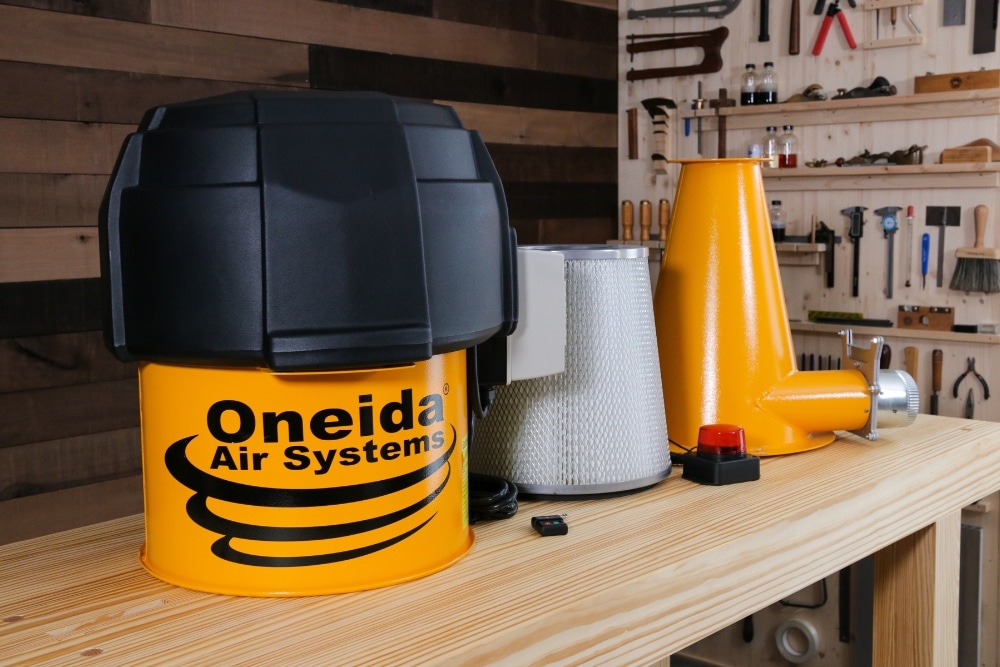
You need a dust collector system for collecting wood chips and dust from power tools. If you need to use a shop vac system, I highly recommend you look into the Oneida Dust Deputy—it makes all the difference. My second dust collection system was a combo of a Rockler dust collector with the Super Dust Deputy, and it was great (See it in action and how I built it here). Now I use the Oneida Supercell, and it is simply phenomenal. Small and ultra-powerful, it even has a remote, see my video review and setup of this system here.
Recommended Dust Collectors:
Air Cleaners
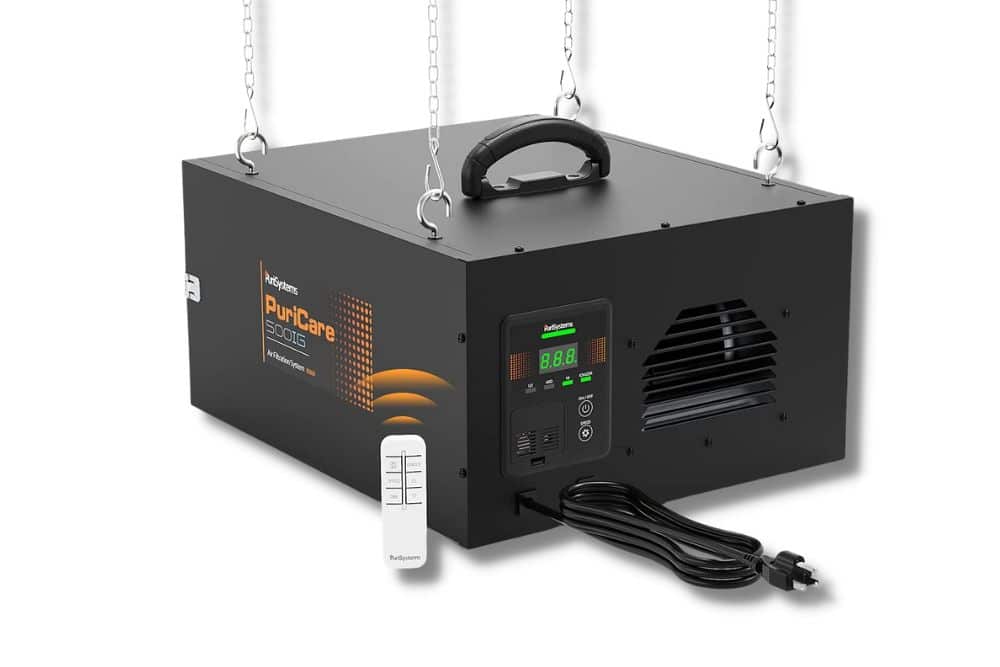
Even with the best-possible solution for the other two categories we discussed, some tiny particles will still be in the air. In many ways, they are the most dangerous of all because they can be inhaled, and their small size can allow them to damage your lungs and more. The best option is to purchase an air cleaner, like the ones below, to hang in your shop. If you don’t have the budget for that, just get a box fan and, with packing tape, add an air filter to the back of it. I have had both and I use the box fan more, simply because I can set it on the bench while I work and draw the air and dust away from me.
Recommended Workshop Air Cleaners:

Standard Vacuum
Cleaner floors = Cleaner lungs. I start every day by vacuuming my workshop with a regular vacuum. Overnight the fine dust, which is the most dangerous, settles down to the ground. So I found that starting each day with a quick vacuum session is a great way to capture it. It gives me a sense of comfort in my space and has become a nice part of my morning ritual. Is it essential? No, but I enjoy it and the benefits it brings.
Recommended Vacuums:
Vises for Guitar Building
Luthier’s Vise
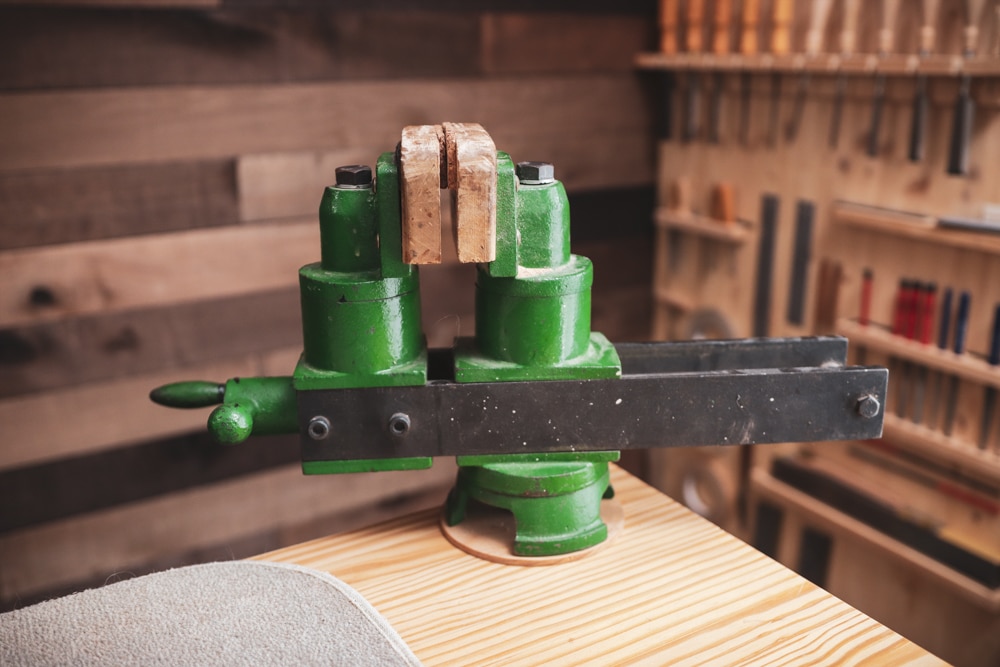
The luthier’s vise (which is actually a pattern maker’s vise) is the most-used fixture in my workshop. I have it mounted in a dog hole of my custom-made workbench (link to the workbench). This allows me to quickly move it around to different dog hole positions on the bench for specific operations, or easily remove it altogether. I currently have the green pattern maker’s vise, but if I were buying a new one, I would get the StewMac version. It has a better design, mainly because of the locking nut on the jaws. If you have the green version like mine, don’t worry because StewMac sells a conversion kit to add the locking nut, which makes a big difference because those jaw bolts it comes with always seem too tight or too loose.
Recommended Guitar Making Vises:
Guitar Nut Vise
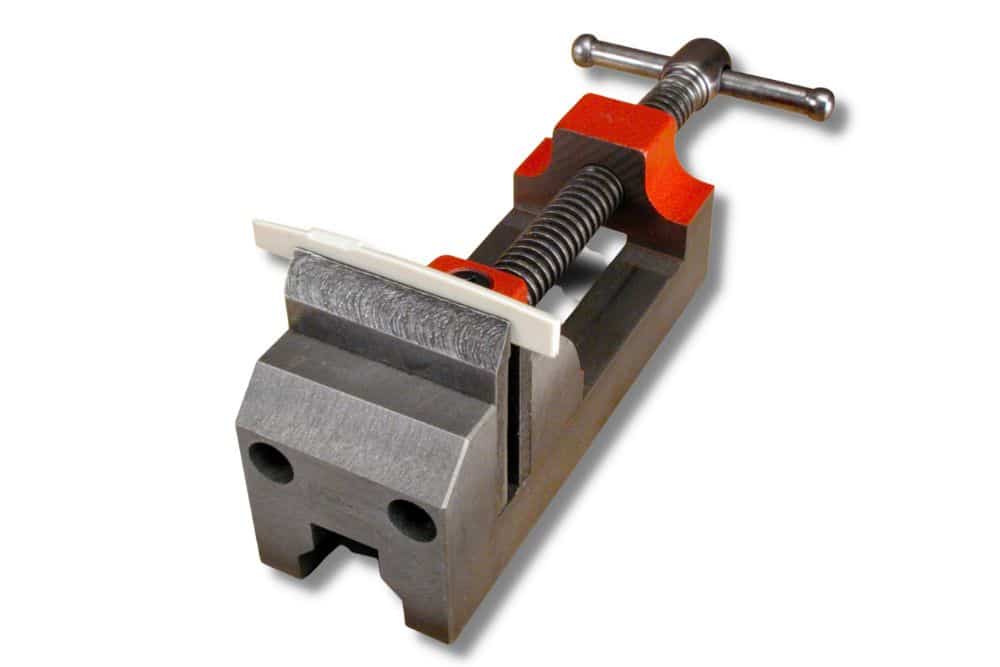
A guitar nut vise is excellent for holding the nut and saddle blanks as you shape and refine them. I can’t say this is essential, but it is great to have. The tall, tapered jaws allow for easy, unimpeded filing and polishing. It’s small enough to fit into your luthier’s vise or any other vise in your shop to hold it steady and make your nut and saddle work more accurate and enjoyable. I’m adding the link to the StewMac nut & saddle tool set that can go along with the vise and makes a great kit for this work. You can also check out the previous guitar set-up tools section for more tools to use with this handy little vise.
Recommended Guitar Nut Vise:

Vacuum Clamp Fixture
Vacuum clamping is a great way to hold guitar bodies and parts while working. LMI has been leading the pack with this technology for years, and they have some great options. I think I can say this isn’t essential, but it seems that for many luthiers, it has become an important part of their workflow and helps them produce better work more comfortably.
Recommended Vacuum Clamps & Accessories:
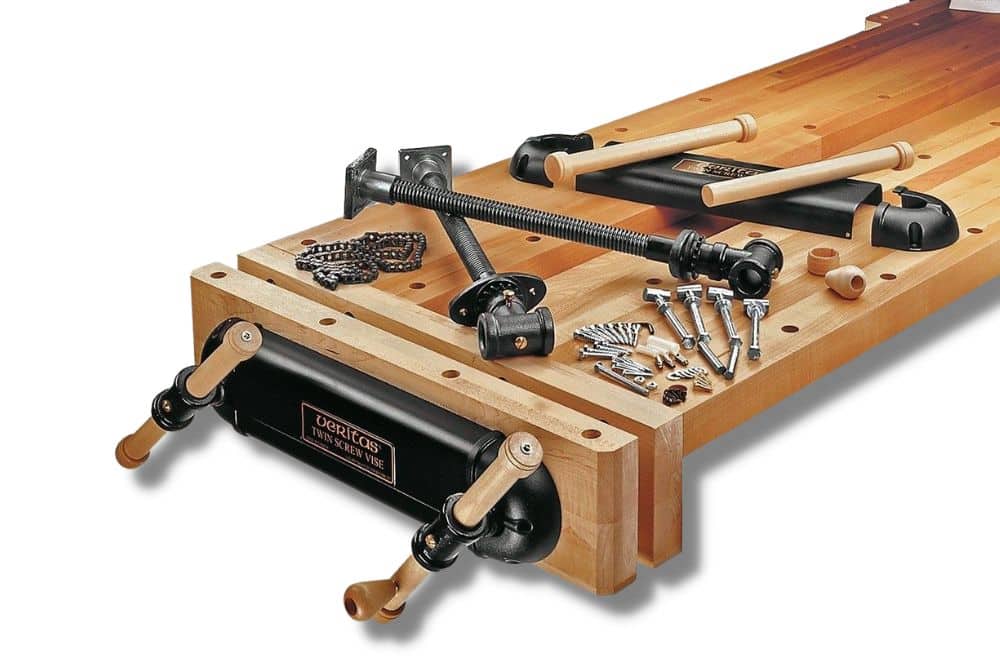
Other Vises For Guitar-Building
There are many other types of vises that can be used for different operations and needs in the workshop. The key is to find the set-up that works best for your space and your style. I will list a few vises and accessories below that many luthiers use and rave about.
Other Recommended Vises:
Sanding: Sanders, Blocks, Sandpaper
Most luthiers would agree that sandpaper, a collection of sanding blocks, and—for many people—even a good random orbital sander are all considered essential to guitar-making. It starts with matching the type of abrasive and the grit of the sandpaper to your specific tasks. Next, your sanding blocks need the proper hardness or flexibility for the stage, task, and wood types you are working on. Lastly, if you can swing it, having a good random orbital sander can be life-changing. Of equal importance to the tools and technique of sanding is taking the time to ensure you have proper dust collection. Trust me, don’t wait to get serious about collecting your sanding dust. Do it now before you have any issues.
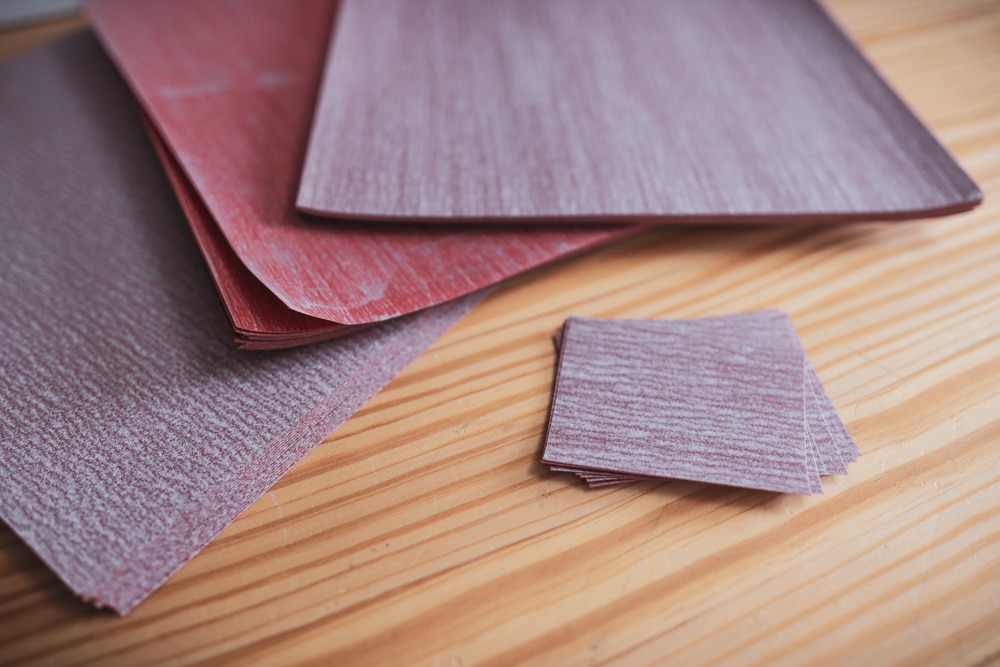
Sandpaper Types
The sandpaper I use most and recommend for general woodworking tasks is aluminum oxide. My preferred brand is Carborundum Premier Red Aluminum Oxide DriLube Resin Paper, but it is tough to get. I use 150, 220, and 320 for woodworking. I used their 600 and 1000 dry grit for polishing ebony and some of my French polish guitar finishing work. If you can’t get the Carborundum brand, I have heard that Klingspor’s, Mirka, or 3M Fre-Cut Gold are also good options. Do you know of a good sandpaper for guitar-building that needs to be listed here? Let me know here.
Recommended Sandpaper:
- Carborundum Premium Red Dry Lub (The GOAT – IMHO)
- Carborundum Premium Red Dry Lub – (Canadian Supplier)
- Carborundum Adheasiv Rolls (I use 150 grit the most)
- Klingspores 9 X 11 sheets (Good source for abrasives)
- 3M Gold Sandpaper sheets and rolls (The can’t go wrong classic)
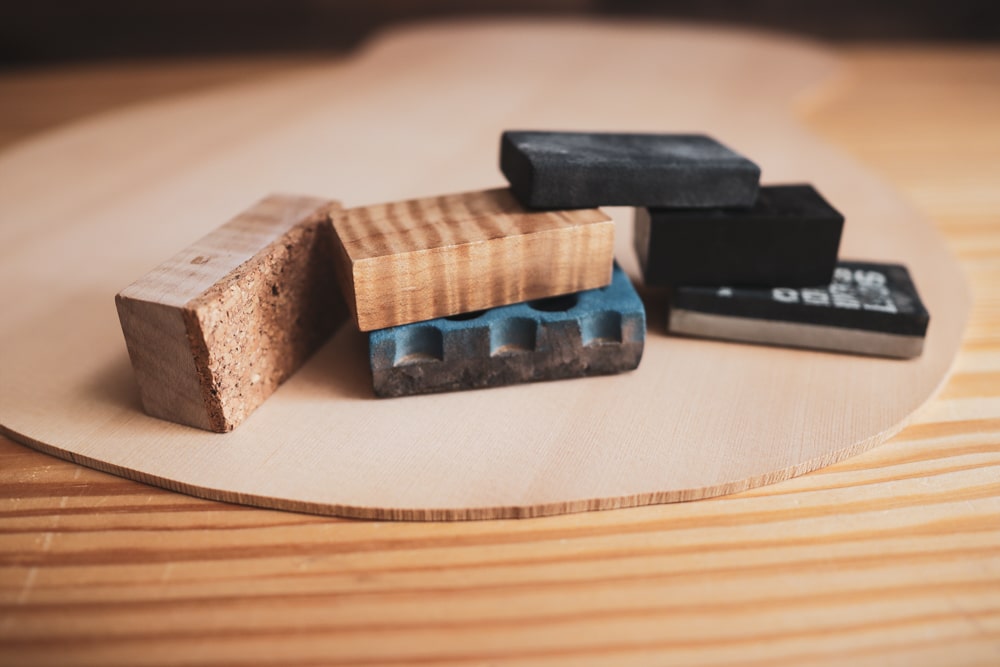
Sanding Blocks
I use a collection of sanding block materials to make blocks of different shapes, sizes, and hardness for specific applications in my guitar-making. My little sanding block kit is absolutely essential to my work. I like maple for my hard blocks. For medium hardness, I use the blue blocks linked below. For medium soft, the black Meguiar’s pads are great. For soft blocks, the grey and black Meguiar’s are my go-to. I cut them into 1-inch-wide sections to make my blocks. That size fits the work, my hand, and the sandpaper sheet sizes well.
Recommended Sanding Blocks:
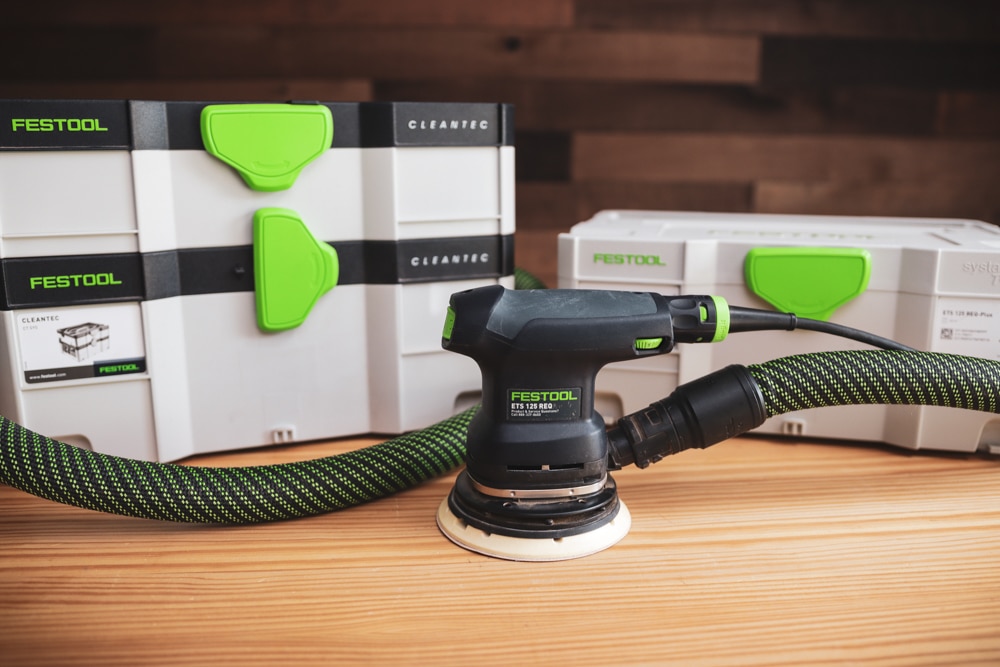
Power Sanders
You can do all the sanding by hand, but using a random orbital sander for specific operations can make things much faster and easier on your body. There is one big key (aside from using the correct type of paper), and that is dust collection. Using a random orbital sander on spruce, for example, will fill your entire workspace with millions of particles that stay suspended in the air for days. Around four or five years ago, after researching the long-term effects of dust inhalation, I invested in the Festool sanding system linked below to solve that problem. What a joy to use, and with the dust extractor, there is almost no dust in the air. This one change has transformed my workshop and my lungs into much cleaner and healthier spaces. Some luthiers also use a downdraft table for capturing this fine dust as well.
Recommended Power Sanders:
- Festool Sander I Use (I love this tool!)
- Festool Dust Extractor I use (fits under my bench)
- Festool Rotex Sander (More powerful option)
- Festool Dust Extractor With Bluetooth
- Bosch Random Orbital Sander
- Dynabrade Sanders (Compressed Air)
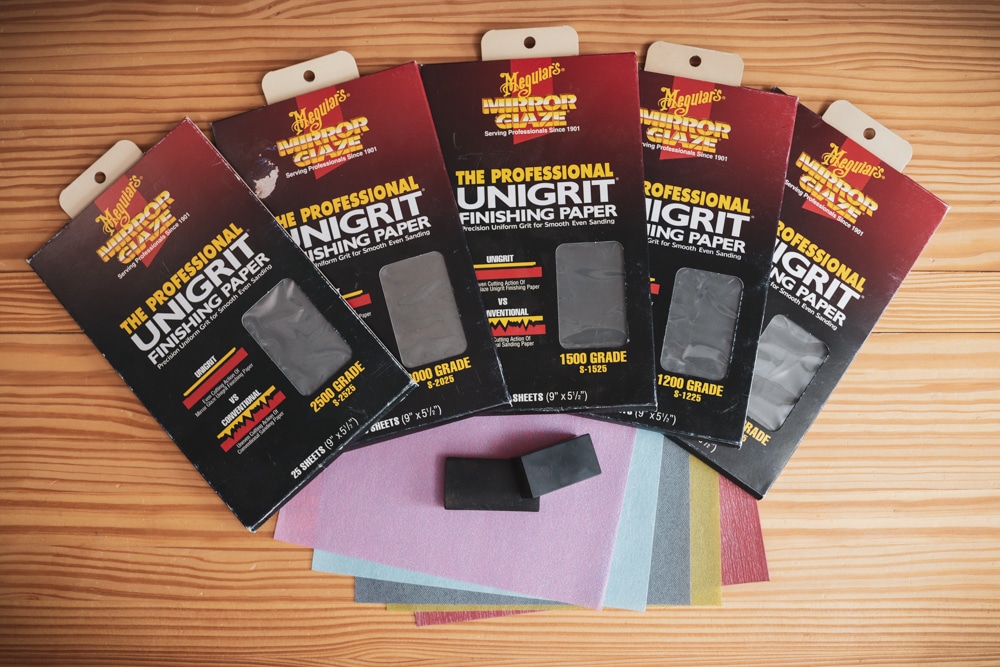
Wet-Sanding Papers
No matter what type of guitar finish you use, from nitrocellulose to French polishing, there is always some wet sanding involved. Having the right we-sanding paper is vital to getting a smooth, scratch-free, and glossy guitar finish. Below are some of my favorite papers that I used back when I sprayed Nitro. For my current French polishing method, I use 1000grit Premium Red Dry-Lube Carborundum and also the 1600 Micro Mesh, which I liked below. (You can learn my complete French Polishing systems here.)
Recommended Wet-Sanding Papers:
Power Tools
The handcrafted aspect of guitar-making is legendary, but in reality, we all use power tools to some extent these days. Are power tools essential? Well, that is a tough one that you will need to decide for yourself, but there are a few power tools that I certainly would not want to build a guitar without. I haven’t used them personally, but Rikon and Wen seem to have some very affordable options. If you are just getting started and need a temporary solution, they might be a good value option.
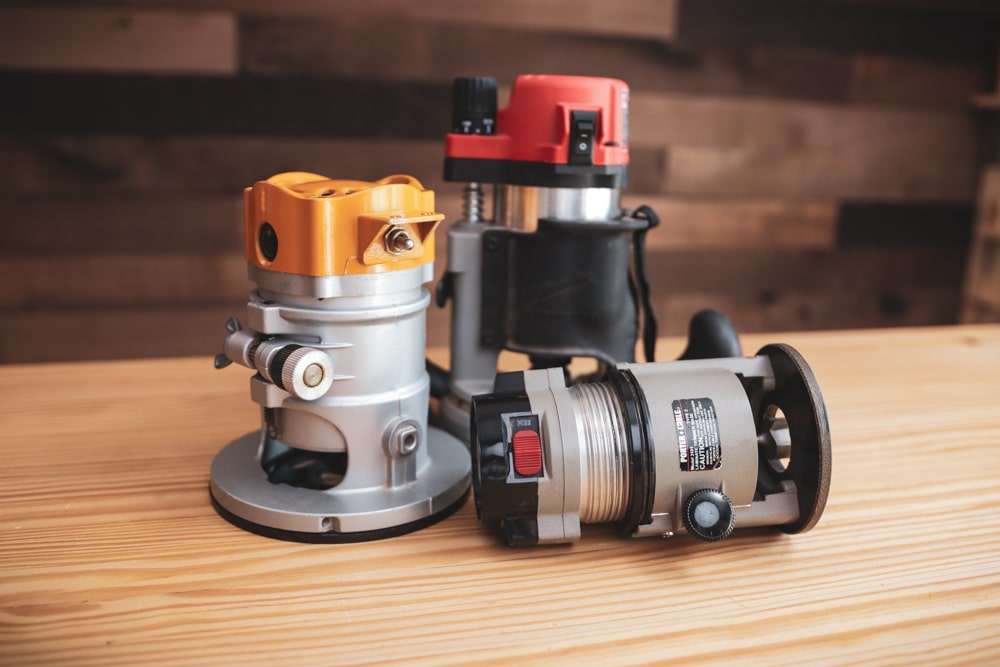
Routers
Routers and laminate trimmers are essential to most luthiers these days. I cut the binding channels on my first guitar with an old Dremel tool with the wrong bit (as I mentioned earlier). The result: It took an incredible amount of time and effort to do a not-so-good job. Purchasing a quality router is more affordable than ever these days. It will save many hours of work and help you get more constant and better quality for many different operations in building your guitars.
Recommended Routers:
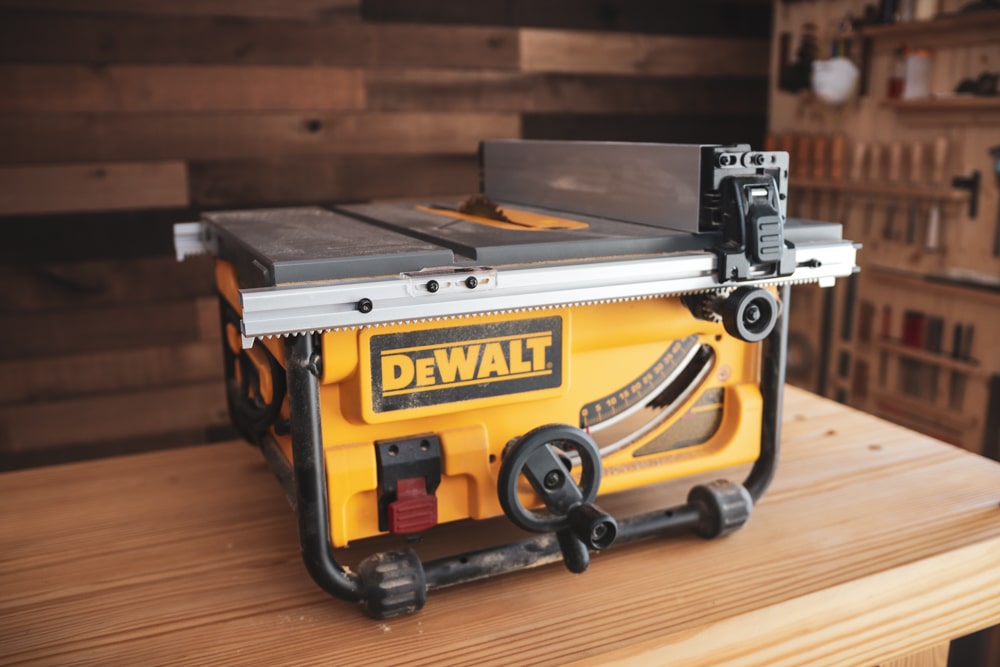
Power Saws
Of the saws I am listing here, the one I use the most is the band saw. The table saw is great too, but the band saw is so useful for many different operations, plus it is relatively quiet, and I simply enjoy using it more. I started with just a coping saw, and then later, I was able to get a scroll saw. And eventually, a 17-inch band saw. The blade guides are a critical feature to look for when selecting a good band saw. Make sure they offer a decent amount of adjustability. Bearing-type guides seem to be the best. I do use the maximum blade size (3/4″) for resawing. I’ll list the one I use, and also some other options below. I had a large cabinet-making table saw in my old shop, and the huge fence was great, but it was just too big for my current workshop. I downgraded to a little DeWalt portable saw, and it has been working well. The only time I miss the bigger and better saw is when I’m making new fixtures, shop furniture, guitar molds, etc. For the way I use the table saw, my little portable one is a workable solution and stows away when not in use.
Recommended Power Saws:

Sanders
Is a belt sander essential for guitar-making? It definitely is for me. I started with just a tiny benchtop belt sander. Later saved up and got a larger floor unit and then eventually upgraded to the Grizzly edge sander I use now. When it comes to handheld sanders, I mentioned my Festool system in previous sections, but it bears repeating because not only does it sand so wonderfully, but it cleans up almost all the dust at the source before it can ever get into the air or your lungs. Lastly, an oscillating spindle sander is another tool that has helped me immensely over the years for making guitar molds and shaping parts by hand. I also have to mention the drum sander as well. They are excellent for thicknessing tops, backs, sides, veneers, binding wood, and more. Essential? Well, at this point in my career, I will say a resounding yes.
Recommended Dog-Leg Chisels:
- Festool Sander I Use (I love this tool!)
- Festool Dust Extractor I use (fits under my bench)
- Festool Rotex Sander (More powerful option)
- Festool Dust Extractor With Bluetooth
- Bosch Random Orbital Sander
- Dynabrade Sanders (Compressed Air)
- Grizzly Oscillating Spindle Sander (Table Top)
- Grizzly Industrial Oscillating Spindle Sander (Full Size)
- Supermax Tools 19-38 Drum Sander (The Best!)
- Grizzly 6″ x 80″ Belt Sander I Use
- Small 4 x 36 in. Belt and 6 in. Disc Sander
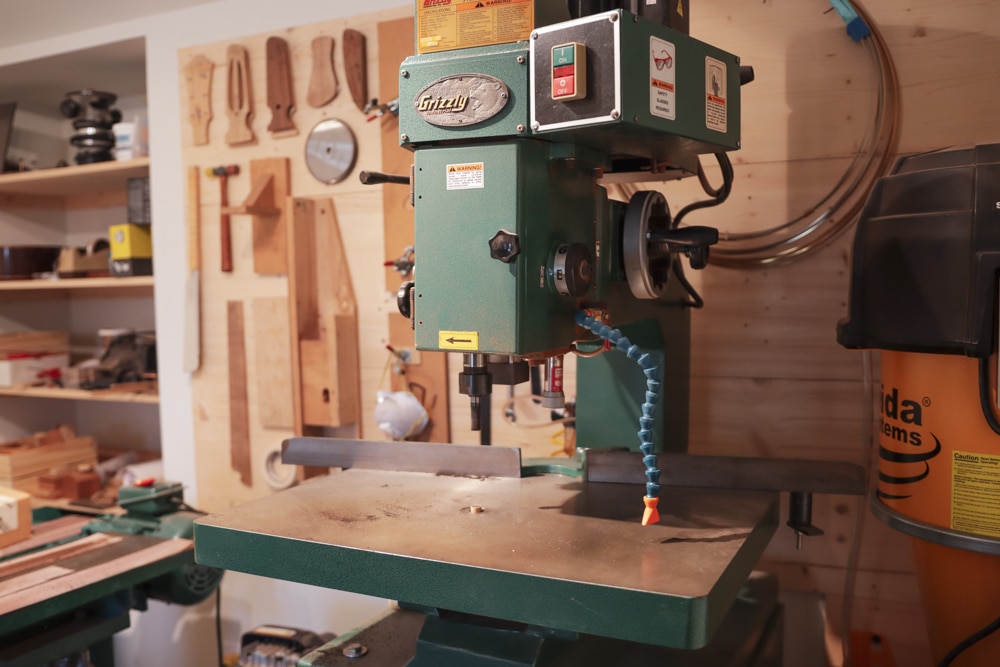
Other Power Tools
There are so many power tools that it could be its own guide, but I will include some of the other tools I use and some that other luthiers I know use to build their guitars. My overarm pin router is a vital part of my guitar-making workflow. It is fantastic for things like duplicating from templates, making guitar body molds, cutting truss rod slots, f-holes, and much more. I can’t say it is essential, but it is very nice to have an air compressor. The size you need will depend on what you intend to use it for. If you use vacuum clamping or an air power sander like the Dynabrade I mentioned earlier, then you might need a larger one. I started with a simple pancake air compressor but later upgraded to a bigger, better (and unfortunately louder) one when I could. I don’t have one anymore, but many luthiers use a shaper as a critical part of their guitar-making process. I’m including the Shaper Origin CNC router because so many of my Luthier’s EDGE students have told me how cool it is and how many new possibilities it opens up. I’ll include an excellent CNC option since that seems to be a direction many luthiers are going now that their prices of them have come down. There are many other types, but Techno has been the gold standard for as long as I have been aware of them. Maybe I’ll try on one day who knows?
Other Recommended Power Tools:
- Overarm Pin Router (I Love This Tool!)
- Pancake Air Compressor
- 8 Gal. Air Compresser
- Ultra Quiet 20 Gal. Air Compressor
- 6” Jointer w/ Quickset Knives
- 6″ Jointer with Spiral Cutter
- Woodworking Shaper, 3HP
- 15-Inch Drill Press (I need to get a new one like this)
- Small Cordless Drill Driver/Impact Driver Combo (been my favorite for years)
- Shaper Origin Handheld CNC Router
- Techno CNC Machines
Drill Bits & Reamers
Thankfully, building a guitar doesn’t require a vast number of different sizes of drill bits, but there are some key drill bits you will need. For accuracy and clean results, the type of drill bit used for specific applications is just as important as the size of the bit. Reamers are certainly essential to me and my process and will allow you to create a perfectly snug fit for important parts, like tuning machines and bridge pins, so I’ll also include some info and links about which reamers I have used. I think sorting by the primary drilling operations should be a good way to organize this section.
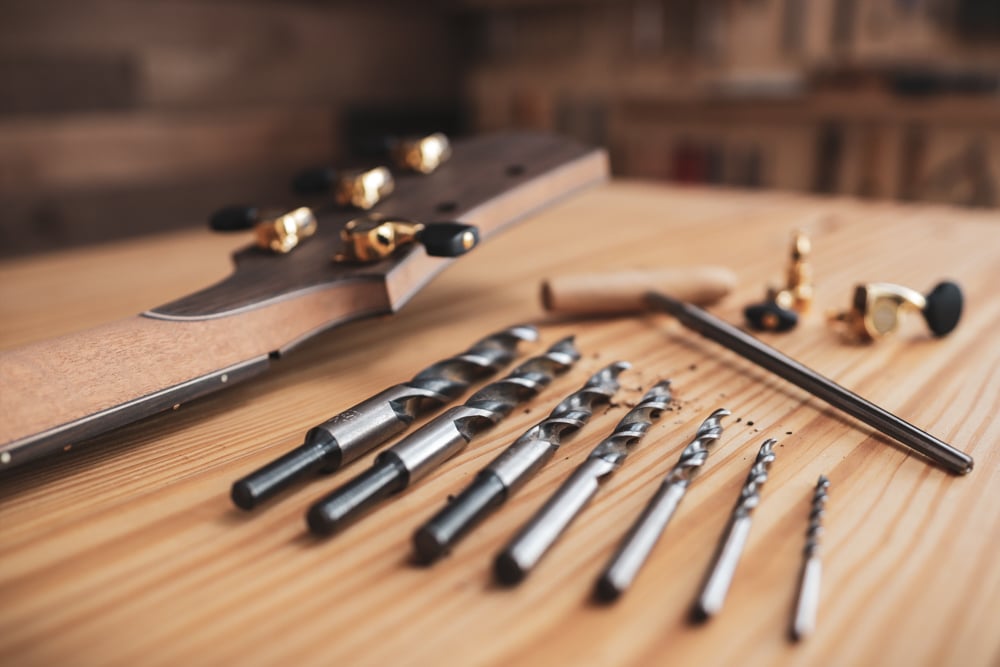
Drill Bits For Tuning Machines
Drilling holes for guitar tuners must be highly accurate. I find a brad point bit is best for this. I drill partly from one side and then the other to prevent chipping. I used to drill the hole just right and then use a reamer after finishing the guitar to fine-tune the hole for a tight fit. Now I use a special system of creating perfectly fitting holes to lock my tuning machines in place for maximum tuning stability, quality of tone, and a sleek look. If you want to learn that process step by step, you can check out my special tutorial called T3 Tuning Machine System, which is included in The Luthier’s EDGE.
Recommended Tools For Tuner Installation:
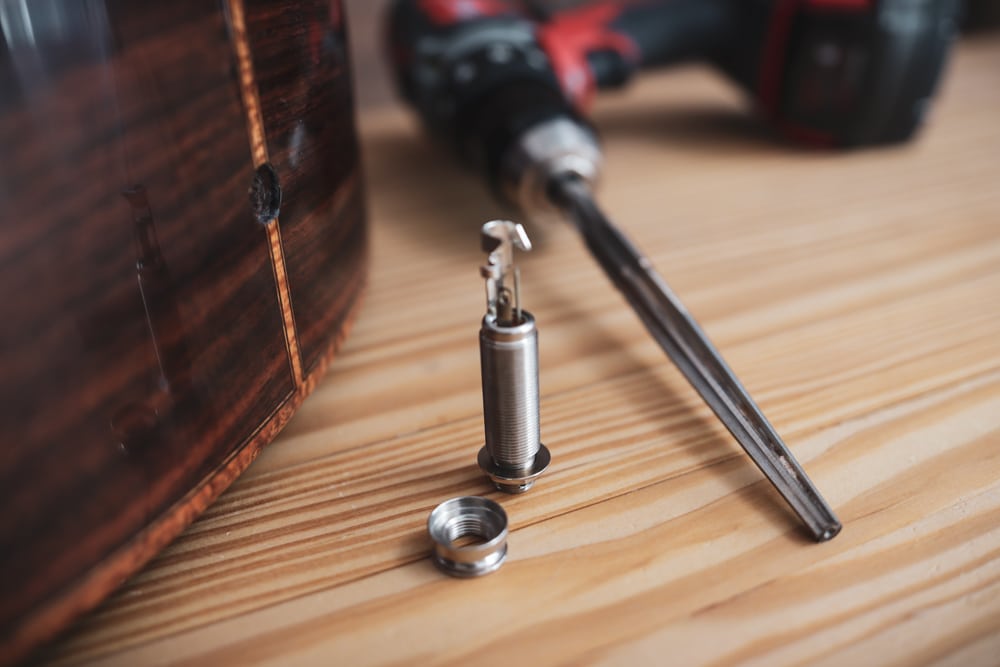
Endpin Jack Bit & Reamer
Drilling the endpin jack hole used to make me very nervous. Once I got the process, the bit, and the reamer right, it got a lot easier. I like to drill it a bit tight and then use the reamer to fine-tune it for a good, snug fit. Obviously, you need a regular endpin to fit tightly, but I also make the endpin jack fit snuggly as well. It seems to prevent them from loosening over time, and it just feels good to have everything perfectly fit on the whole guitar without any exceptions.
Recommended Tools For Endpin Jack Installation:
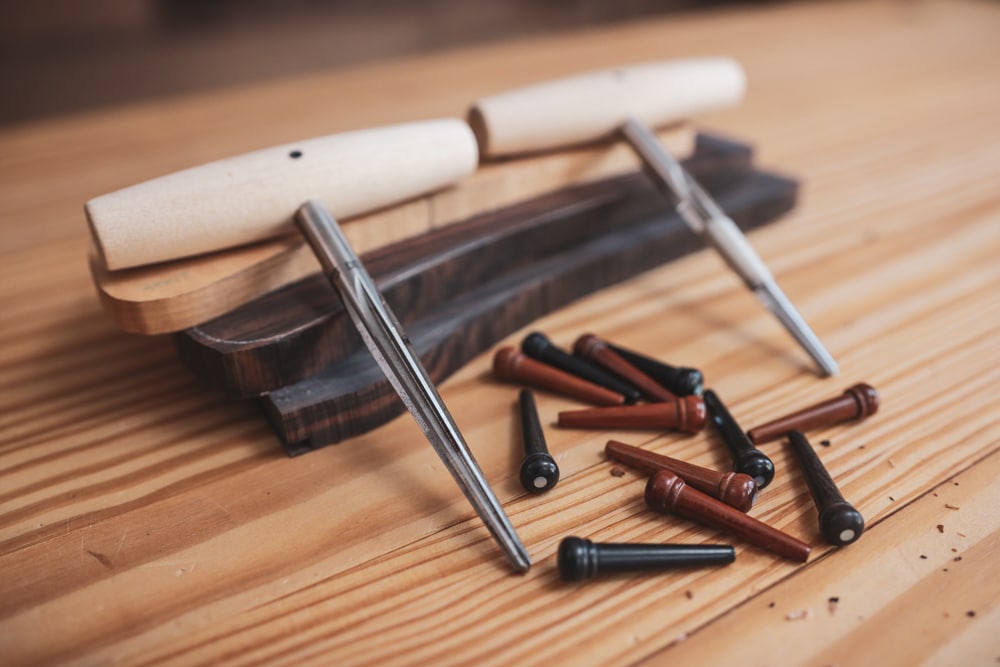
Bridge Pin Reamers
How the bridge pins fit into their holes can make a noticeable difference in the guitar’s sound. Because of this, I like to drill the holes in the bridge just a bit small. Then, after the bridge is glued in place, I drill through the guitar top (still slightly undersized) and use a reamer to fine-tune the fit of the bridge pins until it’s just right. Be sure to match the reamer to the angle of your bridge pin taper. I’ll list two different pins I use often and reamers that match them, along with some other helpful tools below.
Recommended Tools For Drilling Bridge Pin Holes:
- Bridge Pin Hole Chamfer Tool
- Bridge Pin Hole Reamers (For 3 or 5 degree pins)
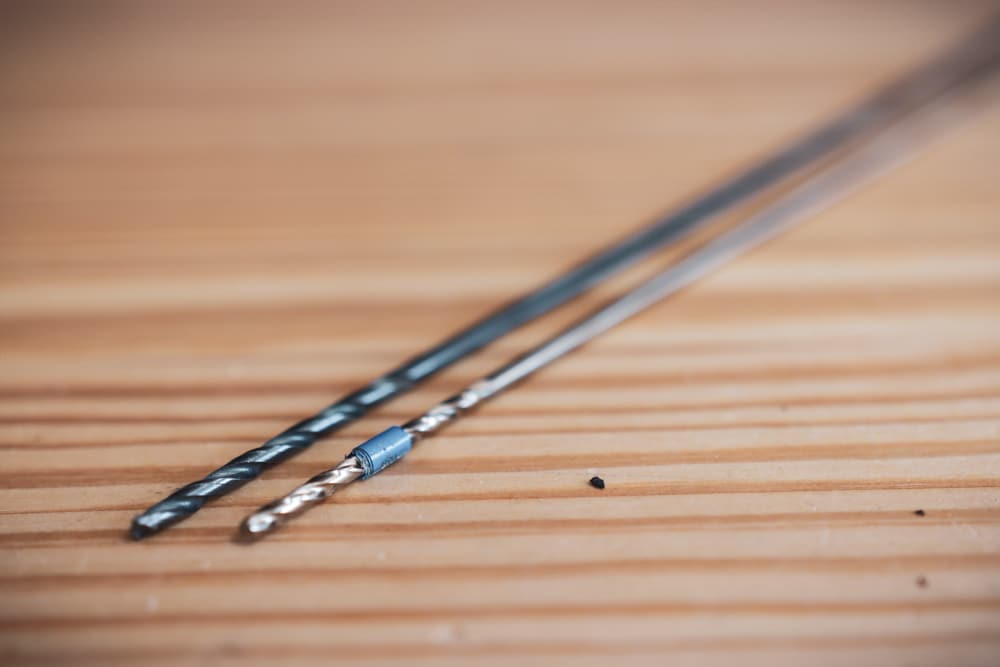
Miscellaneous Drill Bits
Other drilling operations may or may not be involved in your guitar-building process. I’ll list a few other bits and odds and ends below in case you find them helpful. Here’s one that comes to mind: Drilling string holes in an ebony archtop tailpiece can be difficult. I found the DeWalt Pilot point drill bit below to be the only one that accurately tracks straight in the hole without wandering. (I drill in short bursts of about a few mm at a time and remove the bit to quickly knock the wood chips off it and let it cool before going back in to drill the next few mm; I repeat until I get to the desired depth.) For alignment pins, I like to use a 1/16-inch bit in the fret slot and then use a toothpick for the pin. LMI makes a nice little set of alignment pins and drill bits as well, if you like the idea of using a metal alignment pin. Got another drill bit that should be included? Let me know here.
Other Recommended Drill Bits:
Layout, Measuring, & Marking
Accuracy in measuring and marking is vital to producing high-quality guitars. Regardless of how accurate, sharp, or high-quality your luthier tools might be, if the marking, measuring, and layout are not perfect, then the results won’t be either. Fortunately, the toolset needed to produce a high level of accuracy in your drafting and layout is simple. I will share my favorites and essentials in the sections below.
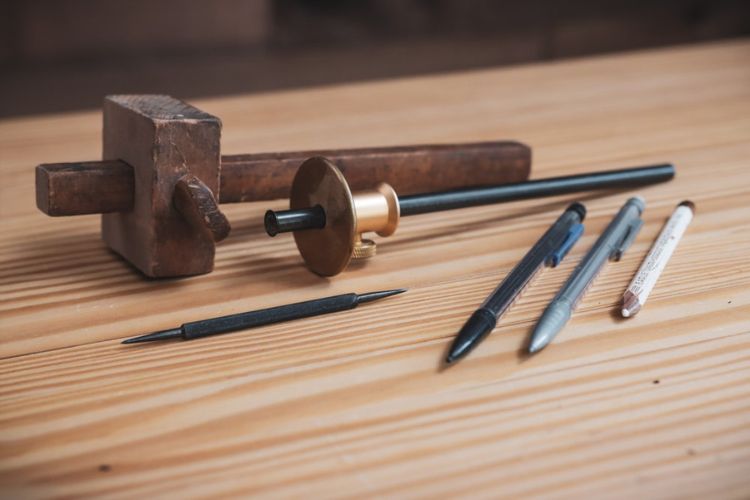
Marking
Marking accuracy is critical to producing your best work. On the most basic level, a .5-mm mechanical pencil is indispensable but not always the right tool. Sometimes an awl or scribe is much better for marking points for layout or drilling. A marking knife can also be used for absolute accuracy in some applications. If you are just starting, the pencils and scribe I linked below may be all you need.
Recommended Marking Tools:
- .5mm Mechanical Pencils (Cheap but good)
- Rotring 500 Mechanical Pencil, Green Barrel, 0.5mm (My new favorite .5mm)
- Leuchtturm1917 Drehgriffel Mechanical Pencil (My new favorite .7mm)
- Luthier’s Knife blade
- Scribe
- Kakuru Awl
- Tite-Mark Marking Gauge
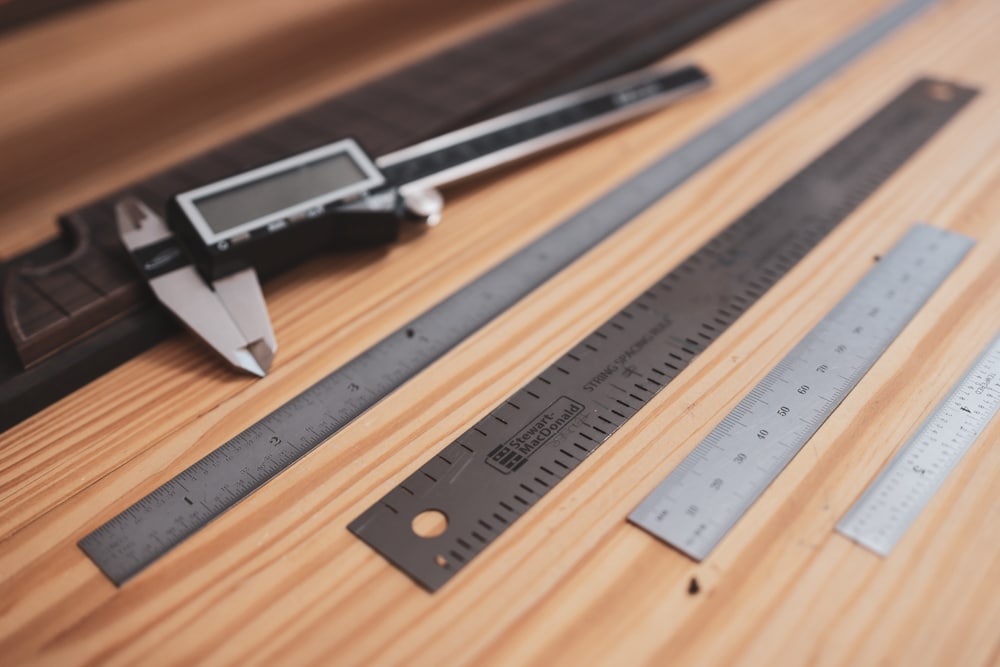
Measuring
When it comes to measuring, there are two main tools that may be some of the most essential in your shop. First is the ubiquitous steel rule. Key sizes for guitar-making are 6 inches, 24 inches, and 36 inches. The 6-inch steel rule linked below is a must. The second type of measuring tool is the caliper. I use a 6-inch digital caliper and a deep-reach dial caliper for measuring top and back plate thickness when carving or sanding. I’ll list my favorites below, but you can read my Luthier’s Guide To Calipers for a deep dive into every aspect of this essential tool here.
Recommended Measuring Tools:
- Ultimate 6” Rule
- Sterrett 16r 24” Full flex (My go-to for fret layouts)
- Sterrett 16r 6” Full Flex
- String Action Gauge
- StewMac Precision Measuring Tool Set
- String Spacing Rule
- Fret Scale Rulers
- Sterrett 6” Dial Caliper
- 6” Digital Caliper
- 6” Luthier’s Caliper (Lifetime warranty)
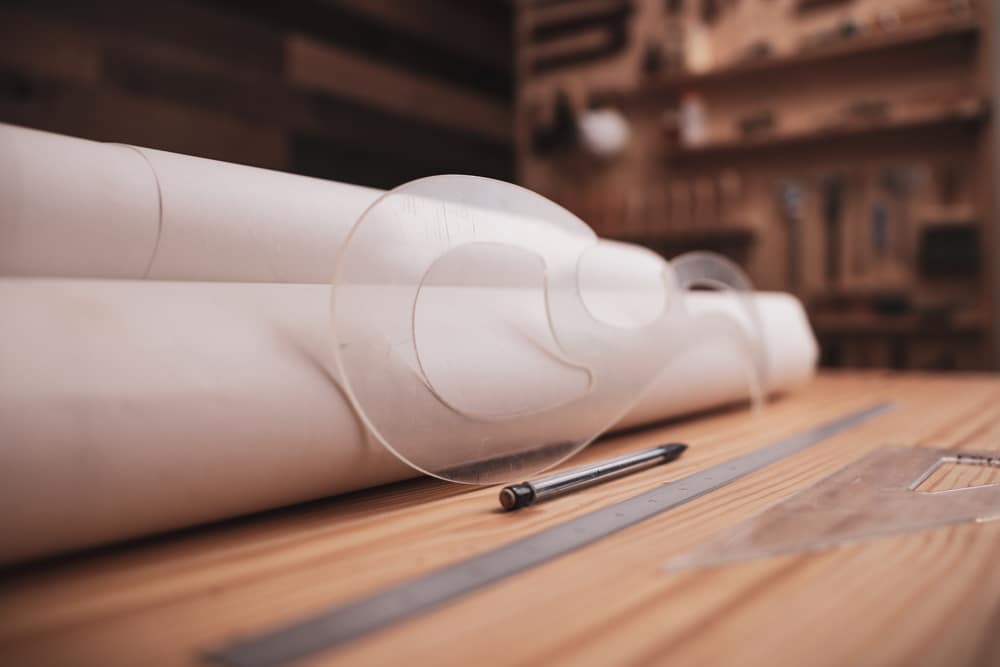
Drafting
If you are a member of the Luthier’s EDGE, you know that my first rule is to never ever, ever, start building a guitar without first making a full-scale drawing. If you have taken my guitar design course, you already know why. To sum it up, mistakes are much easier to fix on paper. I listed my most-used drafting tools that help me and my students get the details worked out, right at the start, so the building process goes much more smoothly.
Recommended Drafting Tools & Supplies:
- Vellum Paper (36″ for front and side view drawing)
- French Curves
- Triangle Guides
- Art Erasers
- Drafting Compass
- Digital Angle Gauge
- StewMac Luthier’s Square (great for drafting)
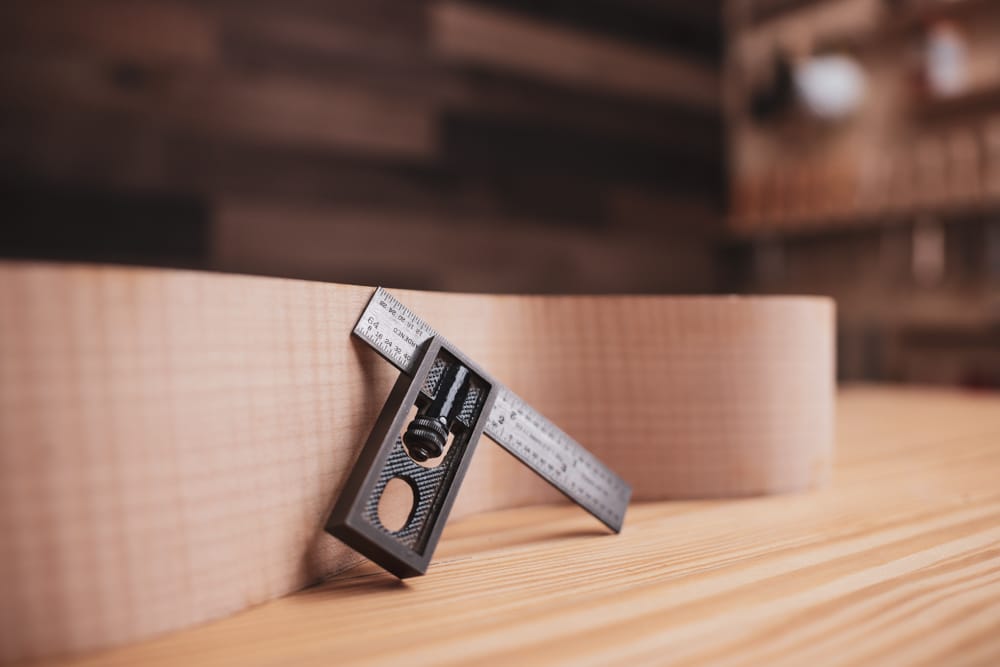
Squares
It is essential that you have at least one square that is dependable and accurate. I’ll list the ones I use and a few other options below. The sizes I found most useful for guitar-making are 4 inches and 6 inches. For shop tools and jigs, body molds, etc., it is also nice to have a 12-inch, but you can get by without it, if needed. I prefer the adjustable sliding handle type as I use it to set and transfer measurements, as well as for checking square.
Recommended Squares:
Router Bits
There are far too many router bits used by different luthiers to list them all here, but I will list a few that I use and consider essential to my workflow and systems. If you have other bits you think should be included, just let me know here.
Truss Rod Slot & Inlay Bits
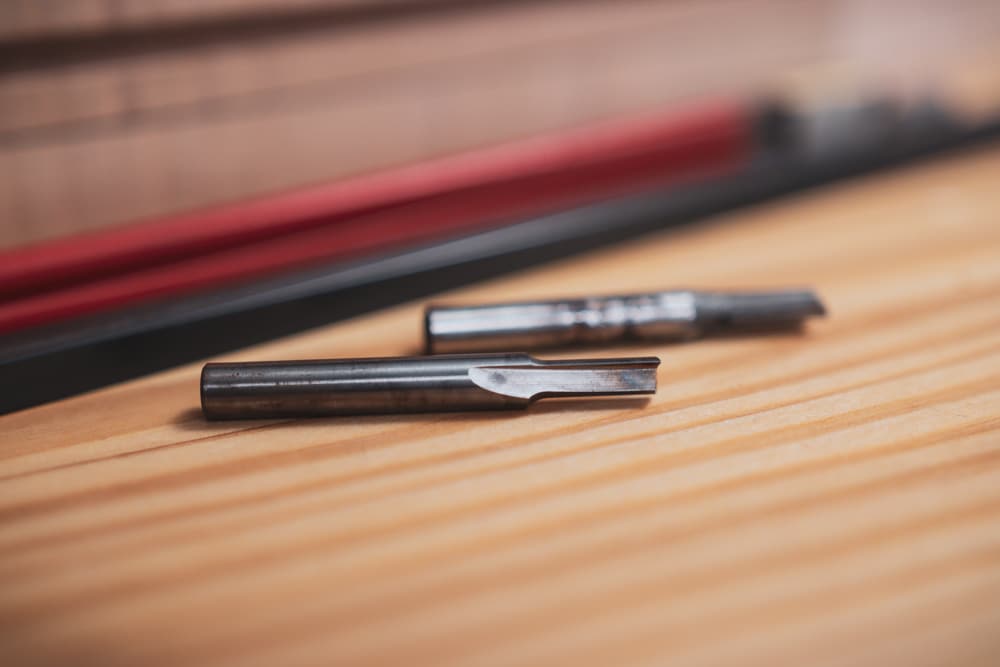
Routing a clean and accurate truss rod channel is an essential part of guitar-making. I use the StewMac Hot Rod truss rods (See my full deep dive article about guitar truss rods here), so I also use the StewMac bit made for cutting those channels. I usually like a spiral bit, but the straight bit seems just fine for my truss rod slots. If you are using a different type of truss rod, just be sure the bit you use will produce a nice tight fit to prevent rod rattle. The decorative inlay process is another story, though. I use only the spiral down-cut bits for cutting inlay pockets in my fingerboards and headstocks, to reduce chipping and to ensure a smooth and precise cut. You can learn my full guitar inlay process in my Guitar Inlay Course. (If you have other bits for these tasks that you think I should include, let me know)
Recommended Truss Rod Slot & Inlay Bits:
Guitar Binding Bits & Bearings
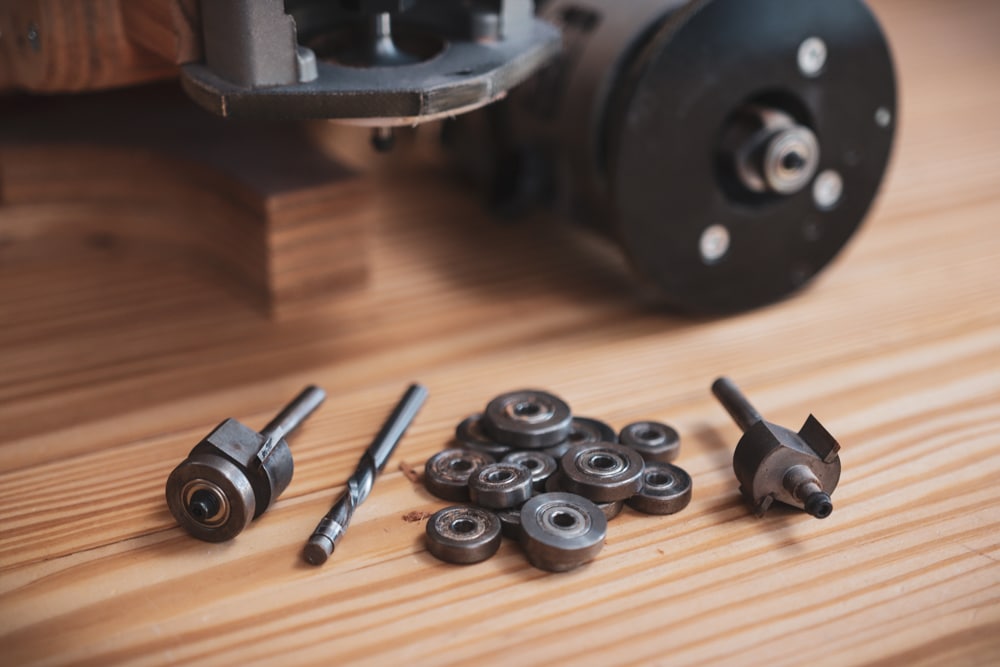
I still remember cutting the binding slots on my first guitar with an old Dremel tool. And of course, I managed to use the wrong bit. It made the process extremely difficult, burned the wood, and caused all kinds of issues. I made it through, though, and the guitar turned out OK. Regardless of how you rout the binding channels, using the correct router bits and bearings definitely qualifies as essential to me. I use a laminate trimmer these days, and I have been using the same bearing and bit set for over 20 years (not the exact same bit, obviously—I get new bits every few years and cycle through them). I’ll list the full kit and the individual parts as well.
Recommended Binding Bits & Bearings:
Pattern-Making Bits
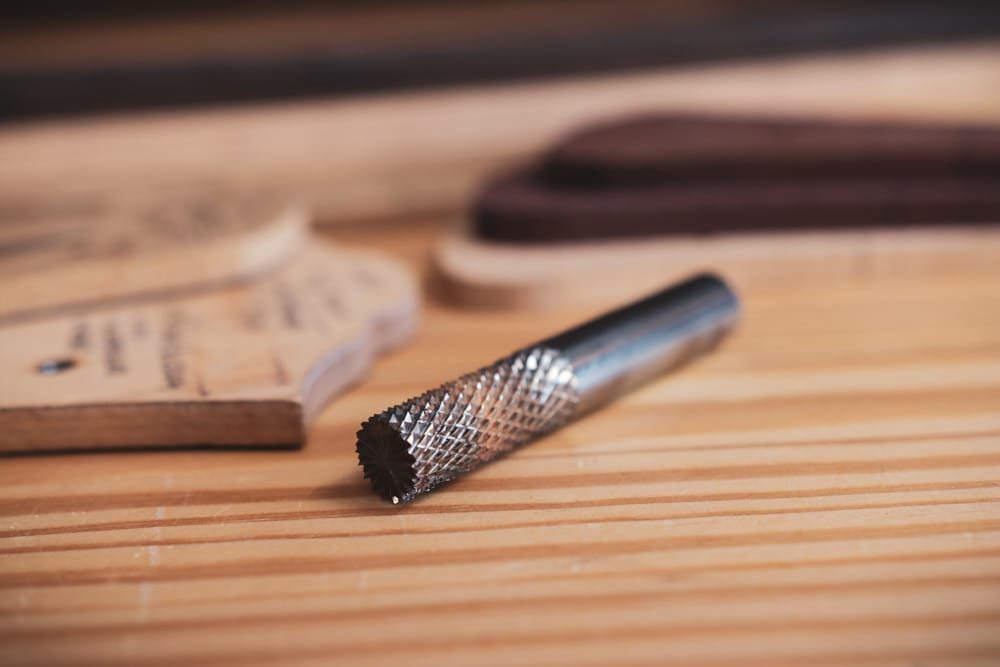
Pattern-making bits for duplicating shapes and parts may not be as important when building your first guitar. Although, for some people who are using a template of some sort, they might be essential. I like to make bridges and fingerboards, for example, in a template form first, and then duplicate them to the actual ebony on my pin router. If you are routing for guitar pickup cavities, beveling pickguards, or duplicating delicate and smaller parts, I will add some links to bits for those applications as well. I started out using a router table, though, and that works fine too. One key is to think about grain directions and find the right bits to reduce tear-out. The most important thing is your safety, of course, so be careful, regardless of what method you use.
Recommended Pattern-Making Bits:
- Amana Tool Miniature Ball Bearing Router Bits
- Amana Tool Down-Shear Cut Ball Bearing Router Bits (for router table)
- Amana Tool Flush Trim Plunge Ball Bearing Router Bits
- Amana Tool Miniature Flush-cut Ball Bearing Router Bit
- Pickguard Bevel Cutter
- UltraTool Burr Bit (my secret weapon for the pin router)
Dovetail & Mortise Bits
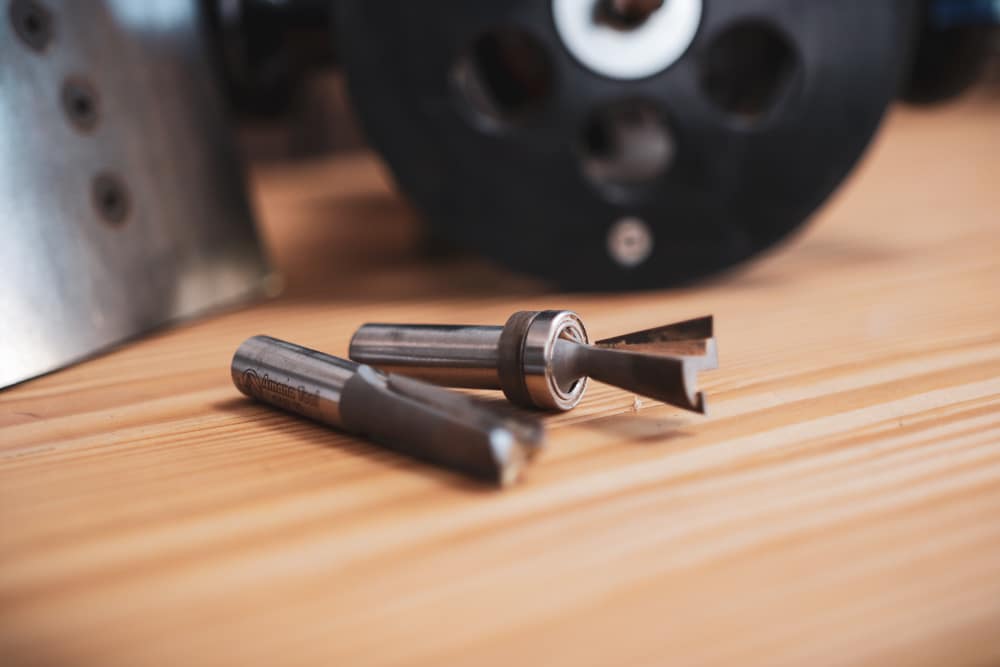
One of the more intimidating parts of my first guitar, and to be honest, even quite a few guitars after that, was the whole process of cutting the dovetail joint in the neck and body. Having the right router bits (and jigs) for that, I guess, isn’t technically essential, but wow, is it nice to have a system that you can be sure will produce a solid neck joint. I have a course in The Luthier’s EDGE about my Ultimate Dovetail Jig template and system that you can check out, and I’ll link to some other great options and bits below as well.
Recommended Neck-Joint Bits:
- Neck Joint Router Bits (1/4″ Shank)
- 7 Degree Dovetail (1/2″ Shank)
- 1/2″ carbide router bit, straight cut (1/2″ Shank)
Luthier Tool Sets
If you are feeling a little overwhelmed and need a curated set of luthier tools to help you just get what you need all in one place and get started on your guitar-building or repair projects, then this section might be just the thing to help you get unstuck and moving forward on your lutherie journey.
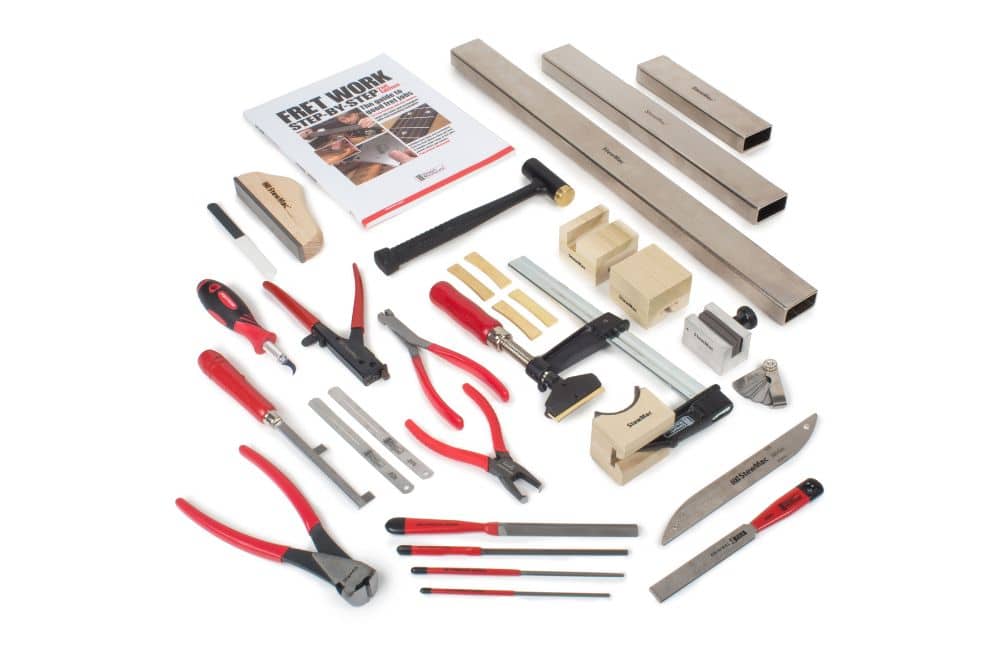
General Luthier Tool Sets
Listed below are some of the larger and more complete tool sets comprised of professional quality tools for guitar making and repair all in one package to get you started quickly and get you set up to build your first guitar and set you up for years to come. Though it seems expensive to buy them all at once, there are significant savings you can take advantage of by doing so.
Recommended Luthier Tool Sets
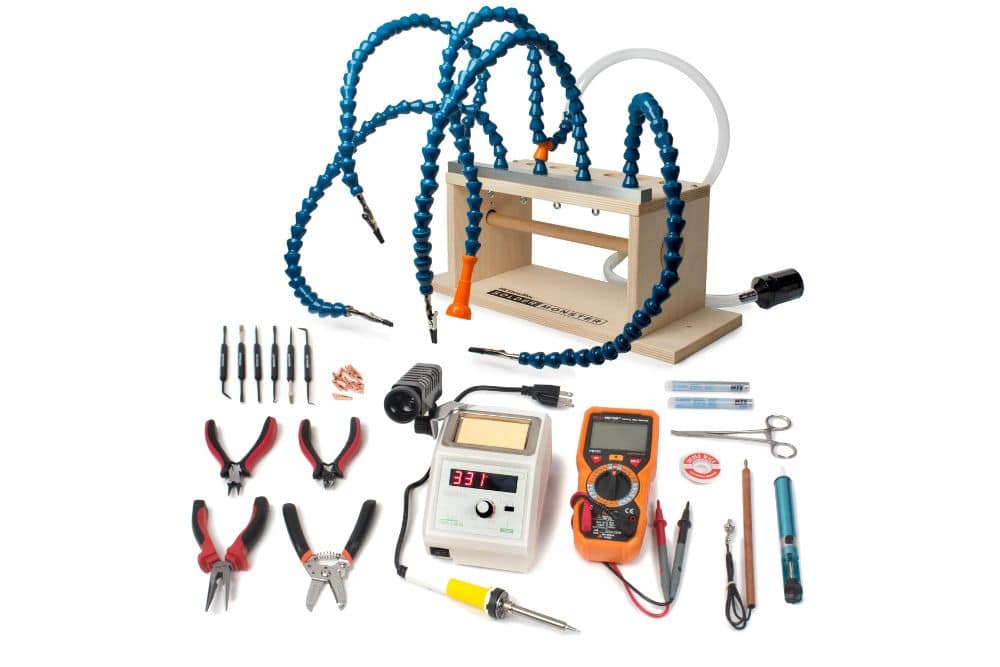
Guitar Electronics Tool Sets
If you are new to adding electronics to your guitars, you can find a list below of some great options for complete electronics tool sets. Some are more basic, and others are fully decked out with the latest and greatest guitar electronics tools. These sets are perfect for electric guitar kit building and electric guitar repair.
Recommended Cabinet Maker’s Chisels:
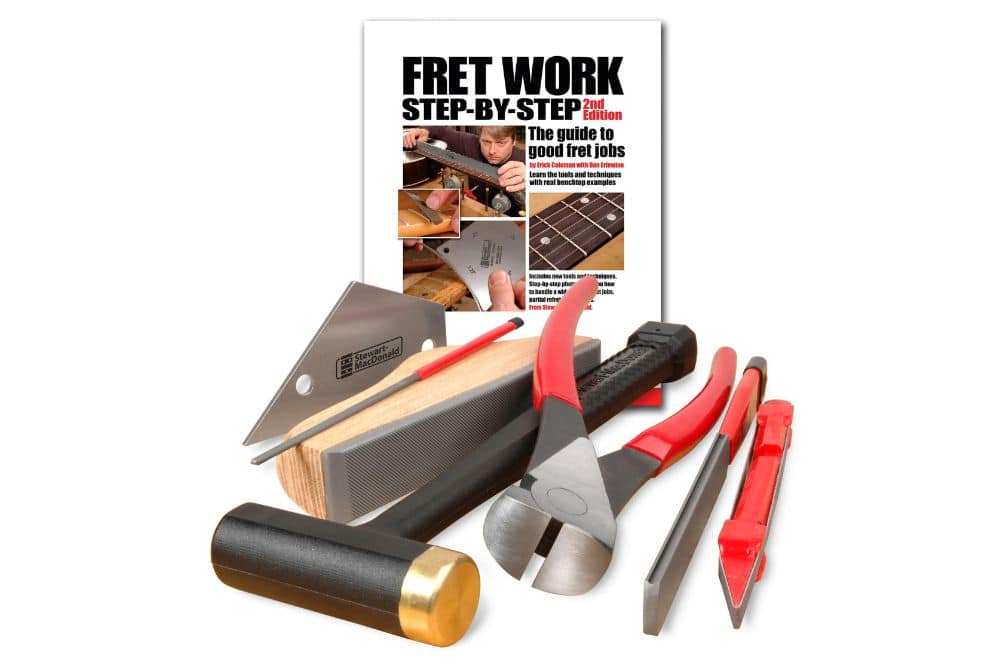
Guitar Building Task-Specific Tool Sets
Having the right tools can make all the difference for specific tasks. Below are curated tool sets built around specific guitar building and repair operations.
Recommended Task-Specific Luthier Tool Sets:
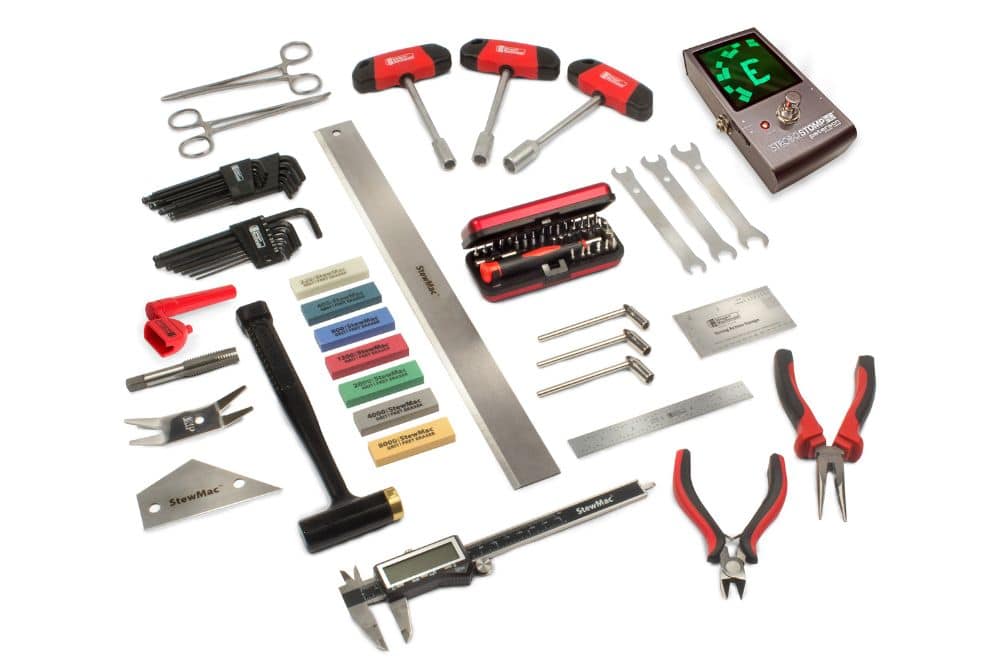
Guitar Repair & Maintenance Tool Sets
If you are a guitar repair tech or just want to be able to DIY some guitar upgrades or maintenance, the luthier tool sets listed below might be a good fit to get you tooled up and ready for your first project.
Recommended Curved Chisels:
Need Some Help Choosing?
I have done my best to create this guide to luthier tools in such a way as to empower you with a frame of reference for the requirements and key features of each type of tool so that you can more easily choose the perfect tools for your personal preferences, style, type of guitars, and even budget. That said, I know it is still a massive document with tons of info that can, even with my best efforts, still seem a little overwhelming, especially if you are new to guitar-making. Because of this, I want to let you know I am just an email away, if I can be of any help, so don’t hesitate to reach out and I’ll do my best to answer your questions and help you find the perfect luthier tools. – Tom Bills


