

New eBook & Video Tutorial!
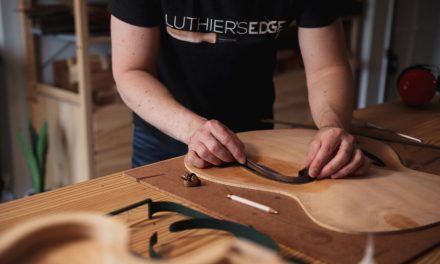
I love the experience of installing the bindings and purflings on my guitars and having them perfectly and effortlessly fall into place. No stress, no pressure or forcing things, just an absolute perfect fit. Years ago I found myself wondering how to accomplish this and thankfully after many guitars and much experimenting, I eventually developed the system I currently use.
One of the secrets I have found to ensure that the bindings and purflings on my guitars are absolutely perfect, both now and for years to come, is making certain that they fit properly into the binding slots without tension.
To do this, every part must be not only the right size and shape, but must also take into account any compensation necessary for glue swelling and things of that nature as I am installing my bindings.
[margin20]
Tolerances: Real vs Theoretical
 Many people don’t realize that woodworking in the real world is far different from the theoretical world as I did when I first started working with wood. For example; In theory if I rout a slot into the my guitar body that is .060″ deep , then a perfectly fitting piece to glue into that slot would be exactly .060″ right?
OK , it’s a trick question 😉 The answer is No, and here is why:
If your veneer stack (or purfling as we call it in this application for guitars) is .060″ before you bend it to shape, you are not taking into account any swelling that will occur from the water in the bending process, or the fact that you will need a little tolerance for glue to be in the slot, and even the glue’s potential for swelling the wood too. And to top it off, this is all assuming that the piece you are gluing in is in fact exactly .060″ for its entire length anyway. Which if all you did was laminate some veneers together, I can assure you it is not and will have slight variation in it.
Solving this real world issue will be different for each luthier depending on his or her method, woods used, and choice of adhesives. But to give you a starting place I find that making my purflings about .001 – .005″ undersized before I bend them works great. Do some tests and measure the size of your purflings before you bend and after to see what the dimensions you need to use will be.
Accurate Thicknessing For Veneer
So once you know what your tolerances should be, making compensations for the unique variables at play in your system, the next step is to be able to accurately size or thickness your veneer stack or purfling.
Fortunately there is an easy to use tool that will enable you to do this with great accuracy and repeatability, the Veneer Sizer or Veneer Thicknessing Gauge.
The Veneer Thicknessing Tool
 The veneer sizer is a simple tool used by luthiers and woodworkers for generations in preparing bindings, purflings, and veneers for hand made rosettes. With this tool you can precisely size your veneer components prior to bending them in order to ensure that they have the right tolerances to allow for a flawless fit every time.
I have used several different versions of this tool through the years, some of which I have even made myself, but several years ago I found this great tool from my favorite tool company Lie-Nielsen.
 There are several things I love about this tool, the foremost being the fact that it has two blades. This is vitally important to me because the veneers I am sizing are usually my purlfings consisting of 3 thin stripes in total of 2 black veneers on the outer parts and a white or lighter colored wood on the inside of the purfling design. It is important for me to be able to size the purflings in a way that doesn’t overly reduce the size of only one of my two outer black veneers in the stack.
Having two blades allows me to set them up so that the first blade will only take 1/2 of the amount of material I want to remove. Then the second blade is set to remove the other 1/2 bringing the piece to the final dimension.
By removing one half from each side it is not only easier to do, since I’m taking off less material each pass, but it keeps my outer black veneers even and looking perfect.
How to Use the Veneer Sizer
 To use the veneer sizer you can simply pull your purfling strips through in a nice slow and steady motion. I first drop one end straight down into the blade with enough material sticking out that I can grab it to pull it through. Most of the time this extra material will not be used on the guitar, so it doesn’t matter if it is left over-sized, but being the perfectionist that I am, after the initial pass through the blades I flip the piece end for end and drop it into the slot and pull the un-thicknessed end through as well to make sure that the whole length of the strip is perfectly sized.
 Then I repeat the same procedure in the next blade bringing the other side of the purfling down to the final size.
So each piece gets passed through 4 times. It seems like a lot of extra work but as I mentioned before it is the key to having perfect fitting bindings now and in the future on your guitars.
The Lie-Nielsen Thicknessing Gauge
 Like all Lie-Nielsen tools, the blades on these veneer thicknessing gauges are amazing. I have never even sharpened mine and have sized hundreds of strips through them with perfect results every time. I set them to a specific place and use them only for that size. If I need another size I can get another sizer. They are only about $65, and for me, they are worth every cent.
If you decide to build your own veneer thicknessing tool or buy one, I think you will find that having properly sized materials will increase the quality of your work and the quality of your time spent crafting your guitars too. Visit the Lie-Nielsen Website HERE.
![]()
Exclusive Video: How To Use The Veneer Sizing Tool For Purfling

Get The Exclusive Video & eBook: How To Use The Veneer Sizing Tool For Purfling
In this eBook & Video Tutorial, “How To Resize Purfling Veneers” master luthier Tom Bills shares his insights, experience, and step by step approach to ensuring that his purfling veneers are accurately and consistently sized for an easier binding process with better miter joints and cleaner more perfect results.
- Instant Digital Download
- Step By Step Photos
- Discovering Inconsistencies
- Real VS Theoretical
- Tips For Better Bindings
- Techniques For Sizing
- Moisture Compensation
- Tons Of Other Useful Tips
- * 13min. Step By Step Video Tutorial *


