Sharpening Planes & Chisels The Easy Way (Vlog Episode 1)
The Art Of Lutherie Vlog Episode 1 – Quick Sharpening chisels and plane blades with sandpaper, my new workbench, and other stuff I was working on that day in my luthier workshop. (You can also find the full transcription of the video below for quick reference)
Find Honing Guides like I use in the video: HERE
 1")
The Art Of Lutherie Vlog
Episode 1: Sharpening Chisels & Planes (the easy way)
 2")
Hey guys. How’s it going this morning? I’m just getting back from kind of a long weekend. Had a holiday, had my wife’s birthday, some family stuff, and just coming down to the workshop. I left myself a bit of a mess here on Friday, but it’s okay. It’s a good mess. It’s wood shavings and all that. But I was just sitting here drinking my coffee and I was just thinking, you know, it’d be kind of cool to turn the camera on and just chat a little bit, just kind of show you guys what I’m working on this morning and I don’t know, maybe share a couple thoughts. We’ll see where it goes, but I’ve always … one of my big goals has always been to, with the Luthier’s EDGE especially, but the art of Lutherie as well, to make it as much like you guys are here with me in my workshop as possible. I think this could be fun to just turn the camera on now and again and just show you what’s going on. Hopefully it’ll be interesting. We’ll see how this happens. It’s a little bit of an experiment here on this first. See how it goes.
My New Workbench (& Workshop) Project
Anyway, so it’s a little bit weird today because I’m working on a workbench. For 20 years, I built all my guitars on my first workbench that I ever made, which was essentially a piece of plywood, a piece of 3/4 inch plywood with some Masonite on top of it and that’s all it was. The base was made out of 2 by 4’s screwed together, and the thing was just completely wobbly and I don’t know. For whatever reason, I got used to it and I just learned to deal with it, that it was wobbly every time I carved something and all that kind of stuff. I didn’t really even notice it anymore after a long time.
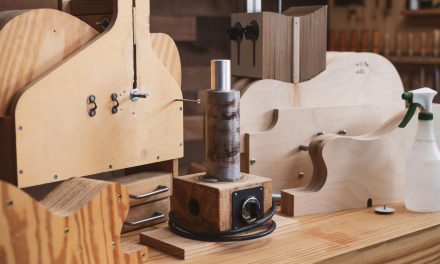
So, but, as many of you know, if you’ve been following me and watching what’s been going on around here, I recently built an entirely new workshop and the crowning jewel, the last piece is, I don’t know if you can see it, but this workbench here. This is going to be a brand new workbench, and just the top of it, this is just one piece of the top. This is actually not connected to anything yet. This is a big slab that I just laminated and the agenda for today is to take this plane and even everything out. As you know, if you’re a guitar maker, when you laminate a neck or anything like that, wood likes to slide when it gets that glue and so today I’m going to be spending a lot of time, a lot of elbow grease, getting a nice workout, that’s how I’m going to look at it, taking some meat off of this big old slab. This thing, it’s got to weigh over a hundred pounds and this is just one half of the workbench. There’s going to be two slabs this size.
Upcoming Course On Building a Luthier Workshop
This video, I can’t show all that in this video, but I have a course … I’m filming this whole thing and there will be a course, not only on how to make the workbench but on how I set up this entire shop and every single thing, which has been an unbelievably humongous undertaking. Anyway, now that I’m almost done, I’m really glad that I did, because I think it’s going to be super helpful and it’s going to be an awesome resource. That’s one of the questions I get all the time from you guys, is how do I set up my first workshop? How do I make my workshop better for guitar making and things like that, so. Anyway.
My Woodworking Planes
 3")
I think the first step here, as we get started on our day, is to check over this blade and make sure this thing’s sharp. I’m going to show you guys how I do that, but I don’t know. You can decide if you want to do it. Maybe the title should be How to Not Sharpen Your Plane Blade. I don’t know, but this is the way I’ve always … I do all my plane blades like this, and my chisels, too, because it’s fast and it’s not fancy and all that stuff, but it’s just at the end of the day when you’re actually trying to get work done, you got to get it done quickly, so. It’ll only take a matter of seconds, so that’s the first thing to do is just get this blade out of here and start sharpening it.
As you might be able to see, these are not your typical fancy, high end woodworker planes. I got … I’ve never even purchased a plane. All of the planes that I have, I’ve got a bunch of different ones and a lot of them aren’t in my shop, but these were my grandfather’s and my dad’s planes. These guys … those guys were pretty hardcore. They were not the kind of guys who were trying to take care of everything and make it perfect. They were out on a job site, building houses and doing finish carpentry and things like that, and so these babies are … they’re in rough shape, but I don’t mind it. I kind of like it. These have a lot of sentimental value and they get the job done, so let’s go fix up this blade really quick in my rough and dirty way and we’ll get back here and get to work.
My Plane & Chisel Sharpening Technique
I’m trying to show you guys the reality of what I would do. On a regular day, I’m not going to get out whetstones and do all this fancy stuff. That’s just the truth. It’s important to have a sharp blade, yes, but this is how I do it in a really fast way that enables me to get right back to work and takes almost no time. Normally I like to do this on my pin router table. Just any steel table that’s nice and flat is a great way to do it. My pin router table, right now, is covered with junk, as it often is. This is another reality here, and so the bandsaw is going to be the flat part of this process so we can get this thing sharpened.
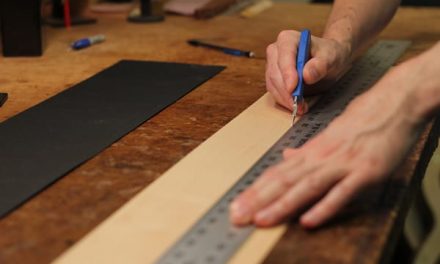
So, really, this is so simple. It’s just … I got my little honing guide, I get my blade set in here. I sort of eyeballed the angle. I think it’s pretty close, we’ll know more, and I’ve got two grits of sandpaper. I’ve got 600 and I’ve got 1000. These are dry papers, and this is the carborundum paper. It’s the same stuff that I use for pretty much everything I do, but in my French polishing course, I use this stuff a lot, so if you’ve taken the French polishing course you already know about this paper. It’s pretty cool. I use it a lot in my guitar fret work course, too, actually, so it’s pretty awesome for finishes and frets and anything that you want to be shiny and have good control and be able to do it dry, which is really nice.
As you might imagine, we’re starting with the 600 and I’m just going to begin by double checking my angle. It can come back just a hair. All right. That looks pretty good, so I’m just going to work this. I may need to get a fresh piece of paper. I’ve already used this one. Until I can feel a little burr coming up. Yeah, it feels pretty good. Okay. So I think that’s all we need.
So the next thing to do is to switch over to my 1000. Yup. That’s really all it takes, just that little tiny bit and once I have a little burr on my 1000, then the next step is just to go flat rag on here. It’s kind of cool because it starts out as 1000. You might notice I’m working on a spot more and more, but … I mean over and over in the same spot because what happens is the paper gets dull and so it’s almost like it’s automatically changing to a finer and finer grit as I go. So it ends up surprising leaving an amazingly sharp edge, and that’s it. A couple seconds, ready to go get the work done.
Okay. One of the quirks of this plane is that it’s really tricky to get this in. Okay. There we go. I think we got it. All right. A little more fine tuning, and we’re ready to get to work.
Final Thoughts & Trying The Sharpened Hand Plane
All right. Well, now you know what I’m up to today. I got the blade nice and sharp, plane is just cutting as smooth as silk, and looks like it’s going to be a lot of fun. Got a lot of elbow grease that’s going to be involved here to get this thing flat and smooth. I got a couple of boards right here that aren’t even getting hit with the plane yet, so it shouldn’t be too bad. Kind of fun. Gives me a lot of time to think. Pretty enjoyable. I am going to need to make a fresh cup of coffee, though, because I forgot to move it and now it’s full of wood chips, but that’s pretty normal around here most days, so nothing new there.
Anyway, hope you enjoyed this video. Maybe you found a couple of little useful things. How to sharpen a blade really fast or maybe how not to sharpen a blade, if you want to do things the right way with your whetstones and all that stuff, which is a good thing, don’t get me wrong, if you’ve got the time to do it. But I just need to knock this thing out, so I’m going to get to it, get this thing finished. If you didn’t yet, make sure you subscribe to the Art of Lutherie channel. Hit the bell to get notified. Leave a comment below. That’s pretty much it. Hope you have a great day and I’ll see you in the next video.
Ready To Take Your Guitar Building Skills To The Next Level?
Join Luthier’s EDGE and get access to a growing library of exclusive guitar making luthier courses, tutorials, and more.
 5")

Hello Tom,
I am retired and have been playing Classical Guitar since I was 18, my major to get into college! I am in the process (as always) of cleaning out old sheet music and books, there are way too many here. I have the room now and am considering making guitars for fun and profit. I emphasize the “fun” part! I too have old tools from my grandfathers and father. But no experience or talent in creating. I know that I have to start slow and move slow. Did I mention that I am slow? Oh well, What are the needed tools and the size of a one-man Lutherie?
Thank -you for being there with your experience!
That’s awesome Steve! Building your own guitar is definitely a lot of fun, that’s for sure. The key is to just start where you are with what you have. I carved my first archtop guitar while it was clamped to my kitchen counter (I wasn’t married then so I could get away with it 😉 Keeping it simple and starting soon is better than waiting until you have the perfect setup. That’s important because at the beginning it’s almost impossible to know just what tools and things will work best for your style and your guitars. With just a little experience all those things will become clear and you can build your tool set as you go little by little. I don’t have an extensive list together yet but here are some of my favorite and most used lutherie tools: Luthier Tools List Also you can find some other articles and info about different important tools for guitar making HERE
Tom thank you for your demonstration. I tend to overthink things, 8000 grit water stones, help! Your process of sharpening blades, whether right or wrong, works perfect for getting a nice sharp edge and getting back to work. Your videos and teaching techniques are just perfect for me. Sometimes I will we watch videos ore than once just to make sure I am not missing any of the fine details you are presenting. You have helped me become a better luthier and a better guitar repairman. Thank you for all your hard work.
Mikey T
That is awesome! Thanks so much for sharing that Mikey, means a lot to me. – Tom