
When it comes to installing frets each luthier has his or her own preferences on methods and tools to use. However, If you haven’t built your first guitar yet the conflicting information from various sources can be very confusing. It doesn’t have to be complicated though, and in this article, my goal is to look at two of the main tools I use to install frets and their respective strengths and weaknesses. For an in-depth step by step demonstrate of my personal methods, as well as an explanation on why I choose to use my current methods and the thinking behind my approach, check out my guitar making video course: Fretwork Mastery Part 1.
Guitar Fret Installation Tools
Here in this article I will be showing and discussing the two main tools I use for installing the fret wire into the fingerboards of my guitars. Although there are several tools involved in the process, I’ll be focusing here on just on the two main tools which are the Fret Press and the Dead Blow Fret hammer.
When installing frets, the goal is to get the fret wire seated as tightly and solidly as possible for the easiest fret crowning and setup work and ultimately the best sound, playability, and long-term stability from the guitar. The fret work is one of the most important parts of your guitar and has to look and feel good to the player. Most
Most luthiers prefer one type of fret installation or the other, they will opt for a fret press method or a hammer-in method, and there are definitely some advantages to each. Personally, I like to use a little of both to make kind of a hybrid approach. To understand this a little better and maybe even help you get some ideas on which is best for you, let’s take a look at the challenges/requirements of fret installation and then look at each tool separately and their respective benefits that we can use to our advantage in getting our frets better seated and improving our guitars.
Fret Press VS Hammer-In Guitar Fretting
To get the fret wire into the fret slot we have to apply pressure in some way. We can hit it with something, or we can force it in with a press. ( we could also make the slot wider so the fret wire can just be glued and clamped in, but that is outside the scope of this article) Each method has its own unique advantages and disadvantages, so let’s break it down to get a better idea of which one might work better for you. Remember, there isn’t a right or wrong way. It’s just a matter of experimenting to find the way that fits you and your style the best, and gives you the best results for your specific applications and your guitars.
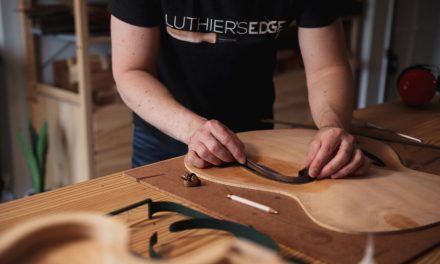
Hammer In Fretting
 Most people start out the guitar building journey with just a simple hammer for fretting their guitars. It does require some experience to get the technique right, but in a short while it can be mastered if an analytical approach is taken. The big problem with this method is that the force of the hammer blow can cause the fret ends to spring up and keep them from seating properly. A specialized dead-blow fret hammer can really help.
Pros
- Relatively inexpensive to get a basic hammer
- Easy to use out over the guitar body
- Works great for refret jobs and on finished guitars
Cons
- If not done properly fret ends often spring up
- Very loud (hearing protection is a must)
- Nerve wracking to bang on a delicate, finished guitar
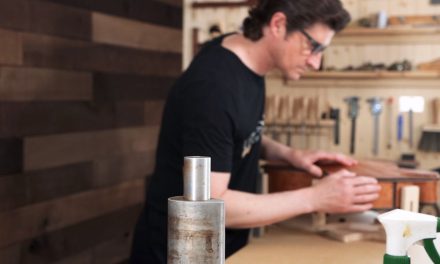
Guitar Fret Press
 A fret press can take on several forms and be a more elaborate jigged system, or just a simple device that can be used with a drill press (the latter is what I use). While this can require a little more setup, in it’s simplest form it’s still not very expensive and in my opinion can be very helpful especially to someone who hasn’t had a lot of experience perfecting their hammer technique. The great thing about using a fret press is that it holds the fret at the proper radius while being forced into place stabilizing the fret ends among other benefits.
Pros
- More even fret installation(ends don’t spring)
- Faster installation
- Quite (no banging)
Cons
- Most expensive than just a hammer
- Harder to do over the guitar body or on a finished neck (but possible)
- Doesn’t compensate for slight variations in fingerboard radius.
Final Thoughts
If you have a super tight budget then you can just use the hammer and you’ll be just fine. My advice is to slot some scrap wood and with some extra wire, practice hammering in the frets to see how different approaches affect the final outcome such as starting in the center of the wire and working toward the ends or starting at one end and working toward the other.
If you can though, using a fret press is really great, and can produce great results and even speed up your workflow ( and to me it’s kind of fun too). I personally use both tools, as I demonstrate in my guitar fretting course. I use various different treatments to prepare the frets, then press the fret in, and then follow up with the hammer to get the best possible seating of the wire. The system I use is for me the best combination and helps me take advantage of the strengths of each tool while minimizing their respective weaknesses.
Ready To Take Your Guitar Building Skills To The Next Level?
Join Luthier’s EDGE and get access to a growing library of exclusive guitar making luthier courses, tutorials, and more.


As you “press” the fretwire into the finger board say on a classical guitar build, the flat fingerboard will become slightly more convex from bridge end to nut end. Is there a rule of compensation for that or do you concave shape the fretboard enough to absorb the difference?
Hi Andry,
I take into account the amount of string tension and the stiffness of the neck woods and adjust the amount of compression I use when fitting the frets to the slots. I think I talk about it in this video course here. On a steel string guitar, I might add more compression which will result in more back bow after installing the frets, which in turn adds stiffness to counteract the string tension from the steel strings. BUT it is important to note that I am using a double action truss rod which lets me bow the neck forward for the initial fretwork and setup if needed. If you do not have a truss rod then you will want to try to balance the amount of compression used when fitting the fret wire to the slots to get a more flat surface after fretting. You can use less compression in the fret slots and you can also put a little forward bow in the neck blank as I demonstrate in this course here. It’s a balancing act that gets easier with each guitar as you develop your intuition on how much the strings will pull the neck forward at full pitch, but you’ll get it!
Hope that helps! Tom
I’m fretting a guitar neck I made form scratch, so it doesn’t have strings yet, but it does have a truss rod. How many different radius presses should I need to ensure all my frets are set evenly across?
Hey Sam, I use the same one for the whole fingerboard. I sand the fingerboard itself using one radius. I press in each fret and then go over it with a hammer to be sure it is fully seated. I add the conical/compound radius when leveling the frets. It sounds odd I know, but I explain and demonstrate my whole process and how it works in Fretwork Mastery Part 1 and it really produces a wonderful feel and playability. Several of my guitars done this way have beat the PLEK (they required no modification when scanned) so somehow it works 🙂
hi. just wanted to ask, how tight a press should i do? this happened to me that the first 3 frets that i pressed are with full force (using fret press of course), but then the 2nd is the lowest and the third is the second lowest, making it not just rocking, but uneven. is it because i use it on full force? or do i just have to use it firmly and check each one?
I press them in with a decent force but not a huge amount. I just go by feel, and it feels a certain way when it fully sets. You can also see if you look with magnification if the fret bead is touching the fingerboard surface. I also go over each fret with a hammer after pressing to be sure they are all evenly seated; I show all this stuff in great detail in my online course Fretwork Mastery Part 1