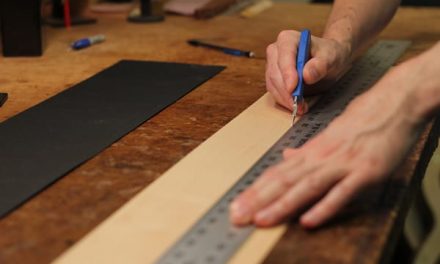
Fitting the braces or tone bars for an archtop guitar is a critical skill to master for any luthier. The exclusive Luthier’sEDGE video shows an overview focusing on the finer points of my sanding technique used in fitting the braces. Sanding is only part of my process for fitting the braces or tone bars to an archtop guitar top, so be sure to read the detailed steps in the tutorial below for the full process and then check out the video at the end for a demonstration of the sanding technique and other info.
Tutorial – Fitting Archtop Guitar Braces
The interior surface of an archtop guitar has a very complex shape to it. In order for the guitar to function at its highest potential, the tone bars or braces, must be perfectly matched to the contours of the inner arch of the guitar’s top. This perfect fit will facilitate a strong glue joint that couples the braces to the top in such a way as to provide maximum tonal response and long term structural integrity. In the following tutorial, I will be sharing with you my simple technique for doing just that.

Once the inside arch of the top is carved to its final state and sanded smoothly you are ready to begin the layout and fitting of your braces to the guitar top.
Decide On Brace Locations
The first step is to decide the placement of each brace (For help choosing which bracing pattern to use, see this article/guide by Bob Benedetto – Archtop Guitar Bracing Patterns). If using an X brace pattern, the wider the X, the more of the top it will grab and the warmer the tone will be. The narrower the X, the more like parallel bracing it will be with a more projecting and brighter tone, though of course not exactly like the parallel brace sound. After deciding on how wide to make the X and other considerations, the position of each brace is marked on the top.
Just a side note: when laying out braces, keep the whole system of the top in mind. The bridge is the most important brace and its interaction with the other braces inside the guitar are the heart of this system. You can read more about topics like this and many other finer points of guitar design in my book: The Art Of Lutherie
Transfer Contours To Guitar Braces
The next step is to roughly transfer the contour of the top directly under the path of each brace onto the side of the brace for trimming. For this, I use a steel washer. The guitar in this example has an arch of about 5/8″ so I use a washer with the same 5/8″ outer rim. I put my pencil in the center hole and carefully guide the washer along, rolling it along the contour of the top on both sides of the brace. This is a great way to easily mark the brace for cutting. Most hardware stores will have different size washers to match or at least get close enough to the size of your arch.

Trimming & Rough Fitting

I then trim the braces roughly on the band saw and then a quick touch up on the belt sander. The braces are now roughly shaped to match the top. I could stop here and switch to my sandpaper technique and just keep sanding until I get the braces perfectly fit, but that would take too long. So instead, I use the sandpaper initially as a marking gauge.
I put pencil lines on the bottom of the braces and then put them in place and rub the sandpaper a few times under it. The sanding scratches left by the paper show me the high spots, then I use my small finger plane to quickly shave the braces down being careful not to take too much wood and make more work for myself.

Sanding Technique & Final Fitting
Once I have gotten the braces fitted as closely as I feel comfortable to go with the amount of control that the finger plane gives me, I switch to using the sanding technique shown in the guitar brace fitting video to bring the brace down to its final perfect fit.
I usually mark the brace bottoms again at this point and then sand each end of the brace, alternating between each end of the brace with each sanding session of a couple minutes or so, until all my pencil marks are removed.

It is critical to keep the brace still in order to ensure that the contour you are creating on the brace does perfectly match the top along the path of the proposed brace location.

After each brace is properly fit, I then draw my lines along the sides of each brace in its place on the top and use the lines as reference points to lay out and cut my box joint where the two bars intersect.

Final X Brace & Other Considerations
When I’m done, the entire X brace pattern can lay perfectly in place on the top and have no gaps. Its is important to me to have it perfect enough to lay there without pressure or forcing it. I want to be sure that this is a relaxed joint with no internal tension or spring. It is common to “spring fit” the brace which does sound good at first but in time, the “spring fit” will relax and the guitar will lose volume. Installing the guitar braces in a state that has no tension, will help your guitars have a wonderfully open and complex voice, not only when new, but also a voice that gets better and better with each passing year.

Access This Full Tutorial and Video


Trackbacks/Pingbacks