Did you know that humidity, the amount of water in the air, is an invisible threat that can drastically impact the longevity of your guitars as well as the stability and quality of the guitars you build?
Properly understanding the delicate relationship between wood, water AND guitars can be very confusing, which is why I have created this special guide to humidity for luthiers (and guitar players). I want to equip you with quick access to the important info you need to keep your guitars as safe as possible. This includes how humidity affects wood (and guitars) as well as how to best use this knowledge to maintain the ideal humidity in your workshop for more stable, long-lasting, better-playing, and even better-sounding guitars.
Table of Contents
1 – Are You A Guitar Humidity Guru? (& Why You Need to Be)
2 – The Science of Water & Wood (A Brief Overview)
3 – Simple Steps to Building More Stable Guitars (Humidity & The Luthier’s Workshop)
4 – How to Diagnose and Protect Your Guitars (Humidity & Your Guitars)
5 – Advanced Applications (Building better guitars)
Chapter 1 – Are You A Guitar Humidity Guru? (& Why You Need to Be)
 As I mentioned in the intro to this guide, humidity can be one of the biggest threats to the stability of your wood and can even wreak havoc on your wood supply before you have a chance to craft it into your next guitar masterpiece.
So, let’s start by discussing why guitar humidity plays such a key role in the way we build and protect our guitars.
Wood loves water. It was made to transport water and sap through the tree when it was alive. When wood absorbs water from the air around it, it’s simply doing what it was designed to do. Those beautiful cell structures that grab the water right out of the air are the same wonderful things that make up the irreplaceable and unique material that we love so much for our guitars (and for many other important things in our lives).
The root of the problem when it comes to guitars (and guitar wood) is simple:
When wood absorbs moisture (or humidity from the air), it expands.
When it loses moisture because the air is dry, the wood shrinks.
This doesn’t seem so bad at first glance, but the big problem starts to reveal itself when you consider that the edges of the guitar top are all glued in place to a ridged side structure. When the top plate tries to shrink (as it loses moisture into very dry air) and the sides are stuck in place it has no choice but to rip itself apart and crack. This type of cracking is commonly known as “checking”.
Conversely, if the guitar top plate tries to expand as it absorbs water from overly humid air it will again be restricted by the fixed ridged guitar sides it is glued to and will have no choice but to bow upward in the center. This results in several negative impacts on the guitar one of which is known as “high action” (or in other words the strings will raise higher over the fingerboard and frets making the playing of the guitar very hard and uncomfortable).
Too High or too low humidity can cause many other serious problems in a finished guitar. I hope that from these simple examples so far, you’re beginning to see how having a deeper understanding of how wood and water behave you can protect your current guitars. As we get deeper into this topic we will discuss how this new understanding of humidity can help you build guitars that are more balanced and stable from a moisture content perspective.
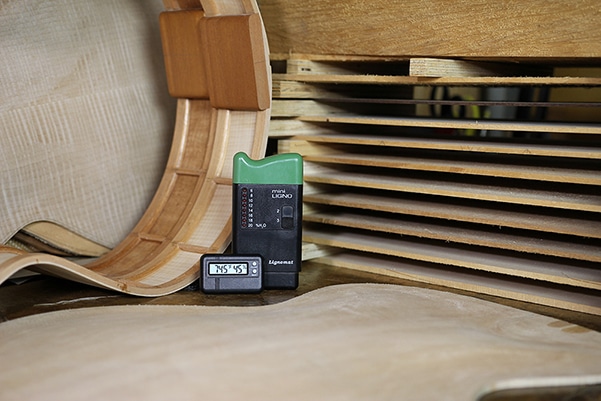
OK so we have the foundation laid here on this topic, but if you are a member of the Luthier’s EDGE you already know that I love to go deep on these topics and get to the root — the “WHY?”.
That is one of the keys that has helped me as a luthier (and my luthier students) to make more informed decisions, which advances my craft and ultimately helps me make better guitars.
So lets dive in a little deeper and see why wood and water share this dangerous romance and more importantly how understanding it fully can make you a better luthier or make you a better care taker of your valuable guitars.
Chapter 2 – The Science of Water & Wood (A Brief Overview)
Let’s start by discussing some basic terminology and concepts relating to humidity and guitars. I am laying out the following sections in an order that I hope will guide you through a brief overview of the main elements we use to understand, measure, and control the environment we work in (or store our guitars in) and ultimately to protect the wood and the guitars for longevity and stability.
I other words, this is NOT just a random list of terms. I strongly encourage you to read them all in the order I am presenting them (even if you already might know what some of them are) because they each build on one another to paint a clearer picture of how these things are all interconnected.
Here we go!
Moisture Content
Let’s begin at the beginning… when wood is cut from the tree it contains a certain amount of water within it which is commonly referred to as it’s “moisture content”. This is usually measured as the “Percentage Moisture Content” which is calculated by comparing the weight of water to the dry weight of the wood.
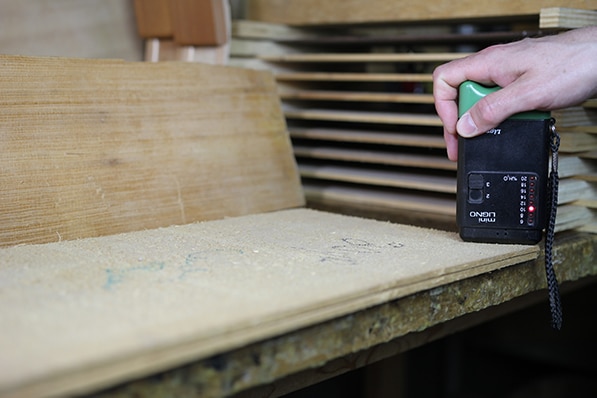
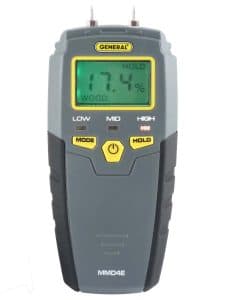
An electronic moisture meter is the simplest way to measure this ratio and quickly determine whether your wood is ready to use or needs more time to dry.
Types of Water
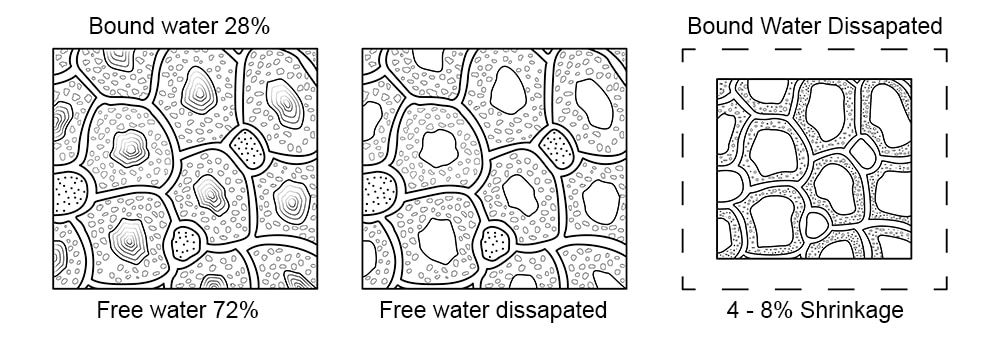
When referring to the wood as having water present, we are talking about the water in the actual wood cells. The water exists in the wood cells in two different forms.
The first is called Free Water, this is the water that is in the cell cavities and is also the first to leave as the wood begins the drying process.
The second is Bonded water, this is the water that is in the cell walls causing them to swell. This water will begin to leave after the free water has been removed. When the bonded water leaves it lets the cell walls shrink which in turn causes the whole piece of wood to shrink.
The Wood Cell
Equilibrium Moisture Content (EMC)
The wood will continue to lose water until it reaches a balance with the amount of water in the surrounding atmosphere. This state of moisture balance in known as the Equilibrium Moisture Content or EMC for short.
Relative Humidity (RH)
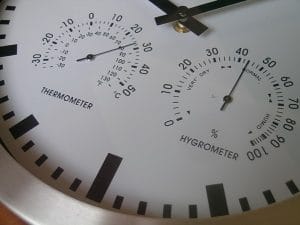 We measure the amount of water present in the air as Relative Humidity. It represents the function of moisture in the air, temperature, and barometric pressure where 100% RH equals the maximum amount the air can hold (saturation resulting in precipitation).
Temperature
I am adding temperature in its own section here not because I don’t think you know what tempterature is but because I feel it is important to draw special attention to the role temperature plays in the humidity (and wood moisture content) equation. The higher the temperature in the air, the more moisture it can hold.
The converse is also true, when the temperature drops the amount of moisture the air can hold also drops. This is the very reason that air conditioning was invented — so that they could control humidity to accurately print on paper at a consistent size which is commonly made from wood fibers and shares a special characteristic with wood which we will talk about next.
Hygroscopic
Impressive word, right? Use this one whenever you want to impress your clients with your knowledge of lutherie ?. Wood will absorb or lose water content in relation to the relative humidity of its environment, or in other words wood is Hygroscopic. It is trying to get to the state of EMC with its environment.
The basic premise of how water and wood behave is actually very simple, even though it might seem a little complex at this point after all those terms and fancy words. Wood will always try to get to a state of EMC which is a result of the relative humidity. The relative humidity is based on mainly (for our purposes) the temperature and the moisture present in the air.
The simple formula for ideal guitar humidity that has worked for me in giving my guitars consistent playability & stability all these years is this:
72 Degrees F @ 50% RH = about 9% moisture content.
That is my rule of thumb. When I check my wood with the moisture meter I’m looking for around 9% moisture content. If it’s higher then I know I need to let the wood sit longer or adjust the environment to be warmer or drier.
A common question is this: How accurate does it have to be?
The good news is there is a fairly wide safe zone that I like to stay in, anyplace from 40% to 50% RH is just fine. I tend to favor the lower side of that, though if it goes a little over 50% don’t worry.
However, if you hit 60% you will likely have problems if that guitar goes to someplace dry, so I recommend you stay around that nice middle ground of 45% (or just under) as much as you can.
Remember the goal of all this %RH stuff is just to keep the wood moisture content around 9%.
Why do I want the wood to be 9%? We will be discussing that in the next chapter — so read onward!
Chapter 3 – Simple Steps to Building More Stable Guitars (Humidity & The Luthier’s Workshop)
Since wood is Hygroscopic in nature, we know that it will always be losing or gaining moisture to try to achieve EMC with its environment. We sometimes send our guitars all over the world to places very dry or to places very humid, so we anticipate the behavior of the wood (expanding and contracting by region or simply prepare the wood the best we can to handle the seasonal changes it will face) and we aim to build the guitar (and set the moisture content of the wood) at a middle ground or average point (between 40% – 50% RH).
This point is around 9% moisture content.
In doing this we are building a guitar that can do a better job of handling a dry winter or a humid summer (within reason or to the best of our abilities).
If you are a custom guitar builder, you have an advantage in that you know where the guitar will live when it is completed.
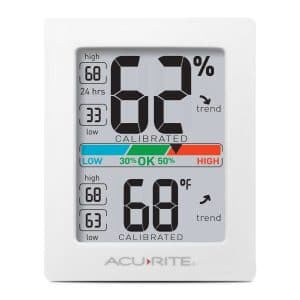 For example, if I know a guitar will be going to Arizona where is it is very dry, I might adjust the environment of my work shop to a lower relative humidity (such as 40 or 45% RH) before and during the building which can produce a moisture content in the wood of slightly lower than 9%. This can give the guitar a little extra protection against the possibilities of cracking from being in an environment that is so dry.
Hygrometers
I think it goes without saying that you will need to get a hygrometer to monitor your RH in your workspace. I will say that you don’t need to get a very expensive one. While it is nice to have better accuracy, you should be monitoring the actual wood moisture content with a digital moisture meter, so we can learn to adjust the RH we are targeting to achieve the actual wood moisture content we need, therefore if the Hygrometer is off a little one way or another we can learn to work around it. (After using and testing lots of hygrometers over the years this hygrometer is my favorite because it is accurate easy to use and cheap.)
Tip — To make sure your guitar hygrometer is correct, you easily calibrate it using what is known as the salt method. For more info on how to use the salt method for calibrating hygrometers click here
Humidification and Dehumidification
To achieve a stable wood moisture content most luthiers will humidify the workshop in the dry months (* only use an evaporative humidifier as the other types will also spray out the minerals in the tap water as well and it will stain the areas around it and can build up on your tools or even your wood or guitars) and Dehumidify in the humid months with a dehumidifier.
Placement of Humidity Control Devices
This is important! Be sure to think very carefully about the placement of your humidification and dehumidification devices in your work space. I like to have mine on an interior wall and have it pointing away from any guitars or wood storage (out into the empty middle of the shop). I want it to evenly condition the atmosphere of the whole room and if it is pointing at a stack of wood or a guitar there is a good chance it could cause damage to them.
Also, be sure to keep the temperature as consistent as you can since we now know that it plays a big role in the RH equation and in how much moisture content your guitar wood will retain or lose. Air conditioning (heating and cooling) is a huge help if you can use it in your shop.
Use a Wood Moisture Meter
Always check your wood with a digital moisture meter to keep track of just how dry your wood is and if it is ready to use for building your next guitar masterpiece. These days they are easy to get and very inexpensive.
I paid over $600 for mine way back when so you have it easy ?
Wood Storage
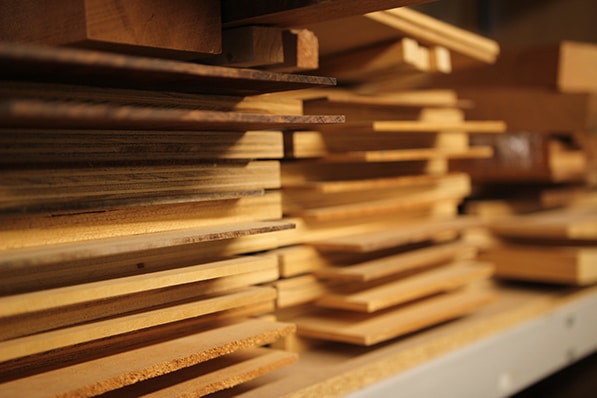
When storing your treasured guitar wood, you can minimize the chances of warping and cracking by using small strips of light colored wood or plywood sometimes
called “Stickers” (See photo). Stacking your wood in this way helps it to have an even amount of moisture gain or loss on all surfaces.
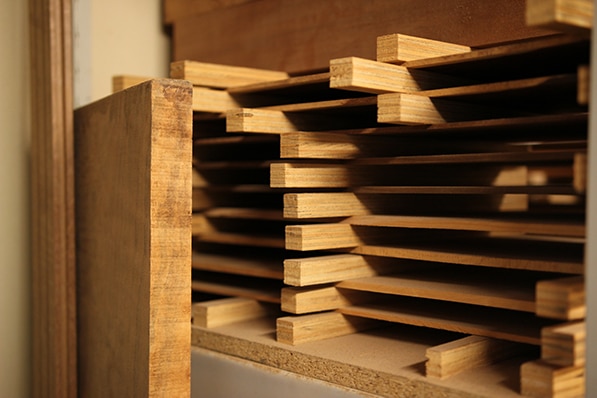
It is also important to make sure that the ends of the wood are sealed with paraffin wax or something similar since water leaves the end grain 10 times faster than it does the other surfaces. Most of the time, if you are buying wood from a luthier supplier this will already be done for you.
Chapter 4 – How to Diagnose and Protect Your Guitars (Humidity & Your Guitars)
If you are trying to diagnose some issues on your guitar that you think might be humidity related check out this simple list of issues related to each extreme:
Your guitar is Too Dry if it has:
- protruding fret ends
- overly low action
- cracks
- thin, metallic sounding trebles
- structural problems (like a collapsing top)
Your guitar is Too Wet if it has:
- overly high action
- a neck that is back bowing
- warping of wood (sides or body)
- smelly inside of the guitar
- finish discoloration
- loss of volume.
PROTECTING YOUR GUITARS
Hygrometers
The very first step is to get a hygrometer, so you can see and track the relative humidity of your room or guitar case. It doesn’t need to be an expensive one, just something to give a close idea of the atmosphere you are exposing your guitars to throughout the seasons.
Room Humidity
If you have many guitars or if you keep them outside of their cases, you will probably need to control the humidity of your room where they are kept. For keeping this room in the optimal zone of between 40%-50% relative humidity you can use a dehumidifier in the humid months and a humidifier in the dry months (see this section above).
One word of caution regarding humidifiers: (I mentioned this above but it bears repeating) I strongly recommend only evaporative humidifiers, the ultrasonic or other types will put the water AND its mineral content into the air, which in many places with high amounts of minerals in the water will lead to white staining or build up around the humidifier.
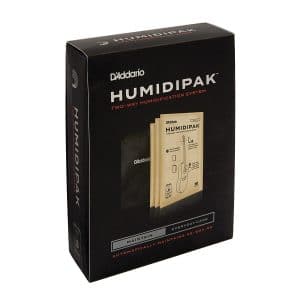
Another way to protect your guitar is by using a humidity control device inside your guitar case itself. There are several types out there ranging from simple sponge type guitar humidifiers that are suspended between the strings to the more modern gel or silica based models that can regulate the humidity in the case more evenly (see the planet Waves Himidipack System).
Heat and Cold
Remember from the sections above that the temperature plays an integral role in the relative humidity equation, so be sure to regulate the room temperature as well as the RH (even if your guitars are in cases).
Now that you’re A Guitar Humidity Guru, It’s Time for the Advanced Applications!
So now you know all the main terminology and concepts. These may sound a little complex at first, but remember — they are simply a framework for us to measure and understand our workshop environment. Ultimately the real goal is met when we keep the moisture content of the wood around 9% AND do our best to make a more stable, better sounding guitar.
That said, there are additional ways you can use the information that we have discussed to improve your guitar building. In the sections that follow I will discuss 3 applications of this knowledge that I would never want to build a guitars without.
Chapter 5 – Advanced Applications
As you might have noticed already, each part of the humidity equation is interconnected with all the others. There is always a chain reaction as the wood tries to get to a balance with the moisture of its surrounding atmosphere. Because of this, we will take the same approach as we did in the first part of this guide by beginning with the foundation and then build step by step until we can clearly see a picture of the whole system with its different inter-working parts.
The foundation of the advanced concepts I want to share with you here are the same as the very first part of this guide: the wood cell and the water.
Remember how we said that in the cell there is water in two forms? Free water in the cell cavities and bonded water in the cell walls. The presence of the water causes the cells to swell. This swelling causes a chain reaction in the wood, that we can use to our advantage in several ways:
1 – Expanding Wood Cells (Fixing Dents)
In the simplest way we can simply introduce water and some heat into the wood to fix dents (or in other words the cells were crushed). In so doing we refill the cells with water and the heat helps to bond some of it and swell the cell walls and maybe even fill some of the cell cavities which many times can pop out a dent. After it dries, the wood will retain its new state and the newly restored cell structure.
This is a super handy trick for fixing a ding in a spruce top for example…maybe something you may have done before but now you know WHY it works so well! 🙂
As we look even closer it gets even more interesting and getting this next part is very important to fully utilize your new knowledge of wood and water.
2 – Grain Orientation & Wood Expansion/Shrinking
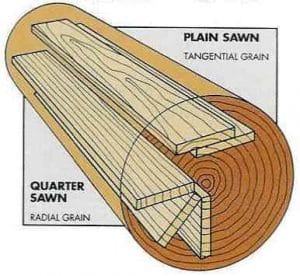 In addition to understanding how water affects wood, there is another element in this scenario that is equally important – the grain orientation of the wood (how the wood was cut)
When the boards you are using are cut from the tree, there are two main terms we use to describe the resulting grain orientation they have:
1 – Plain sawn(or Flat sawn) – when the end grain lines are running parallel to the wide face of the board.
2 – Quarter sawn – this is when the grain lines are running perpendicular to the wide face of the board.
It is widely known to luthiers that quarter sawn, or quarter cut wood is preferred for parts such as the top or back of the guitar since it offers the most strength to weight and stiffness in the direction of the strong tension, but those aren’t the only reasons…
Humidity and grain direction (uneven expansion/contraction)
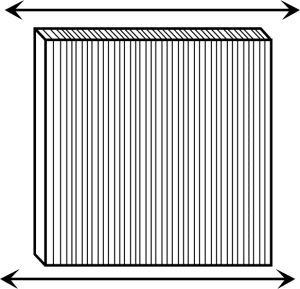
Well, as we know the wood will expand because the cells get swollen when wet, but interestingly the wood does this swelling or shrinking in different amounts in three different directions. See below for a list of how much on average wood shrinks in each direction after losing its bound water.
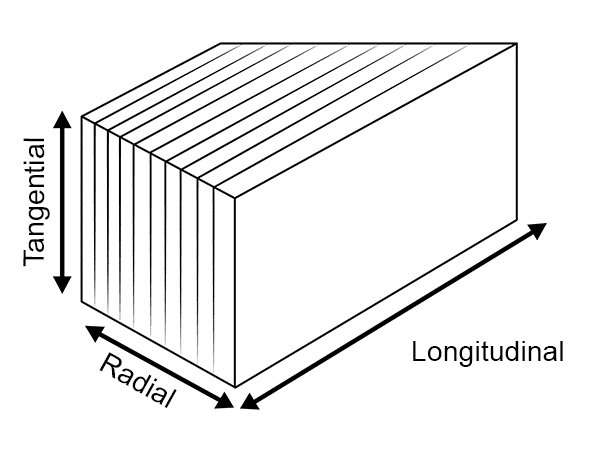
- Tangential (Flat sawn face) – 8%
- Radial (Quarter Sawn Face) – 4%
- Longitudinal (Parallel to long grain) – 0.01%
So for a quarter sawn guitar top the swelling (or shrinking from loss of water) across the grain will be much less than a flatsawn guitar top of the same size.
This uneven swelling or shrinking based on grain direction means that the way your wood is cut from the tree will effect the way it changes in shape with the loss or addition of moisture (see photo below)
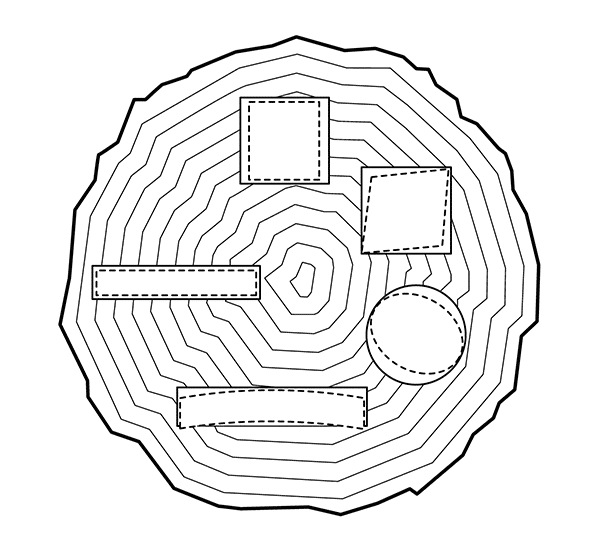
Even with a quarter sawn top, a guitar that is too dry will result in cracks in the lower bought of the top or back where there is more width and greater shrinking due to a cumulative effect of all those tiny cells losing water and contracting.
So, what do we do about this?
Well, first and foremost we must prepare the environment to get the right RH and wood moisture content as we discussed early on in this guide, but another great solution is to add a subtle dome to your guitar top during construction.
Benefits of using domed top (or back construction)
- Adds extra protection against cracking – With the top doming upwards, there is more room for the top to shrink since the first phase of shrinking will be the falling of the dome, which will affect the action of the guitar but many times can prevent actual cracks from occurring in the top wood. The guitar can easily be re-humidified to restore the dome which is much easier than fixing cracks in the top itself.
- Give the guitar top more strength without adding mass – This is enough reason all by itself to use the domed top and back design for classical and steel string guitars. As you might know from my Guitar Physics Course, anytime we can reduce mass and keep the strength constant it will result in more sensitivity and power for your guitar (see this course for a more detailed explanation).
Getting an understanding of the simple concept of how the wood will move relative to grain orientation on an almost subconscious or intuitive level is important as we take this a step further and apply it to another key aspect of taking your guitars to the next level…
3 – Glue Joints & Adhesives
This next part was a big epiphany for me and I owe it to my mentor Eugene Clark. Eugene was the one who first opened my eyes to what was happening inside the glue joints as they are affected by the moisture in the glue when it is applied. This is critical because the quality of the glue joint has structural implications of course, but beyond that a perfectly executed glue joint will both look better and transfer sound better. I find that as I get better at really finessing and refining my glue joints that the feel of my guitars improves. It’s hard to explain, but basically when I hold the guitar or pick it up, its more unified, more alive, more like one integrated piece rather than a bunch of parts stuck together…it’s subtle, but the jump from good to great is often very subtle…
Back to glue joints…
Since we are aware of the way the wood joint surfaces will move when water is applied (via the RH of the air or through our water based glue) we can apply our new understanding of water’s effect on wood in a few ways:
1 – In some cases we can simply choose not to use a water-based glue. When I studied with a renowned guitar maker he showed me his system for getting super stable guitar necks. One of the things he did was to laminate the neck blanks one year in advance. This allowed a full year for all the moisture from the glue to thoroughly leave the wood and lessen wood movement after the completion of the guitar which equaled more stable necks, better fretwork, and better play-ability.
I took this a step further and just stopped using water-based glues in the neck at all. This gives me a more stable neck, but without the year-long curing time. (for more info on adhesives and their applications, see my detailed article on glue for guitar makers)
2 – This next option requires some careful observation of the parts of the wood joint surfaces. When I plan a glue joint and when I prepare it I think about the wood grain direction or cut of the wood. I know that wood will expand at different rates in three different directions and change the shape of the piece slightly while it is wet. How much change will depend on variables such as the wood type etc. If using a water-based glue, I will usually set up the joint to account for how much the wood will spring open after the water-based glue is applied.
So to get a joint where both pieces are flat and touching one another along the full surface (without using crushing clamping force) I will make a very subtle concave to the surfaces so that after they are wet and spring open (warp slightly) the result will be a flat surface. Getting a feel for this and getting it right takes practice, but the result is a suction fit that looks amazing, takes less clamping, and sounds better too.
A common application for this is when I glue the bridge onto my guitars. I want to be sure the fit is flawless, so I give it just a slight bit of concavity considering the wood type and grain orientation of the bridge to compensate for the effects of water in the glue reacting with the wood.
Final thoughts
It’s funny how the simplest things can sometimes be the hardest to thoroughly explain. Yet they can also be the things that have the biggest impact on helping you achieve your goals of moving toward your best work.
If you got this far in this guide I congratulate you and encourage you to keep digging deep in your studies and observations of this wonderful craft of lutherie.
Remember that while the beginners are stuck at the starting line ignoring the basics and mesmerized by all the shiny tricks and fancy tools, the true masters are confidently striding across it because they are focused on deeply mastering the basics.





Hi Tom, Great article. I don’t build but do repair and modify as a hobby not as a business. I live in a dry location, Snake River Plain of Idaho, and often suffer humidity related complications with guitars I work on and or play. I’ve learned over time much of what you share here, however never have I seen it so well presented in such an easily understandable way. Thanks for that. I have yet to get a handle on how various guitar finishes effect the swelling-shrinking process. And how finishing only one side of the wood effects the swelling-shrinking process. I know you’ve worked primarily with lacquers and now exclusively with schellacs but was wondering if you had any thoughts about these questions or references that would lead me to additional information.
Thanks John! So glad you found it useful! The way I think about finishes on guitars is that they don’t stop any moisture from getting to the wood, they just slow it down some. Slowing it down does help because it lessens the shock of moving a guitar from one extreme to another, but the wood will still get that moisture no matter what you do. I adhere to the old woodworking rule which is basically what you do to one side of a board you have to do to the other. It’s just keeps the wood movement (from swelling and shrinking) in balance. If we only finish one side of a board, then when it is exposed to humidity for example, the unfinished side would react faster and the finished side will be slower to get that moisture. The result would be the unfinished side expanding more than the other and warping the board. I don’t do a full gloss finish inside my guitars or anything, but I do use shellac to seal it pretty well in there, I think it looks nice too ? Hope that helps and thanks again for taking time to let me know you enjoyed the article it means a lot! – Tom
Thanks, what a great detailed article! I live in the tropics where the humidity is well over 60% most of the time. Do you know if some tonewoods are more susceptible to humidity than others? I’m wondering if it might just be worth going for a solid top with veneered sides and back.
Concise and comprehensive info, Tom. I live on Hood Canal in Washington State and too much moisture is always an issue. I keep my instruments in a front room of a daylight basement that is kept at a slightly lower temperature than the upstairs. Despite the high humidity of ambient air in our part of the world, the forced-air heat I use helps to keep indoor humidity down during the damp winter months. My hygrometer varies between 40 to 50 percent in our music room. wihich houses a number of guitars, including some from Eastman and Tacoma (both Northwest luthiers). It’s also where my wife keeps her Eastman mandolin.
Well done, Tom!