What Is A Guitar Backstrap?
If you’ve been building or repairing guitars for any time, you might already know what backstrapping, also known as a backstrap overlay, is. Just in case you haven’t heard about it yet, implementing a backstrap overlay is a technique luthiers use to fix broken headstocks or, in my case, to strengthen that critical point where the headstock meets the neck—this, to reduce the chance of them breaking in the first place, as well as to increase the power, sustain, and stability of the guitar. However, applying a backstrap can be tricky and intimidating, which is why I created this in-depth tutorial to make the process easy to understand, and to lead you through every step. Before we get to the step-by-step tutorial, we need first to take a quick look at a few essential principles at work behind the scenes—remember, you can follow a recipe to build a guitar, but I want you to learn how to write your own recipe and make it too.
Following Beauty: Why I Began Using A Backstrap
 When I was in Baja, California, in 2001 studying with luthier Boaz Elkayam, he opened my eyes to a great deal of information about the underlying physics principles related to the guitar, how it functioned, and how to apply a scientific approach to designing and refining the guitar. One day, as we discussed different designs, he said something that has proven to be accurate in my experience over the years: Boaz explained that if there were two similar items, the one that looked more beautiful and visually pleasing would usually perform better.
You might be thinking, OK, great, but I thought we were talking about backstrap overlays for guitar headstocks? Well, I mention this “law of beauty,” for lack of a better term because that is the very reason why I started using a backstrap. I just thought it looked cool and added refinement and elegance to the design. I didn’t come from a guitar repair background—I started as a jazz guitar player—so I didn’t know how many guitars get the headstock broken off and what an epidemic it was and still is for many types of guitar.
I had a similar experience with fanned fret guitars, where I was following what I felt was beautiful and pleasing to my eye and my intuition; little did I know that learning to incorporate fanned frets would revolutionize my understanding of the guitar itself and be a linchpin in the quantum leap my guitars took sonically as a result.
The headstock backstrap was no different from the fanned frets. I have many other examples of this too, where my eyes, intuition, and quest for refinement and beauty also produced significant advances in the performance and tonal qualities of my guitars.
I have found all these things to be interconnected: The visual harmony that excites and inspires us is the very thing that also is propelling the functionality of the instrument to new levels. This reciprocal relationship is one of the mysterious and magical things I love about handcrafting guitars.
Why Does A Backstrap Improve The Guitar?
If you are a member of the Luthier’s EDGE or have been following my writings or courses you might know that one thing that is at the core of everything I do here on rpd-3f25.ue1.rapydapps.cloud is to do my best to explain “why” we do what we do as luthiers, rather than just a list of steps to blindly take. So let’s talk about why adding veneers to the back of the headstock can improve the strength and the sound of the guitar.
Understanding why a headstock backstrap is so effective starts with a simple principle that I talked about in great depth in my book ( The Art Of Lutherie) called Stress Concentration.

Photo Credit: teachengineering.org
A material or design is always strongest when the force acting on it is evenly distributed over its entire area. If there are any variations in the area or material then it can create a situation where the force lines can become localized and begin to build up at that point. I think of stress flowing through a material like water, running downhill looking for a place to puddle up. Any sharp edge or drastic change in stiffness can result in a point of stress concentration where the object is most likely to fail structurally. In the image above you can see the lines of stress flowing through the material. Notice how the one on the right has a huge concentration of force at the point of the triangular cut? Structural failure is very likely there because of that focal point of stress.
Understanding stress concentration and, more importantly, stress concentration avoidance on an intuitive level is key for creating successful guitar designs. I could do an entire course on the application of this to guitar design which I may do in the near future because the applications are far reaching and have been an essential tool for me as I have evolved and refined my guitar designs over the years. Now that we have some basic understanding of the forces at work here, let’s apply this thinking specifically on the guitar neck and headstock design.
The infographic above illustrates the key concepts of force and stress acting on the neck/headstock portion of the guitar design and how the backstrap overlay can help to reduce the build up of stress concentration under the nut at the sharp edges of the fingerboard and the headstock face veneer, and simultaneously help to strengthen the weak wood grain area of the headstock.
As a side note, this also illustrates one reason (but not the only reason) why having a very tight fitting nut can improve tone and sustain. It not only makes a solid base for the strings to anchor on, but if fit tightly, it can reduce some of the forward flex of the headstock there between the two stiff zones of the headstock face and the fingerboard thus reducing the loss of string energy from the flexing of the headstock. The backstrap also helps in this regard to a noticeable degree, one of the very pleasant surprises I found after doing my first guitar with a backstrap veneer, was the increase in sustain.
Guitar Backstrap Design
 I think it is important to mention a few important points about the design of the backstrap overlay. The distance the backstrap veneer extends out under the fingerboard is important in making sure it is, in fact, strengthening the critical areas. If your veneer stops under the nut or on the headstock side of the nut, you might be making things worse and your glue line could become another point of stress concentration where the force lines can puddle up and cause structural failure. I like to make the backstrap extend no less than 1/2 the distance from the fingerboard edge to fret #1 and no more than just under fret #1. Most of the time I make it stop right in the middle of fret #1. This will vary for your design and is impacted by various factors such as headstock back-set angle and neck thickness, truss rod depth, etc. I highly recommend that you make a full-scale side view drawing of your design before you try it. Many mistakes can be prevented with the drawing as it will force you to work out the geometry and other details on paper first: Paper is cheap, guitar necks are not! 😉 You can find all my methods and materials for making effective drawing laid out in great detail in the course; The Art Of Guitar Design, which is one of the courses included with your membership to the Luthier’s EDGE.
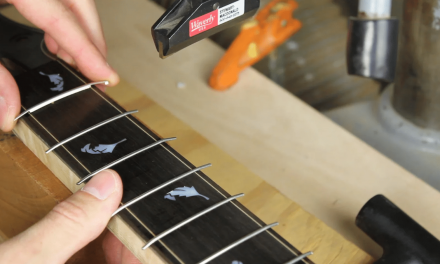
Add a Backstrap To Your Next Guitar With Our Step-By-Step Video Course & Tutorial
Now that we’ve looked at “Why” the backstrap is important, we are ready to get into the “How”. In the step-by-step online video course “The Art Of The Guitar Backstrap” you will learn how to build a stunning backstrap on your next guitar. You will be guided through each step of the process including tools, materials, design, and more, no detail is left out. It includes a companion photo tutorial for quick reference and the best part is that this course included along with all the other video courses when you join the Luthier’s EDGE. Check out the trailer below to learn more:


