On most steel string or classical guitars the end-graft provides an opportunity to get creative and add some subtle details to your guitar. The design you use can be complex and very involved, or minimal and precise. Whichever style you chose will require you to cut a clean and perfect slot at the end block of your guitar where the two sides meet in which you will inlay your design elements.
What Is A Guitar End-Graft?
 Just in case you haven’t heard of this before the end-graft (also sometimes called a “butt joint”) is an additional design element added to the end block area of the guitar as a treatment to the joint where the two sides of the guitar meet, usually on the center line of the guitar body. It is not necessary to use an end-graft treatment if your two sides meet perfectly, and the resulting joint is pleasing. I like to use an end-graft on my guitars because it gives me a really cool and subtle way to add some elements of the design to that area of the guitar. It also provides an opportunity for me to have the end graft interact with the side bindings and purflings, adding interest, cohesiveness, and artistic appeal to the overall design.
Design Considerations
Most of the time, acoustic guitars will have a traditional wedge shaped end-graft. This looks nice from a visual standpoint, but it also gives the luthier a few benefits as well. First, it affords a larger margin of error in case the top or back of the guitar happen to be off center a slight amount. The angles of the wedge end-graft will help to visually hide small amounts of misalignment.
The second benefit of the wedge shaped end-graft is that it is much easier to fit in place tightly. When using a straight design, if you over-sand your filler strip, you have to start over and make a new wider one. If the angled style is used, you can simply slide the filler piece in until it fits because the tapered design gets wider as you move it into the end-graft slot further, providing you have enough available length.
Preparing The Sides For Cutting The Slot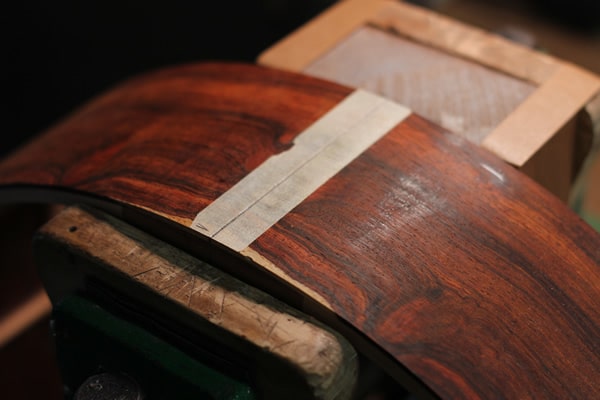
First I mark the center line on the tail block and the neck block very precisely both on the top and back sides of the each block. I put a piece of cheap masking tape (better tapes have a coating on them that makes it hard to write on with pencil- see my luthier’s guide to tape here) on the outside area approximately centered on the center line of the neck and tail blocks. I transfer the center line from the top and back edges of the blocks and draw it on my masking tape to establish the center line I will be using for the end-graft layout.
Preparing To Cut A Perfect Slot
Once I have decided on the design of the end-graft, the next step is to cut the slot into the sides of the guitar. Most luthiers have created various jigs to make the process faster and easier to do. If you make a similar design on each guitar, this is a great way to make your operation more efficient. All my guitars are very different, so I cut all my end-graft slots by hand.
I think that I can cut it almost as fast by hand because the setup is so simple. Plus, I don’t like routers and loud, violent tools. I do use them of course, but only if there is no other way. I feel that when I use a loud power tool my sensitivity level is reduced for several hours afterward.
To lay out the edges of the slot, I simply mark the lines that I want to cut on either side of the center line. I keep in mind the fact that for example, an 1/8″ wide piece can not fit in a 1/8″ wide slot. So I cut the end-graft to the size that I want. Then I will make the filler strip the exact size also and then slowly reduce it by a few thousandths of an inch at a time on a sanding block until I get a very tight and perfect fit.
Cutting The End-graft Slot
Once I am feeling good about my lines, I am ready to cut the slot with my fret saw. This can be tricky to do if you do it freehand, but with the little trick I am about to show you, it’s pretty easy.

First I take my 6″ steel ruler and put some handy double sided masking tape on one side. I then stick it down so that the ruler is on the outside of my line that I want to cut. The edge of the ruler is right on the center of the pencil line. If the slot is a little narrow its ok because I can widen it. If I make it too wide I’m in deep trouble. So I err on the thin side if need be.

I tweak the ruler a little and double check its position in relation to the center line of the body using my caliper to make sure it’s just right.
Making The Cut
When making any cut with a fret saw, the key to accuracy starts with the first few passes. A trick I learned for Eugene Clark for cutting fret slots by hand is to use the front tooth of the saw as a kind of scribe. I draw it back toward me with a good amount of force and control a few times to establish the path that I want all the teeth to cut right along the side of my ruler. If you slip a little toward the inside of the slot its OK because all that material will be removed. But the ruler keeps the saw from moving to the outside of the cut which would make big problems.

Once I feel comfortable I ease the saw down on plane with the surface of the guitar sides and start cutting with all the teeth in slow deliberate strokes with the same controlled force that I began the first stroke with.
As I get into the wood a little, the saw will start to hang up in the slots as it generates heat and pulls out resin from the wood, gumming things up. At this point, I wipe some cutting lubricant onto the sides of the saw teeth. It only takes a little but it makes a great difference. Then back to cutting, nice and smooth and deliberately. I’m seeing in my mind and feeling the teeth of the saw cutting on the back stroke firmly optimizing the cutting action, but not forcing it down. The forward stroke is light and easy, but still very controlled.
Meanwhile, I am monitoring the angle of my cut, being sure that my cut is going into the wood at the proper angle of approximately 90 degrees. I check this angle very often sometimes kneeling down to view the saw straight on and get a better perspective on the cutting angle and take note of any subtle corrections I need to make.
I cut just slightly deeper than the thickness of the sides. The important thing to be sure of is that you did in fact cut all the way through the sides. I will look down into the slot to see if I can spot the brown mahogany of the tail block all the way thought the length of the cut. Many times the middle isn’t cut as deep if I was rocking the saw a little during my cutting action. I make any additional passes with the saw to get things perfect.

I then repeat the ruler guide and cutting process on the other side of the end-graft slot, making sure that if I do make any mistakes in alignment or cutting or cutting angle of the saw, that they all occur within the inside of the end graft slot so that any evidence of my mistakes will be removed along with the the material in the slot. I also make sure that if I am not perfectly accurate that it is a mistake of cutting the slot to thin and not to wide.

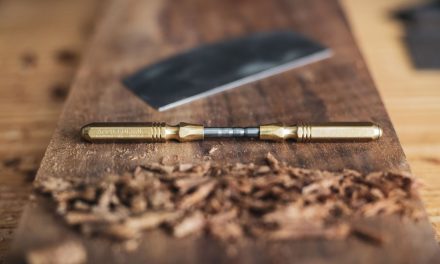
Once the cuts are made, I am ready to start chiseling out the material inside. I usually use a 1/8″ or 1/4″ chisel for this, but in this case I am making a very thin slot of only 1/8″ final width, so even a 1/8″ chisel is too big. I’m forced this time to use my little dog leg chisel. I think this little chisel was actually 1/8″ originally but I used the belt sander to make it a bit smaller so I could work in 1/8″ slots.

For the fine details of the slot, perfecting the angles of the sidewalls, and opening up the width to the perfect size; I just wrap a little 180 adhesive sandpaper around my 6″ steel ruler. Normally I use a file for this, one of the Stew-Mac luthiers files work amazingly well for stuff like this, but this particular end-graft design is too thin for that, so the ruler is the best tool for me to work in such a thin slot. Also the sandpaper is pretty subtle, which gives me a little more fine control, which helps in this case as well. Because this is so thin, it really has to be perfect.

After a little more elbow grease and some fine-tuning and checking with my caliper the slot is done, and I am really happy with how accurate the results are. When you do things by hand it’s a challenge every time. You have to trust in yourself and in the gifts you’ve been given, trust that this time you’ll get it perfect again, and that can be scary and intimidating, no matter how many times you have successfully done the task before.
Time To Fit The End-Graft Inlay In Place
For this end-graft I’m using two thin strips of my black/maple/black purfling material to match what I have done on the back center strip of this guitar. It’s funny that this ended up so minimal, my first drawings were very modern and involved. As I worked though my different ideas, it kept getting more and more simple until I settled on this design. Being able to take the time to let a design evolve is a wonderful thing and always leads me to a final result I can feel good about.

I seal the surrounding areas of the sides with some shellac to protect them from glue and give them a couple minutes under the heat of my bench light to dry them fully. My veneers fit perfectly into the slot, and they are just tight enough so that I can set them snugly in place with my dead-blow hammer.
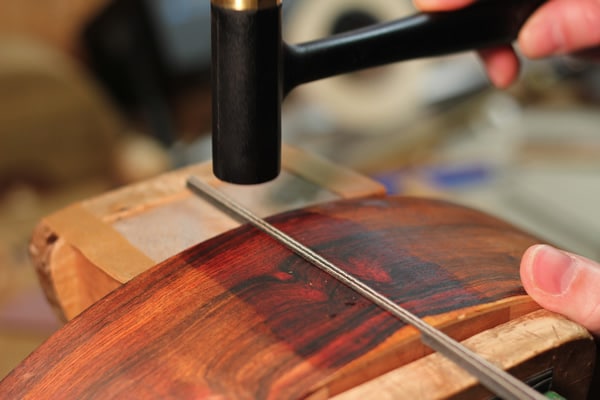
Once I feel the veneers are firmly in the slot, I run some thin Cyanoacrylate glue ( aka superglue ) in the seams of each side ,and down the middle between the two veneers. I am careful not to over do it because I don’t want any glue getting on the gluing surface of my tailblock. The thin Cyano wicks into the tiniest spaces using capillary action and creates a very strong glue joint.

Trimming The Inlay
After it has some time to dry, I cut the overhang off with my fret slotting saw or japanese dozuki saw. Then I put some protective luthier’s tape one either side of the end-graft inlay so that my hand plane won’t accidentally mark the surrounding surfaces while I’m planing the excess material. I plane it as far as I can until I’m lightly touching the tape, and then I switch to using a scraper to get it down as close to the surface as possible.

I then take the tape off and use a small sanding block to bring the inlay down to the surface of the guitar sides. The trick to this is to put a piece of masking tape on one end of the sanding block. This way I can let the tape side of the block act as a guide resting on the surface of the sides without removing material, and use the front sandpaper as the cutting edge of the block to remove the wood from just the places I want to remove it from. Finally I take the tape off and do the last bit of sanding to bring in down flush and smooth.

Normally I would be done but I have a few more fun things in mind for this design. I’ll post the final photos or a link to them here when this guitar is finished, but for now here is little sneak peek.

I hope you found this helpful and that my process of cutting the end-graft by hand is useful to you. My hope is that you can also find some other applications and benefits from the tips and tricks described in the process too.
If you have any questions or comments, let me know in the comment section below.








A wonderful and inspiring article Tom. Thanks for taking the time for this.
Hey thanks Robin! So glad you enjoyed it! Seemed like a simple subject on the surface, but I was hoping that in the details people could find some useful stuff to apply to many different areas of their building. Thanks for taking time to give me some feedback and great to hear from you! – Tom
In the old days (not sure about now) a dovetail saw had a larger tooth in the front for just the technique you described. I always do a couple backward strokes for any backsaw work.