Today, I’m going to show you a great fretwork tool called the Fret Barber and a four-step process you can use to make fret installation easier, prevent fingerboard back-bow, and ensure a strong and stable guitar neck.
All those benefits I just listed are affected by how the frets themselves fit into the fret slots of your fingerboard.
If the frets are too tight in the fret slots, it can cause:
- Excessive back-bow from too much compression
- Difficulty seating the fret during installation
- Issues when re-fretting
If the frets are too loose, it can cause:
- Less sustain and uneven tone
- A weaker neck (No compression at all)
- Frets that come loose or pop up on the ends
The crazy thing is that many people aren’t even aware of this subtle yet crucial point that can drastically impact the quality of their guitars.
Fitting your frets to the fret slots is key to high-quality fretwork and a strong, stable guitar neck
When the frets are fit just right, it results in:
- Little or no back-bow
- A stronger and more stable neck
- Well-seated frets with even tone and sustain
- Less chance of frets popping or moving over time
- An easier fret installation process that you actually enjoy
As you are about to see, getting that perfect fit is super easy, takes just a few minutes, and only requires one simple tool called “The Fret Barber.”
Let’s Dive in!

What is The Fret Barber
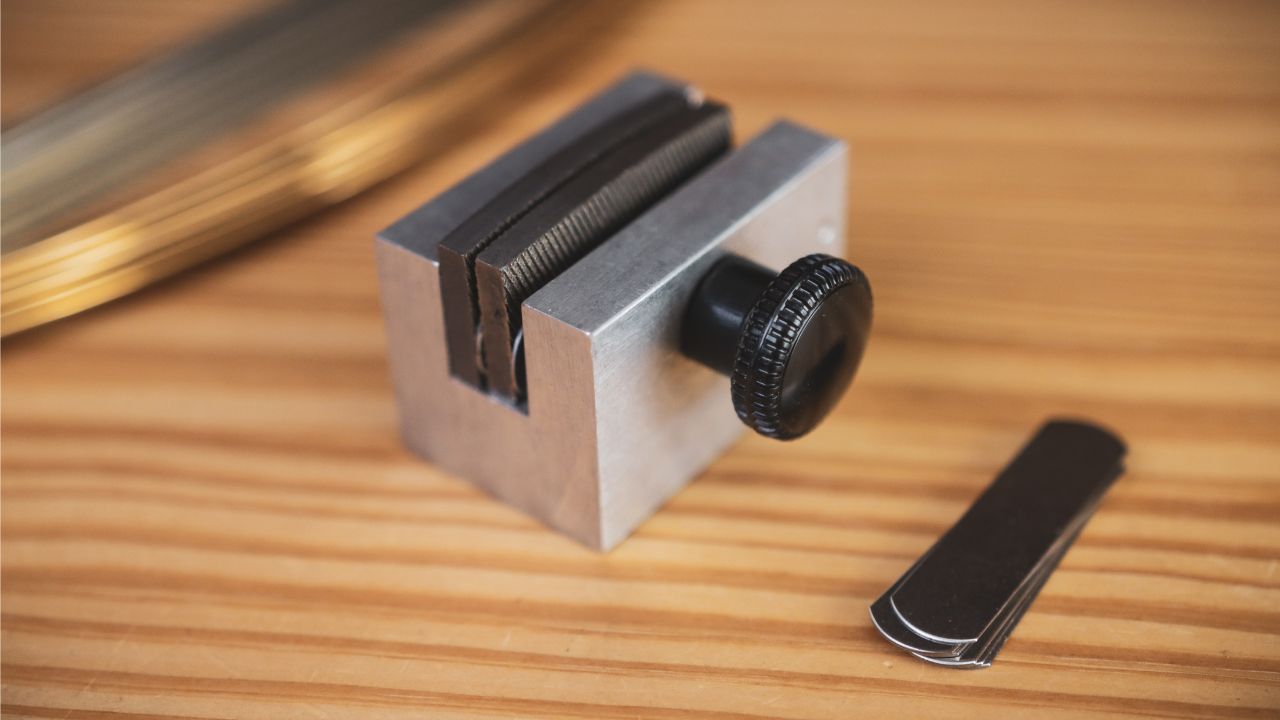
The StewMac Fret Barber allows you to adjust the width of the fret tang to ensure a perfect fit with your fret slots. It consists of two small files separated by a gauged steel shim and held in an aluminum body.
It comes with a set of common-size shims that will help you fit your frets to just about any fret slot you may encounter.
Fret Wire Preparation
Before using the Fret Barber, I find it best to prepare the fret wire for installation. The steps I take include:
- Cleaning the fret wire to remove oils from manufacturing.
- Radius the fret wire to match or be slightly tighter than the fingerboard radius.
- For bound fingerboards, I use my favorite fret tang nipper to trim the fret tangs so they fit each slot for length. I also file the undersides of the fret bead so it can lay flat and tight as it extends out over the purfling and binding.
- Lastly, I do an over-bending technique on the fret ends to ensure that they stay down tight for the life of the guitar.
NOTE: You can find a step-by-step demonstration and in-depth explanation of this process, in the course Fretwork Mastery Part 1
With the preparation of the frets completed, it’s time to make the final adjustments to the fret tangs for a perfect fit and a strong, stable neck.
How To Use The Barber (4 Steps)
I use the Fret Barber for every guitar I build because it makes installing the frets easier, gives me peace of mind that they are properly fit, and helps me take my work to a higher level.
Here’s How I Do It Step By Step:
1. Measure The Fret Slots
It all starts with the fret slots. They must be cut precisely and have a uniform width along their entire length. You can cut them by hand (see my fret saw guide for more) or use a power fret slotting system.
Regardless of the cutting method, measuring the width of the fret slots is essential. Even with the same saw, they can sometimes be smaller or wider due to heat, cutting technique, or dimensional change in the wood over time. In my case, they are usually .023″, but I always check to be sure.
2. Set Up The Fret Barber
3. Check The Fit
4. Resize the Fret Tangs
I run all the frets through the Fret Barber. I pull each one through using needle nose pliers, one by one, until all the fret tangs are uniformly sized and ready to install. (I wrap some brown binding tap around the plier jaws to prevent scratching the fret wire beads.)
And that’s it!
With this cool little tool and the four steps I showed you above, you will be ready to add this new level of control and refinement to your next guitar for a straight and stable neck and higher-quality fretwork.
If you have questions or if I can be of any help, just let me know, I’ll do my best to help.


