
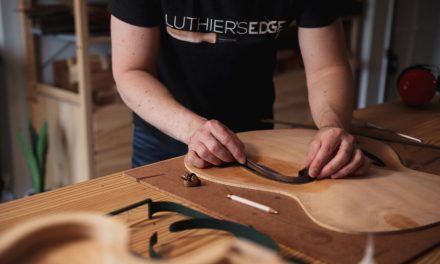
 I was working on my guitars that are in the process of being built today and realized I needed some more shellac to use for basic sealing purposes to protect the wood while I’m gluing and things like that. Shellac is great for so many different things in addition to French Polishing.
When getting shellac ready for French Polishing a guitar, I’m usually decolorizing and dewaxing it to get it just right, so it takes a little time (for all the details on this process, check out my French Polishing Course), but using the tricks in this tutorial can really speed things up. In this case, I need some fresh shellac tomorrow morning so I need to get it ready fast! No problem though, I have a quick way to make shellac with a coffee grinder which I’ll show you in the article below.
Free Download
The Shellac Handbook

")
")
Free Download
The Shellac Handbook
Your Information is 100% Secure And Will Never Be Shared With Anyone. You can unsubscribe at any time. Here’s a link to our privacy policy

The equipment we will need to get our shellac made by morning is pretty basic; a cheap coffee grinder and a cooking scale. Also, to use this method exactly as I do it you’ll need some 4 oz Boston round bottles too. If you don’t have the bottles then use whatever you have on hand and it will be fine.

I’ll be using a super blond flake shellac for this, you can also use the coffee grinder on seed lac, but not on button lac. I destroyed a coffee grinder trying it with the button lac (even after I first crushed it up with a hammer). Maybe a better grinder could handle the button lac, but the blade just bent and was ruined instantly on these cheap grinders. I love this little grinder though, and you’ll see why in a moment.

I put the empty coffee grinder on and zero the scale. Notice how you don’t see a chord in the photo? That’s because this nifty grinder has a feature where the chord winds up inside the base of the grinder. I love this because I can roll it up in there for storage, and also when I put it on the scale I’m not fighting to keep the long chord on the scale surface, it’s all nice and neat. You can see how it goes into the base in one of the photos above.

I pour in my shellac flakes until I reach 1 oz

Then on goes the lid and out comes the chord, and its time for grinding.

I start by pulsing it a little bit to break up the bigger pieces. I take it slow because I don’t want to heat the shellac and make it soften.

Now I see it getting more finely ground and I can hold the button down longer until it’s looking good. It doesn’t matter how fine you make it, we’re just chopping it into smaller pieces so that the alcohol can react with it faster since we want to use this stuff tomorrow.

This is about where I like it, I think I could make it a bit finer ground, but this is good and will fully dissolve in time for me to stay on schedule with my building tomorrow.

I pour the ground shellac into the lid of the grinder to make it easier to pour into my 4 oz bottle.

I place the bottle on the scale and insert a small funnel ( I used a rolled up piece of paper as a funnel for a while before I had this one, it worked fine) and then pour the 1 oz of ground shellac in.

I’m showing this on the scale, but in reality I don’t measure it anymore after I first weigh the shellac in the grinder. I know from experience that the mixture I like is one ounce of shellac in this bottle, and then just fill up the bottle with alcohol, no need to measure. But for the sake of this tutorial and in case you are using a different bottle type or size. You would put it on the scale, pour in the 1 oz of shellac, then zero the scale, and add 3 oz of alcohol to your one oz of shellac.

And here is how it looks after pouring in the alcohol, to the eye it looks like almost a 50% ratio, but really is just under a 3-1 ratio. I think the ground shellac kind of swells a little as the reaction to the alcohol starts working.

Here it is after I shake it up a bit, all done.
Now here is another tip to help ensure that it will be ready in time. I take the bottle and put it in my pocket. I first put it in there right side up (just be sure the lid is on tight). I go about my work and as I walk around it is agitating the mixture. As a bonus my body heat brings it up to 98 degrees which also speeds the process further. Every so often I take it out and flip it over and then put it back in my pocket only upside down this time to keep it from caking up on one side or the other.
Tomorrow I can cut this down to a 1 lb cut or use it like it is depending on what I’m using it for. This whole process only took a few minutes and then I’m back to work making sawdust and woodchips as usual.


Hey Tom, where did you get that great idea for using a coffee grinder to speed up shellac making?
Craig
Hi Craig,
I think I learned it from my French Polishing teacher Eugene Clark. He had a ton of cool tricks like that, many of which I share in my Online French Polishing Class
Tom