
In this article, I’m going to tell you about a simple tool that radically changed the way I work, accelerated my growth as a luthier, and continues to help me build better guitars to this day.
It’s called a Hacklinger caliper (or magnetic thickness caliper).
With a Hackling caliper, you essentially have a form of X-Ray Vision, which enables you to:
- Measure the thickness of guitar tops and backs AFTER the guitar body is assembled
- Measure finished instruments by other luthiers to learn how plate thickness affects the responsiveness and tonality of the guitar.
I can’t remember how I first learned about the Hacklinger caliper, but I definitely remember the day when I first realized its true potential…
X-Ray Vision & Seeing Beyond The Numbers
It was circa 2000, and one of my clients brought in a beautiful 17″ D’Aquisto archtop for me to work on. At that time, I had only made about ten guitars, so it was a really big deal to get to play and study such a legendary instrument.
The D’Aquisto guitar was super lightweight and had a very acoustic voice. I played and studied it closely, taking notes on the bridge size, tailpiece, scale, and everything else I could imagine.
As I was about to put it back in the case, I remembered the Hacklinger caliper I had recently gotten to help me as I did the final graduation of my guitars after the body was glued together and decided to try it out.
I used it to measure the thickness of the top and back plates at different points, creating a very crude map of the graduations. I didn’t know then how important and pivotal this would be, so I grabbed a scrap of paper and quickly scribbled some measurements on it, as you can see in the photo of that old paper below.

Not long after that, several other amazing guitars came through my workshop, including some made by Benedetto, D’Angelico, D’Aquisto, Martin, Taylor, SGC, Gibson, and others.
I used the Hacklinger caliper to measure the graduations of the guitar tops and backs, listened very closely to how each sounded and responded, and took detailed notes.
With my notes on the sound AND the graduations, specific trends emerged about how different thicknesses and graduation treatments correlated with the guitars’ voice and feel.
The actual measurements themselves don’t matter much; The goal is to learn how changing the thickness and graduation affects the voice of the guitar.
If you don’t have access to guitars like those, don’t worry; this next part is where the real fun begins.
Building Your Library & Accelerating Growth
Up until now, we talked about taking measurements and making observations. Those are great, but they are just a theoretical backdrop. The magic happens when you begin testing your theories on your own guitars.
The Hacklinger caliper comes in clutch for this part, too.
In this stage, you can:
- Formulate what you want the guitar to sound like.
- Lay out a plan based on your previous research to get that sound.
- Take notes on your observations and measurements as you build it.
- Finish up with a final set of notes on how the guitar turned out.
Repeating this process over time, you’ll build a valuable library of notes and measurements from your guitars to reference as you work.
The exciting part is that the improvement of each guitar becomes almost exponential because each new guitar draws from the lessons learned through all of your previous guitars.
If you need a specific sound or responsiveness, you can look through your notes from past guitars and see what you did and how they turned out.
You can use that data to formulate a new hypothesis and strategy and dive into your next guitar-building journey with confidence and excitement.
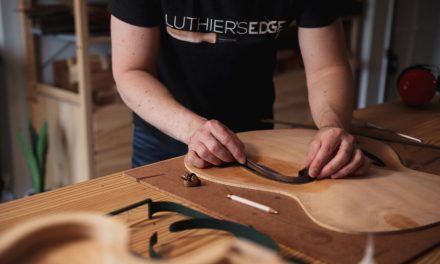
How To Use the Hacklinger Magnetic Thickness Caliper
One reason I love this tool so much is how easy it is to use.
It has two main parts:
The upper tube that contains a magnet and a measurement marker.
The second is the small magnet that goes inside the guitar.

Here are the basic steps
- Place the magnet inside the guitar so that it is magnetically connected to the upper tube.
- Slide it to the location you want to measure.
- Pull up on the top handle until you hear a click.
- Look at the indicator to see the thickness measurement.
It’s fast and low-tech tech, so I can take measurements quickly, get back to work without disrupting my concentration, and stay in the zone.
Final Thoughts And Links
Recently, the original Hacklinger caliper patent expired, and a new version of this magnetic thickness caliper is available at a much more affordable price. The new and more affordable version works great and makes adding this fantastic tool and its superpowers to your arsenal much more feasible.
For those who prefer a more tech-based approach, you can also check out a digital version that connects to your computer called the MAG-ic Probe Thickness Gauge.
You can also check out my Ultimate Guide To Calipers for more on all the different calipers I use and recommend.
Whether you get a Hacklinger caliper or not, I encourage you to listen to and study as many guitars as possible, made by others or your own.
Take the time to write down your observations and notes so you can fully utilize and leverage what you learn from each one, propelling you forward and helping you reach deeper levels of understanding and higher levels of excellence as you craft each new guitar.


