
Basics Of Headstock Binding
 If done properly, adding wood binding and purfling to the headstock of your guitar can add a wonderful touch of elegance and refinement to your design. Additionally, I feel a bound headstock helps to tie the design of the neck/headstock portion of the guitar together visually with the body since they are both bound in similar ways.
Binding the headstock is another opportunity we have as artists to control our design and craft these elements in order to give the instrument the desired look we have in mind. Of course, there are times when an unbound headstock is just the right touch as well.
When the design does call for binding on the headstock it is important to have the proper skill set and do the necessary planning to execute the design flawlessly. A poorly executed headstock binding job will most likely not have the intended effect since it could make the guitar look less elegant and refined if things aren’t done properly.
You may be thinking of trying a bound headstock for the first time or maybe you have done it many times before, but if you’re like me then you might be on a similar quest to keep growing as a luthier and learning to build each guitar better than the last.
I feel that the binding treatments on the guitar and the way they are executed plays a very critical role in how the final outcome will be perceived by players and potential customers. So I have personally put in many hours and years into developing my methods to ensure that my binding work is as clean and precise as can be.
I have much to say and share with you on the subject, so much so that I created a 44 part video course where I demonstrate every step and trick and tool I use in building my own guitars. You can learn more about that here: The Art Of Headstock Binding.
In this article, however, we have to begin at the beginning. So my goal here is to share some basic but very important points that I hope will help you regardless of the level of experience and background you have behind you in your lutherie career.
5 Keys To Better Wooden Headstock Binding

1 Leave Extra Length For Leverage
Be sure to leave enough extra wood on either side of the bend to give you leverage and to allow you to heat the longer wood fibers and work that steam along the length of the piece as you gently rock it back and forth on the bending iron or pipe. Especially in tight radii, you need a place to firmly grip the wood binding piece and to let that steam soften the glue that hold the wood cells together to allow for bending without breaking.

2 Work From A Larger Radius To Smaller
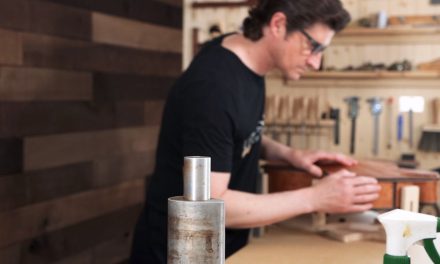
Always start your ben no matter how tight the curve should be, by steaming the wood on the widest part of your bending iron. That initial steaming is helping to get the moisture into the fibers and open them up to receive more moisture. Then step down to a slightly tight curve like the front side of the bending iron. Next, you might go to a smaller radius extension (like the one Stew Mac sells for mandolin). Then when that is bent nicely you’re ready to go to a small radius like the 1/2″ tube I am bending on in the photo above. Going for a tight curve too fast may cause the wood to break. think of the fibers as long straws and work that moisture in there all the way up and down the piece.

3 Not Too Wet & Not Too Dry
Look for the ideal amount of moisture to use when bending wood. Each piece of wood and species of wood is different and will require a different approach. Don’t dry out the wood too much and don’t get it too wet. I start with a small amount of water that I put on with a paper towel. Then as I begin working on the hot iron I am testing to see how it is reacting and making adjustments accordingly. Some types of ebony and rosewood have plenty of resin and require very little water and need a lot of heat while other woods like maple or mahogany might need more water. Flammed woods are different oo and some types like big leaf maple when over wet will many times break along the flamed grain pattern. Developing a keen sensibility to help guide you as you work to make adjustments to the moisture accordingly will greatly improve you wood bending work and make it far more enjoyable too.

4 Don’t Over Heat The Wood
Don’t overheat the wood, If you do, the wood cells (or maybe the glue that hold them together called lignin) hardens and becomes brittle. Instead, keep the temperature of the bending iron a little lower (just hot enough to make steam – 300 degrees F works for me most of the time) and pay close attention to how the wood feels and how fast it drys out when you put it on the iron. When I started I only tried not to burn the wood because I didn;t want to leave a mark on it, but now I realize that long before a visible burn shows up on the surface the cell structure within the wood is damaged and becomes less able to bend properly and starts to get brittle. I use a surface thermometer that I put on top fo the bending iron as you can see int he photo above to gauge the temperature and then adjust it accordingly as I work to get the best results for the woods and the application.

5 Go For the Perfect Fit
Take the time to get the fit perfect. Some parts of guitar building require a glue joint with some tension built in, but this is not one of them. I want my binding to be easy to install and I want it to stay put for many years without popping loose or moving around. Making sure the fit is perfect so the wood can be relaxed in the binding channel is the key to a clean and stress-free binding job ( no stress in the joint and no stress for me while installing it ).
If So You’ll Love The Full Video Course:


knowledge stored in a silo just ferments thanks for cultivating yours. best wishes, john
Thanks John!