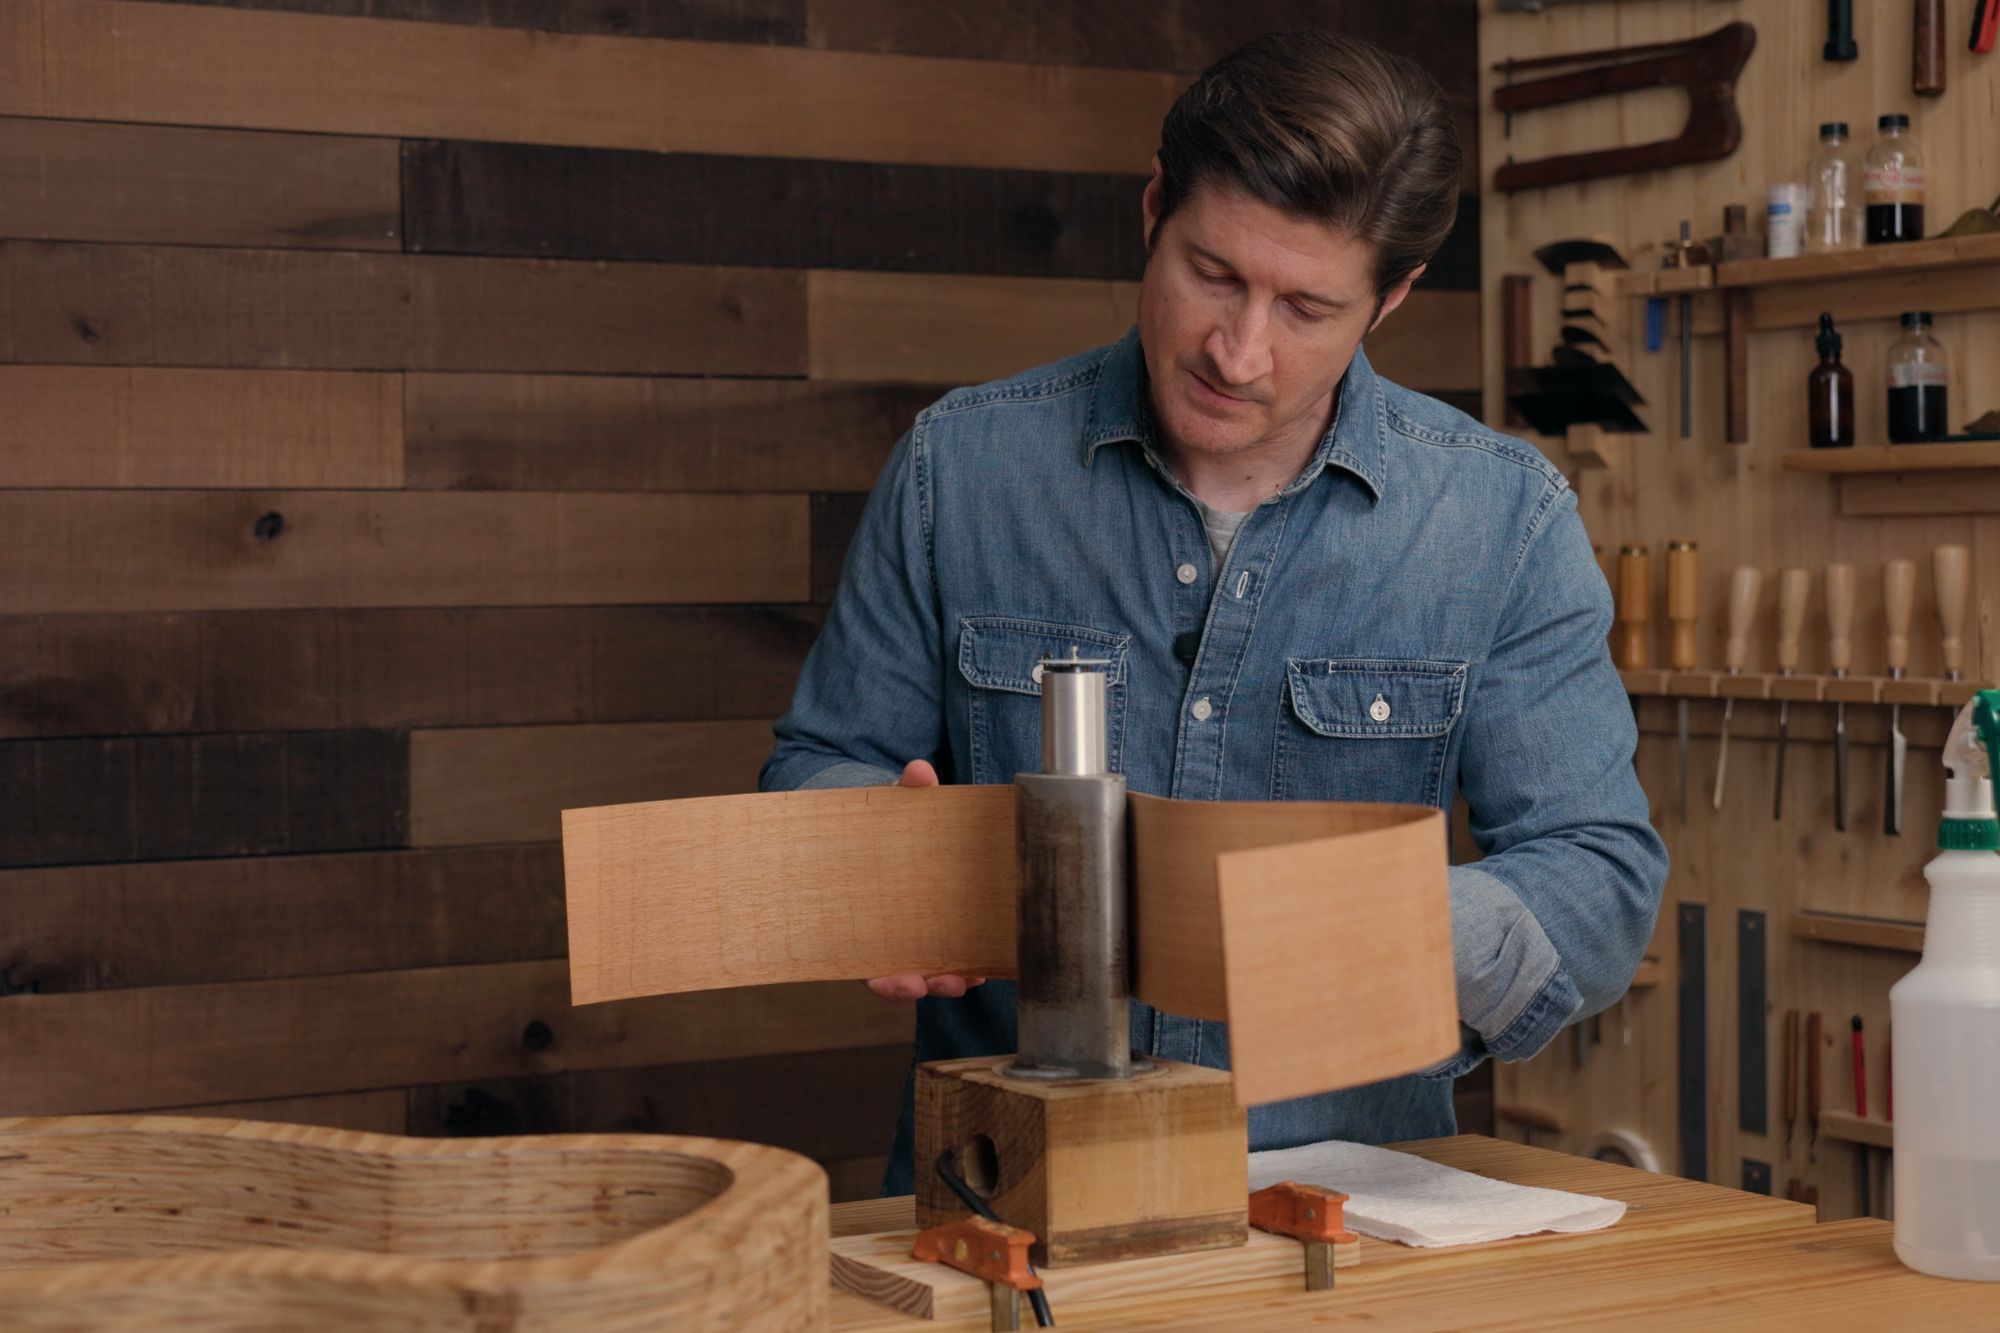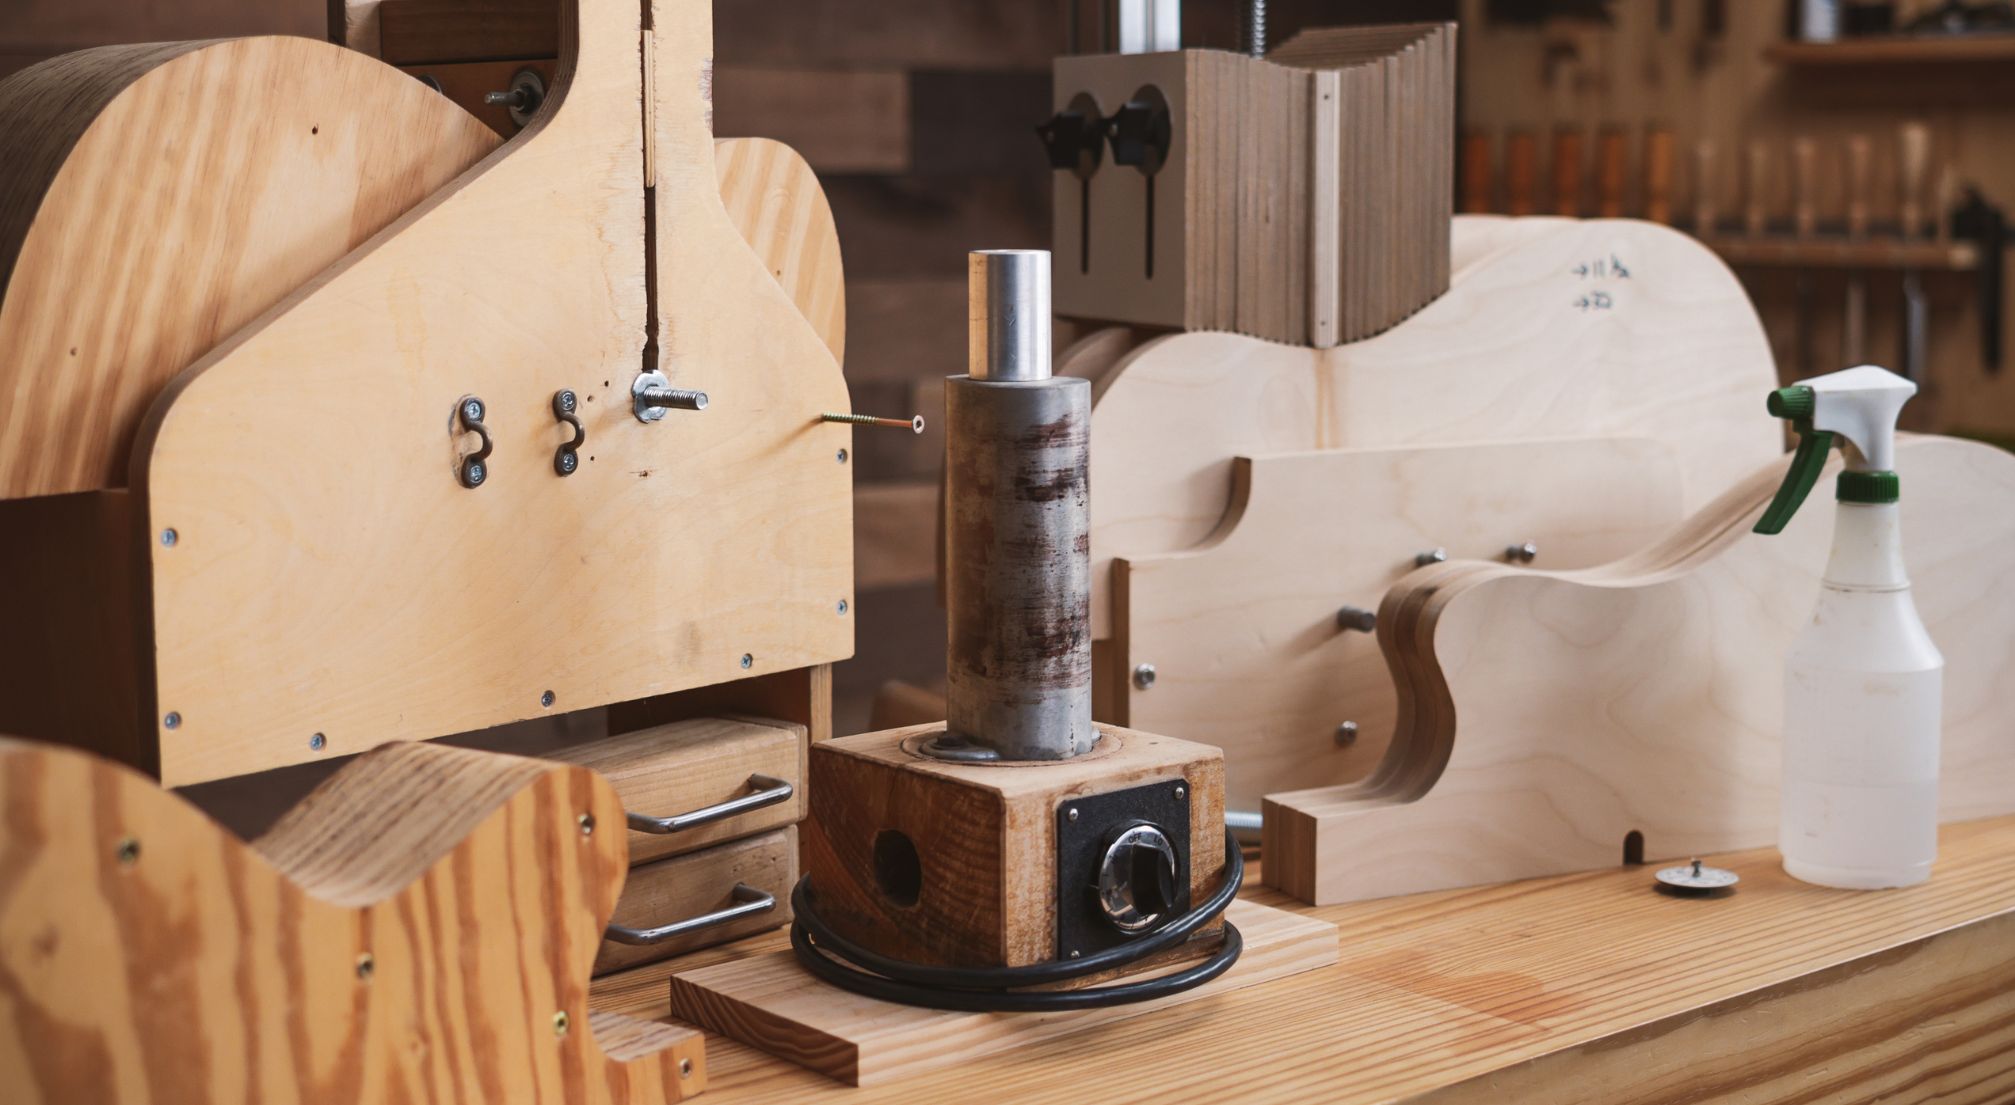
There’s a rhythm to side bending—a balance of heat, moisture, and controlled pressure. Once you learn to feel and understand how the wood moves and responds, side bending becomes a deeply enjoyable and intuitive process.
Of course, your technique is crucial, but the right tools can also make a big difference—helping you learn faster, get more consistent results, and reduce the risk of costly mistakes.
- But which guitar side bending tools are actually worth investing in?
- Which ones will fit your skill level and the kind of guitars you build?
In this guide, I’ll break down the guitar side bending tools I’ve used over the years, including:
- The pros and cons of each
- The Tools I recommend and rely on today
- And even some solid budget-friendly alternatives
So you can find the best setup for your needs and set yourself up for side bending success.
And when you’re ready to go beyond just the tools—removing the guesswork, eliminating frustration, and turning side bending into an enjoyable, artistic process that delivers consistent, pro-level results—check out my step-by-step video course, The Art of Guitar Side Bending.
But before you can master the process, you need the right tools.
So, let’s start with the most fundamental one for developing your bending skills: The Side Bending Iron.
Table Of Contents
Guitar Side Bending Irons
I see the bending iron as the cornerstone of side bending because it gives you direct, hands-on feedback from the wood. Unlike a bending machine, which automates much of the process, a bending iron teaches you to feel the wood’s resistance, recognize when it’s ready to bend, and apply just the right amount of pressure.
Mastering this skill builds the sensitivity and control you’ll rely on—no matter what side bending tools you use in the future.
And like any tool, not all bending irons are created equal.
The right one can make learning easier and more enjoyable, while the wrong one can lead to frustration and wasted wood.
Here are the top guitar side bending irons I recommend, along with key insights on each to help you find the best fit. Choosing the right bending iron is the first step toward developing the hands-on skill and sensitivity that will improve your side bending results for years to come.
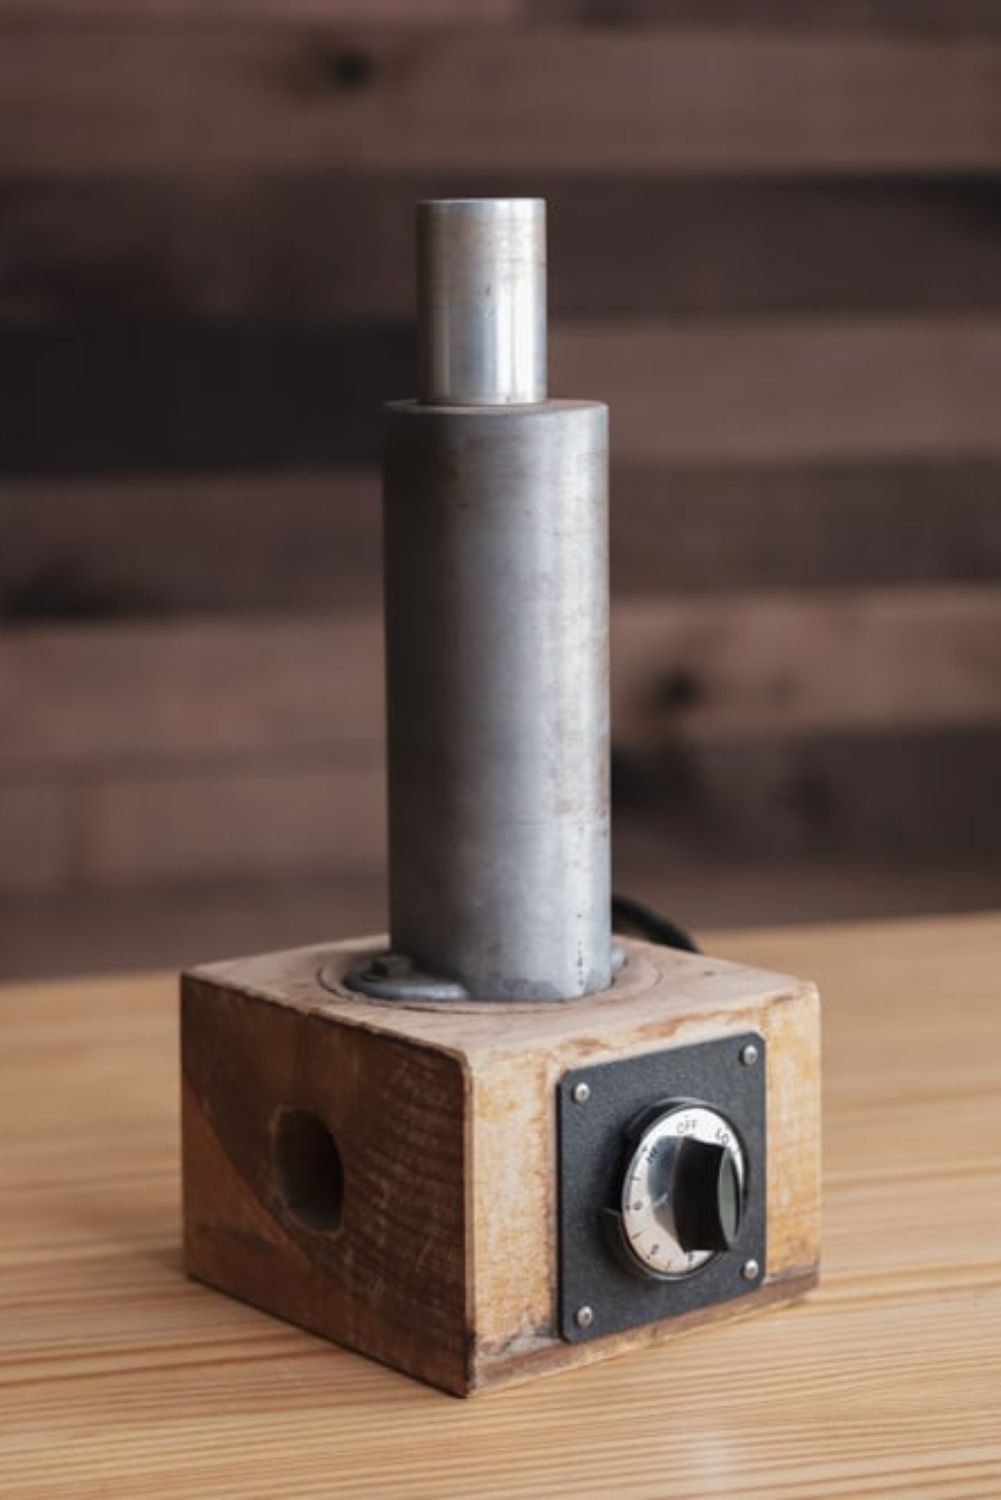
StewMac Bending Iron
I’ve been using this bending iron since I built my first guitar back in 1998. With StewMac’s lifetime warranty, there’s a good chance it’ll still be with me when I make my last guitar—now that’s what I call a quality tool!
My favorite features of the StewMac Bending Iron
- Versatile Mounting Options: The base allows you to mount it in both vertical (my preferred setup) and horizontal positions, offering flexibility depending on your workspace and bending style.
- Solid Aluminum Construction: The aluminum body holds heat evenly and maintains a consistent temperature, which is crucial for achieving smooth bends without scorching the wood.
- Thoughtful Shape: The bending iron features curves that are perfect for guitar sides, including a tighter radius ideal for smaller instruments and binding work.
- Bending Iron Extension: While I don’t use the bending iron extension much for side bending, it’s a must-have for bending wood binding. The fact that StewMac includes this option is one of the reasons I’ve stuck with this bender—it’s simply a great all-in-one tool.
This is a fantastic tool that will last a lifetime, and it’s the one I use in my side bending course. But as you’ll see in the next sections, there are plenty of other options out there to consider.
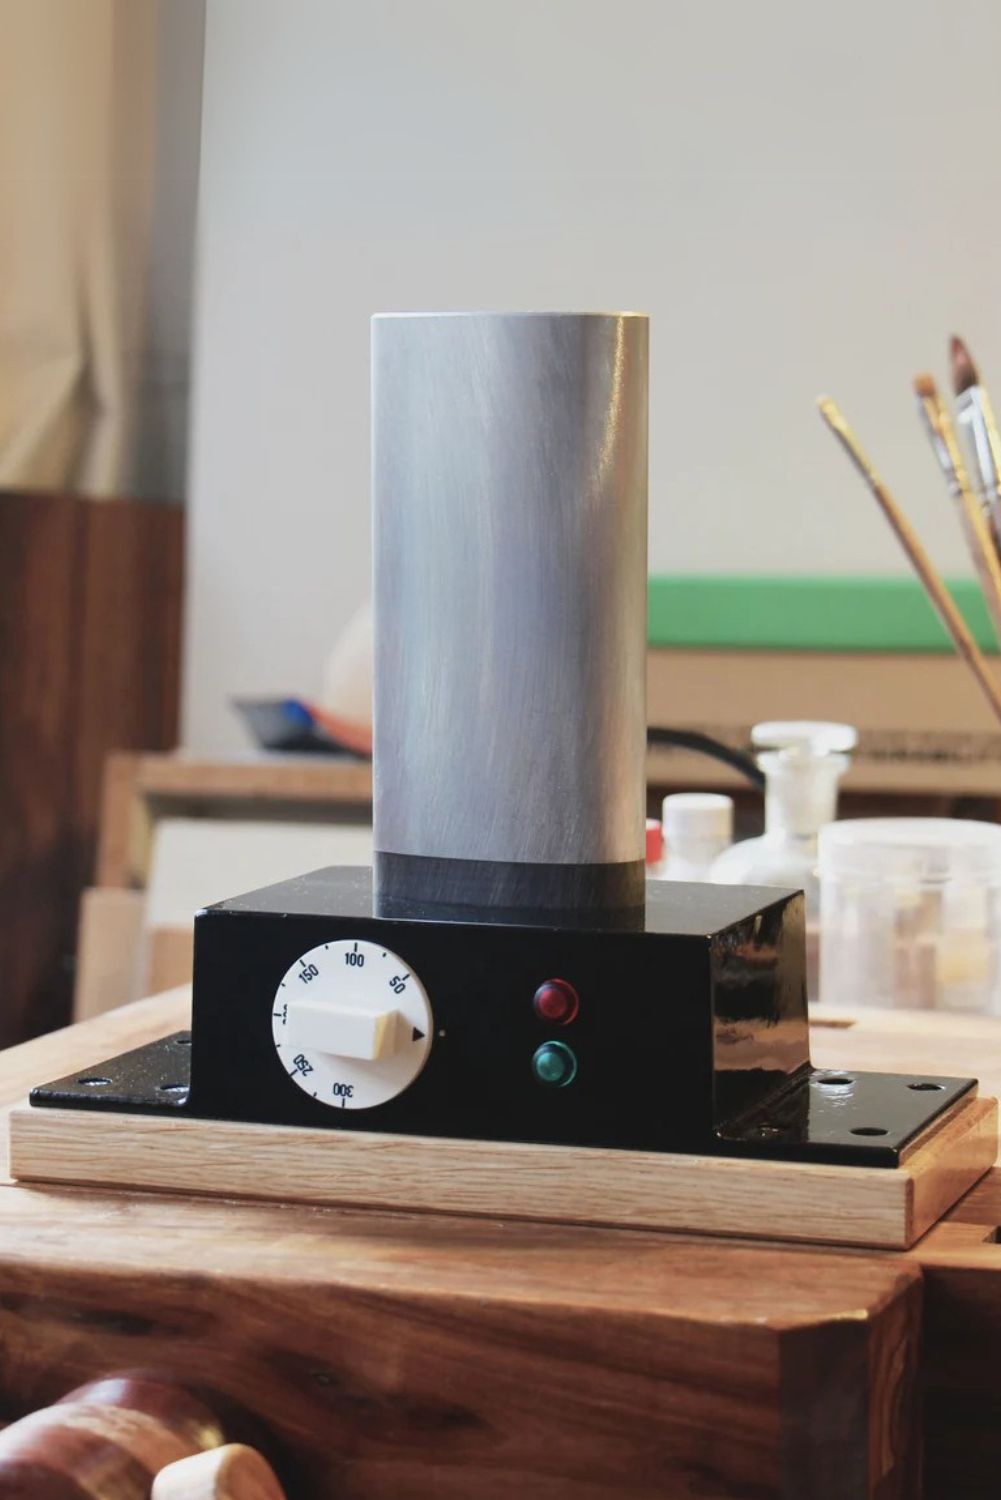
Luthier’s Bench Rib Bending Iron
The Luthier’s Bench Rib Bending Iron is a tool that has intrigued me for some time. I haven’t pulled the trigger yet because I don’t really “need” it, but there’s enough about it that catches my interest, and I think one day soon I’ll give it a try.
My favorite features of the Luthier’s Bench Bending Iron
- Flatter Shape: The side of this iron has a flatter curve, which I believe would be perfect for starting bends and finessing more subtle curves like those in the lower bout. This unique shape could make handling certain parts of side bending much more intuitive.
- Power & Ready Indicator Lights: It might sound like a small detail, but for me, it’s a game-changer. I’ve wished for a power indicator light on my bending iron for years. As someone who tends to get deeply focused when working, I can easily forget to turn off the iron, and having a simple light would help prevent a potential mishap.
- Wide Base for Stability: The wide base, with its wings for clamping, is ideal for anyone who prefers bending in the upright position, like I do. I’ve even added a modification to my StewMac iron to make clamping easier, so having a base that’s ready for this setup is a big plus. (However, if you typically bend in the horizontal position, this feature might not be as useful for you.)
One downside is that this iron lacks the smaller diameter extension piece that the StewMac model offers—a crucial feature for my binding work.
Despite that, there are some great aspects to this bending iron, and I’d be interested to see how the different metal options affect the bending process. (I think the bronze looks really nice)
Next, we’ll explore a few more bending iron options for anyone on a tighter budget.
Other Bending Irons To Consider
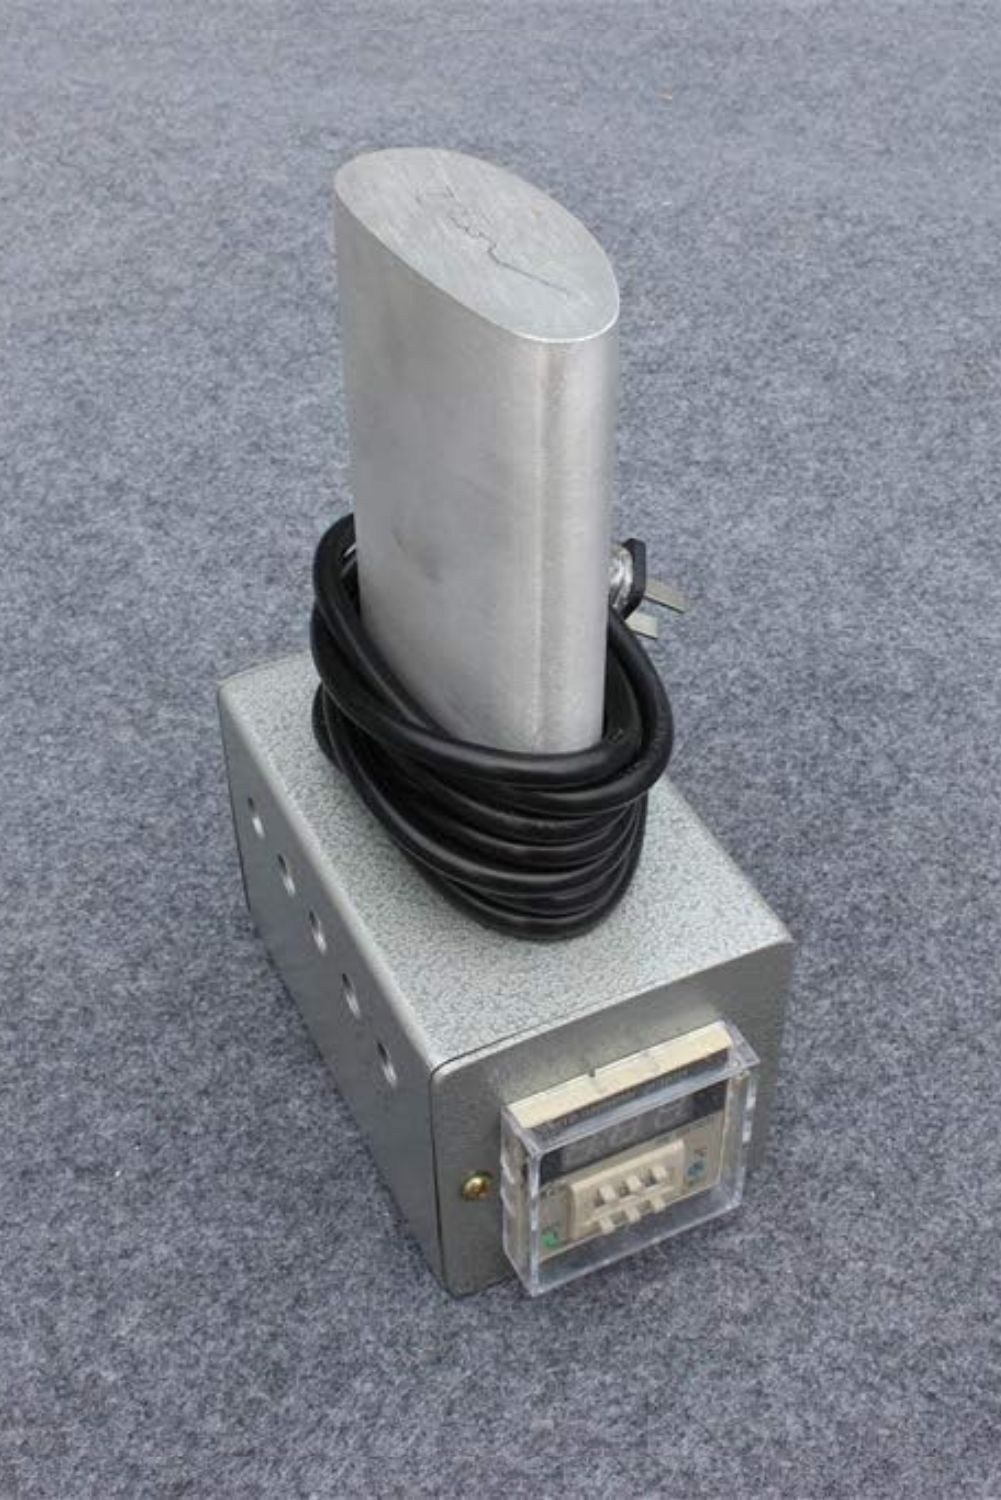
If you’re on a tighter budget, there are several other side bending irons available that might be a good place to start. I haven’t tried all of these myself, and while they don’t come with a lifetime warranty like the StewMac Bending Iron, they could be a great option if the higher-end tools are out of reach. Just be sure to check their safety features to ensure they’re electrically sound and safe for use.
My favorite features of the budget-friendly bending irons
- Affordable Price: These irons are inexpensive enough that you could use one until it wears out and then simply replace it without breaking the bank.
- Digital Temperature Control: While I can’t vouch for the accuracy, having the ability to set a specific temperature is a nice feature. Typically, I go by feel and how the wood responds, but I sometimes use a surface thermometer for more precision, which I demonstrate in my side bending course.
- Included Bending Strap: Some of these models come with a bending strap, which can be quite handy. Many luthiers use bending straps for all their bends, as they help support the wood and maintain moisture. I don’t always use a bending strap, but if you do, this could be a convenient bonus.
Whichever bending iron you choose, remember to take your time, start with practice pieces, and let the wood guide you.
Whether you’re using a bending iron or a bending machine, the goal is to build an intuitive understanding of the wood’s limits and possibilities.
If you want to see these tools and techniques in action and get my personal help and guidance, I invite you to join my step-by-step side bending course.
In the course, I take you through every detail—from selecting and preparing the wood to setting up your tools and mastering the techniques for achieving those perfect bends—so you can approach each guitar you build with confidence and beautiful results.
Guitar Side Bending Machines
While a bending iron allows you to develop that all-important tactile connection with the wood, side bending machines bring a new level of precision and efficiency to the bending process.
They make bending sides smoother, faster, and more consistent—especially when you’re working with a batch of guitars or when consistency is key.
In this section, I’ll share insights from over twenty years of experience using side bending machines, compare different models, and highlight their pros and cons.
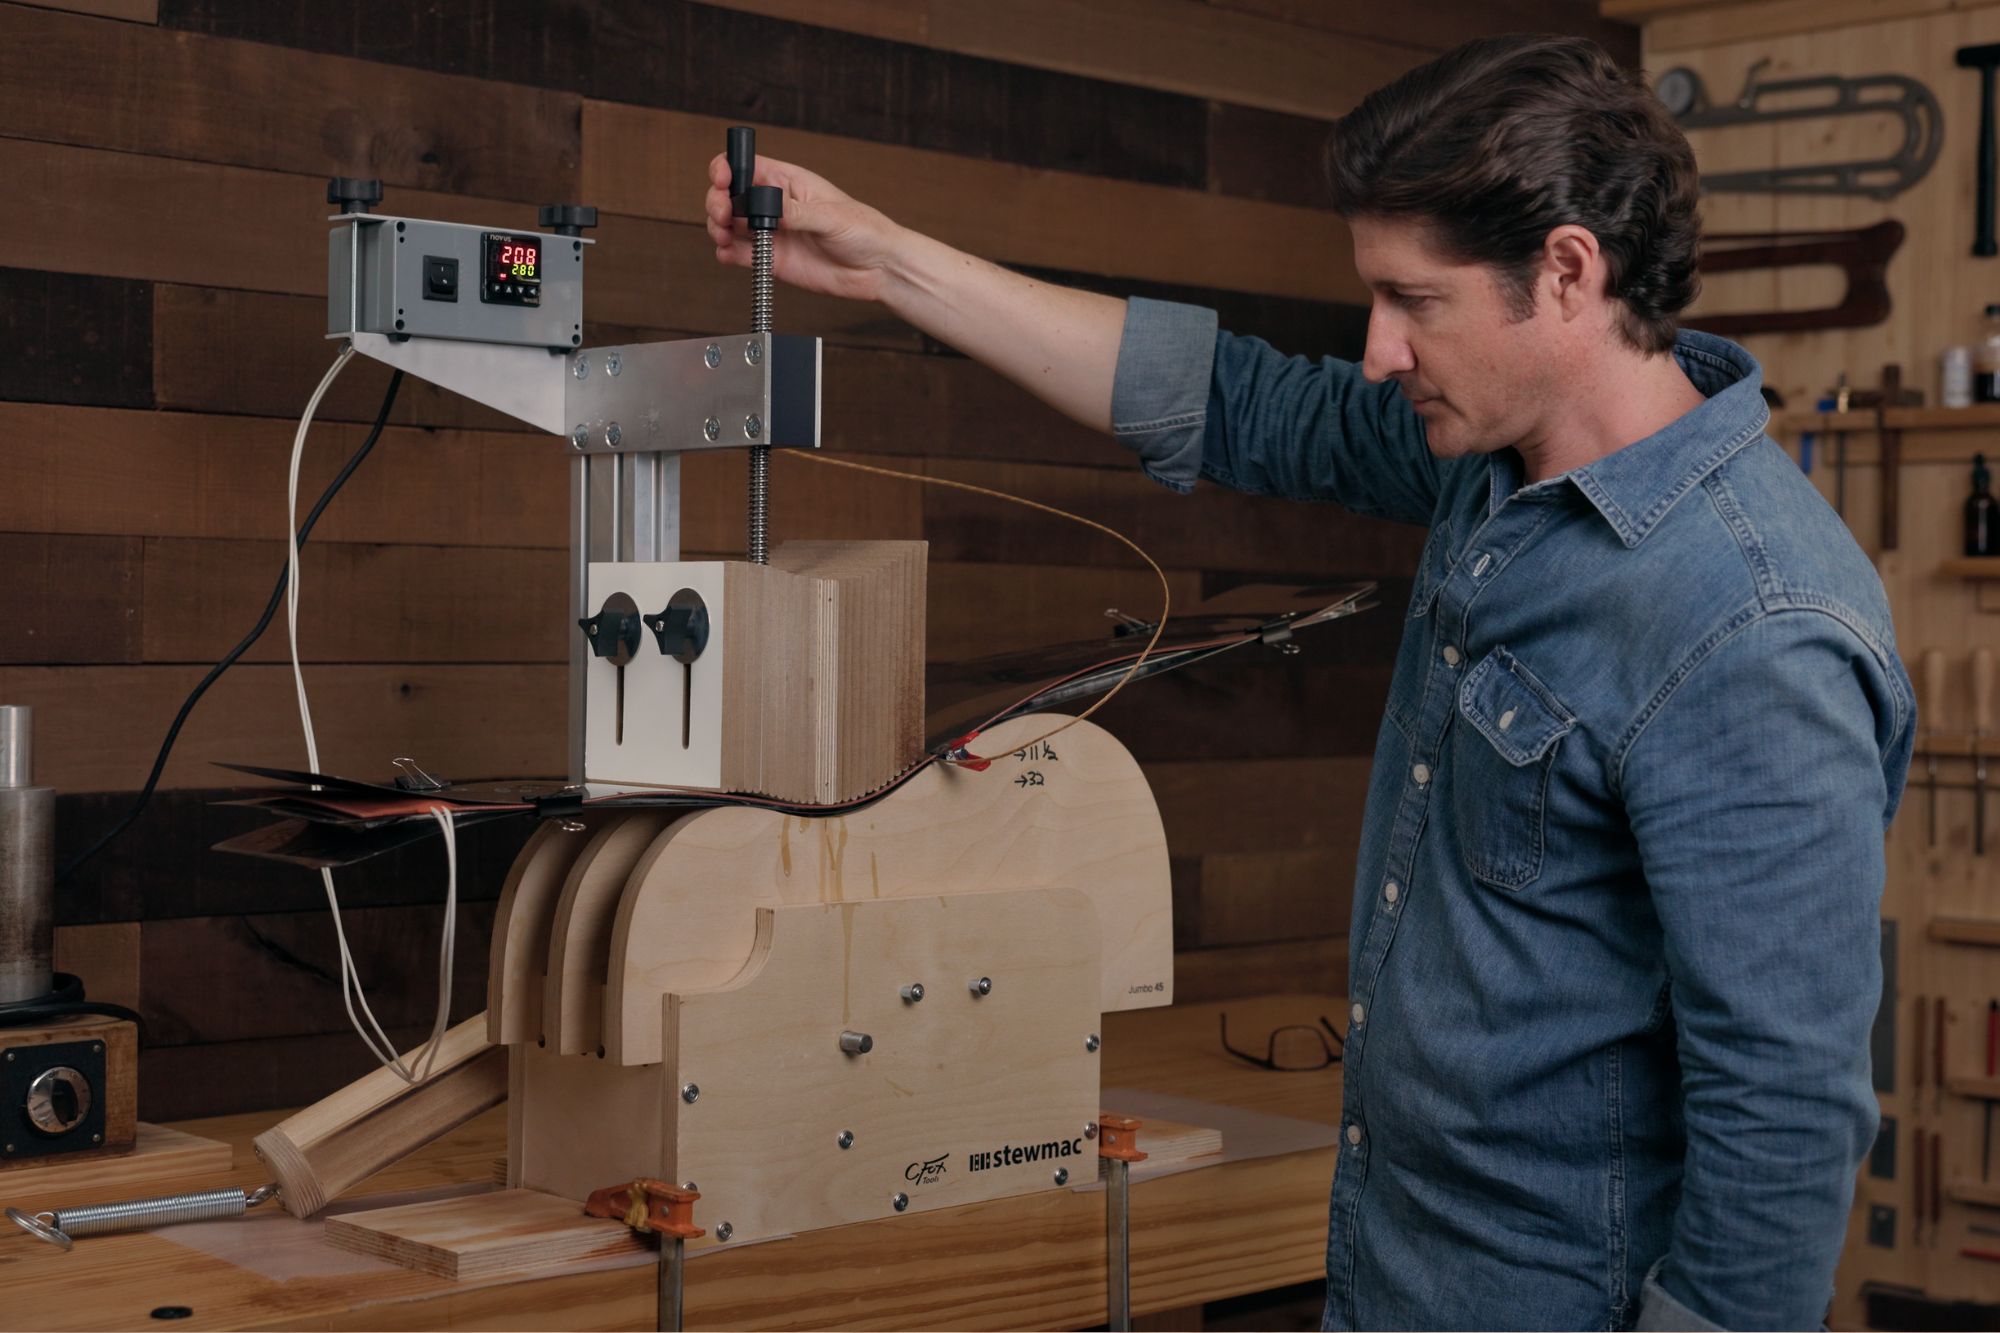
What Is a Side Bending Machine?
A side bending machine is a simple system that uses forms, heating blankets, metal slats, and spring-loaded cauls to heat and bend the guitar sides.
Unlike a bending iron, which relies on your ability to shape the wood by hand, a side bending machine provides more consistent pressure and even heat to minimize breakage and produce super smooth and consistent bends.
Here’s a quick breakdown of the main components:
Body Forms
These hold the guitar sides in the desired shape. The forms are specific to the guitar model—for example, a dreadnought mold will be different from an OM mold.
Heating Blankets
These apply consistent heat across the entire length of the guitar side, helping the wood become pliable for bending.
Metal Slats
Metal slats, usually made from stainless steel, are placed on either side of the wood to ensure even heat distribution and protect the wood from scorching.
Spring-Loaded Cauls
These help apply even pressure on the wood as it bends, ensuring a smooth, consistent shape.
Together, these components make side bending machines a fantastic option for producing precise bends, especially when you need consistency across multiple guitars and body sizes.
How to Choose a Side Bending Machine – Top Three Options
When it comes to side bending machines, there are more options than ever. I’m going to divide them into what I see as the top three options: the Stewmac Side Bending Machine, the older Fox Style Side Bending Machine (Fox Classic), and building your own side bending machine from blueprints.
Each option has unique strengths and considerations, depending on your budget, experience, and specific needs. Let’s compare them to help you decide which one is best for your workshop.
We’ll start with my current favorite bender.
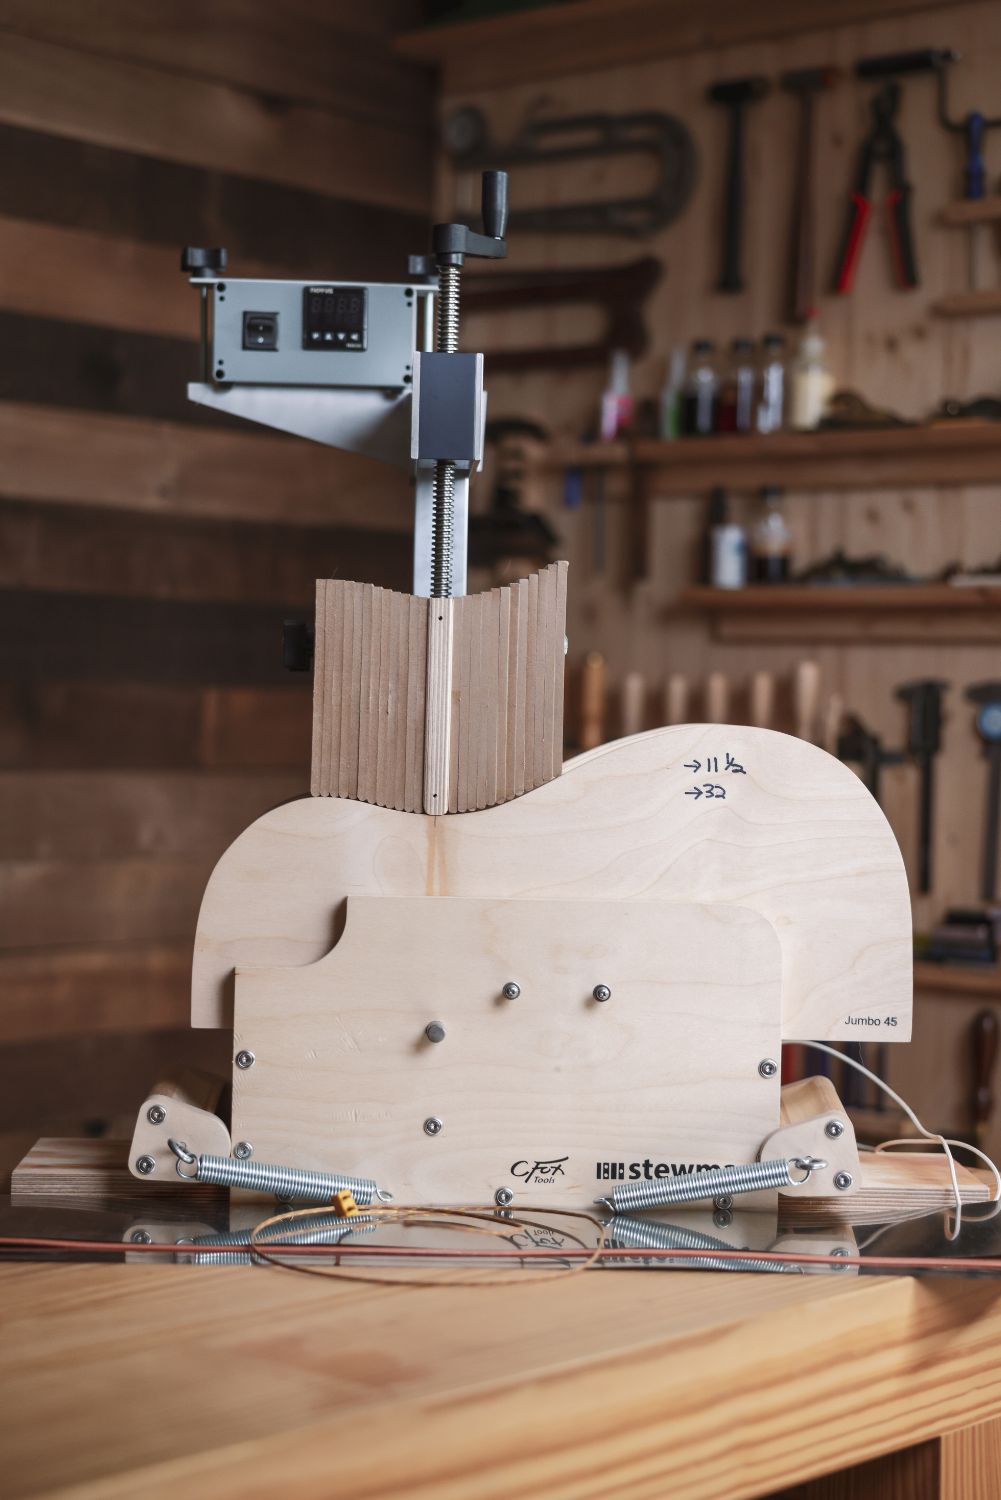
1 – The Stewmac Side Bending Machine
The Stewmac Side Bending Machine is a modern, premium option with a range of features designed to make the bending process more efficient and user-friendly. Stewmac worked with Charles Fox, the inventor of the side bending machine, to address many of the limitations found in older designs and provide a more streamlined and reliable experience and better results.
Check out the video I made on How to use the Stewmac side bender here
Pros of the Stewmac Side Bending Machine
- Improved Waist Clamping Caul: The Stewmac bender features a large, exposed waist clamping caul that applies even pressure across the entire waist area. This helps prevent warping and makes the whole process smoother.
- Ease of Use: With easy-to-use tightening knobs and an open design, the Stewmac bender eliminates the need for a wrench and allows for more convenient adjustments.
- Open Design for Safer Removal: The caul is open on one side, making it easier to remove the bent sides without damaging fragile areas like cutaways.
- Temperature Controller: The integrated temperature controller allows for precise heat management, reducing the risk of overheating or burning the wood.
- Smooth Press Screw Mechanism: The press screw is stable and smooth, making it easier to apply controlled pressure during the bending process.
- Simplified Bending Form Design: This machine has a simplified side bending form system that is easy to change and customize.
Cons of the Stewmac Side Bending Machine:
- Higher Cost: The Stewmac bender is the most expensive of the three options, which might be prohibitive for those just starting out or on a budget.
Learn More About The Stewmac Bending Machine
For me, it is well worth the extra cost, but if the price is out of your range, don’t worry; let’s take a look at the next two options.
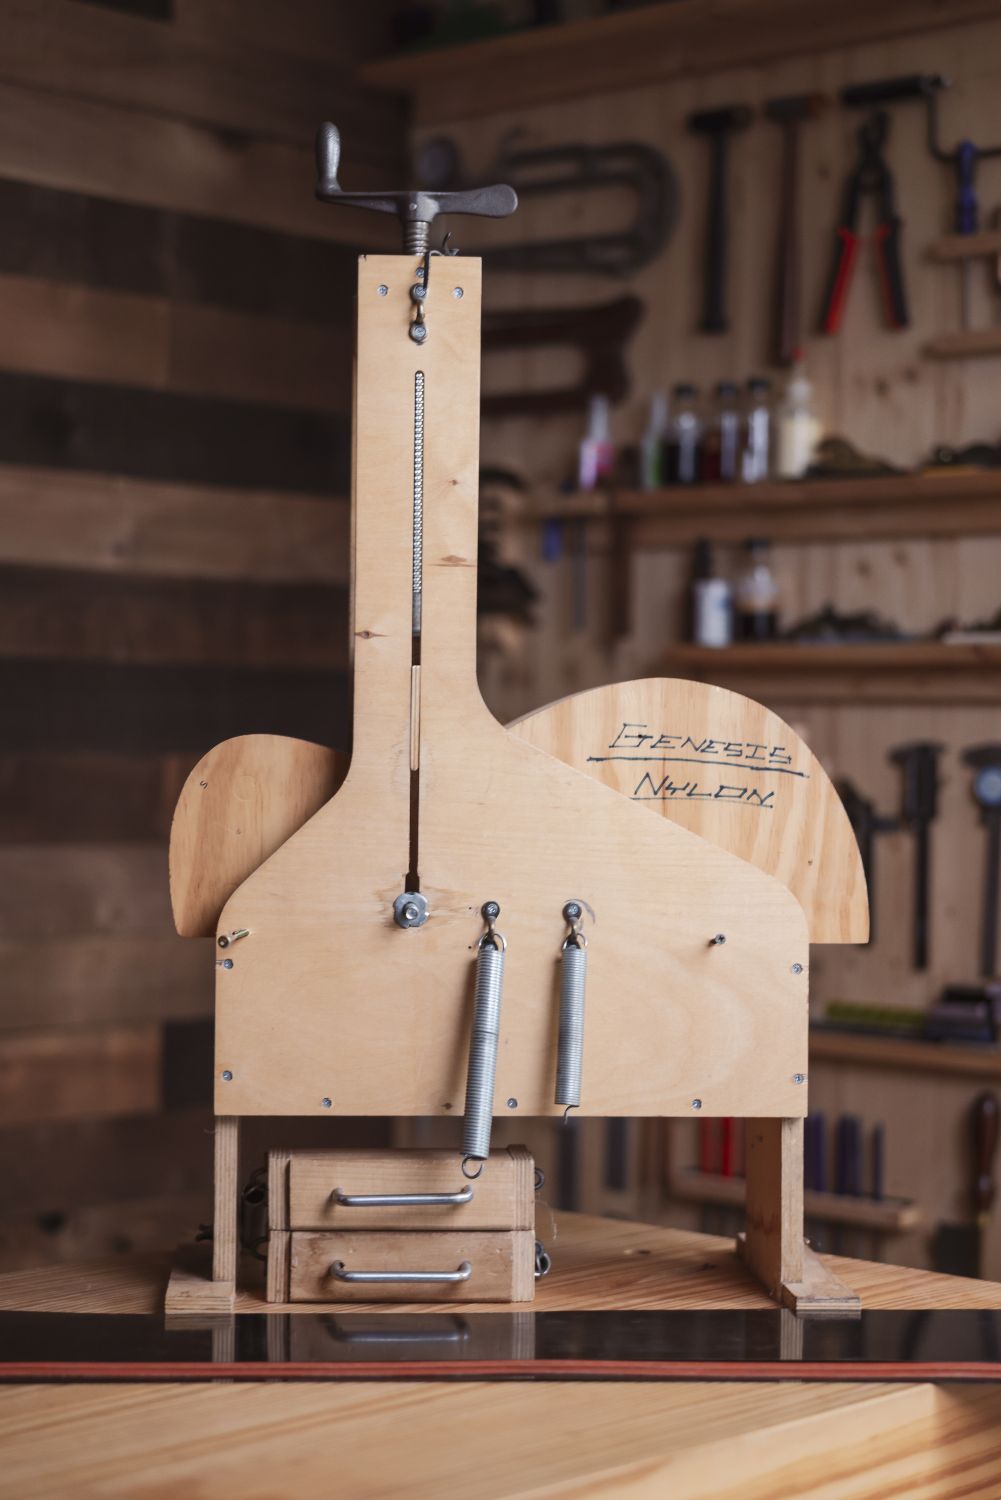
2 – Older Fox Style Side Bending Machine (Fox Classic)
The older Fox Style Side Bending Machine is a classic design that luthiers have used for decades. It’s a more budget-friendly option than the Stewmac. Though it lacks many of the improvements and upgrades of the newer version, it can still produce excellent results if you learn to use it correctly.
Pros of the Fox Side Bending Machine:
- Affordability: This style of bender is more affordable than the Stewmac model, making it an attractive option for those on a budget.
- Proven Performance: This classic machine has a long-standing reputation for getting the job done. It’s reliable and consistent, especially for those familiar with its operation.
Cons of the Fox Side Bending Machine:
- More Difficult Adjustments: Adjusting the Fox bender is slightly fiddly and requires a wrench, which can be cumbersome and slow down the bending process.
- Closed Waist Caul: The waist clamping caul is narrower and enclosed, making it more challenging to position and remove the sides. This can be especially tricky when working with delicate woods and cutaways.
- More Difficult Side Removal: The design of the Fox bender can make removing the bent sides difficult, increasing the risk of accidental damage, particularly with more fragile pieces.
- No Temperature Control: Most versions of this bender do not include a digital temperature control (but can be added later).
Some Bending Machines Of This Style To Check Out:
I used a machine like this to bend sides for over 100 guitars. Even though it isn’t perfect, with the right technique, you can definitely make it work and get great results.
3 – Build Your Own Side Bending Machine
Building your own side bending machine can be an excellent option for those who want to save on costs. There are blueprints available online, and with the right materials and skills, you can create a functional side bending machine tailored to your needs.
Pros of Building Your Own Side Bending Machine:
- Cost-Effective: Building your own machine is often the most affordable option, especially if you already have some of the necessary tools and materials on hand.
- Customizable: You can customize the machine to fit your exact needs. Whether it’s adjusting the size, choosing specific materials, or adding features, you have complete control over the design.
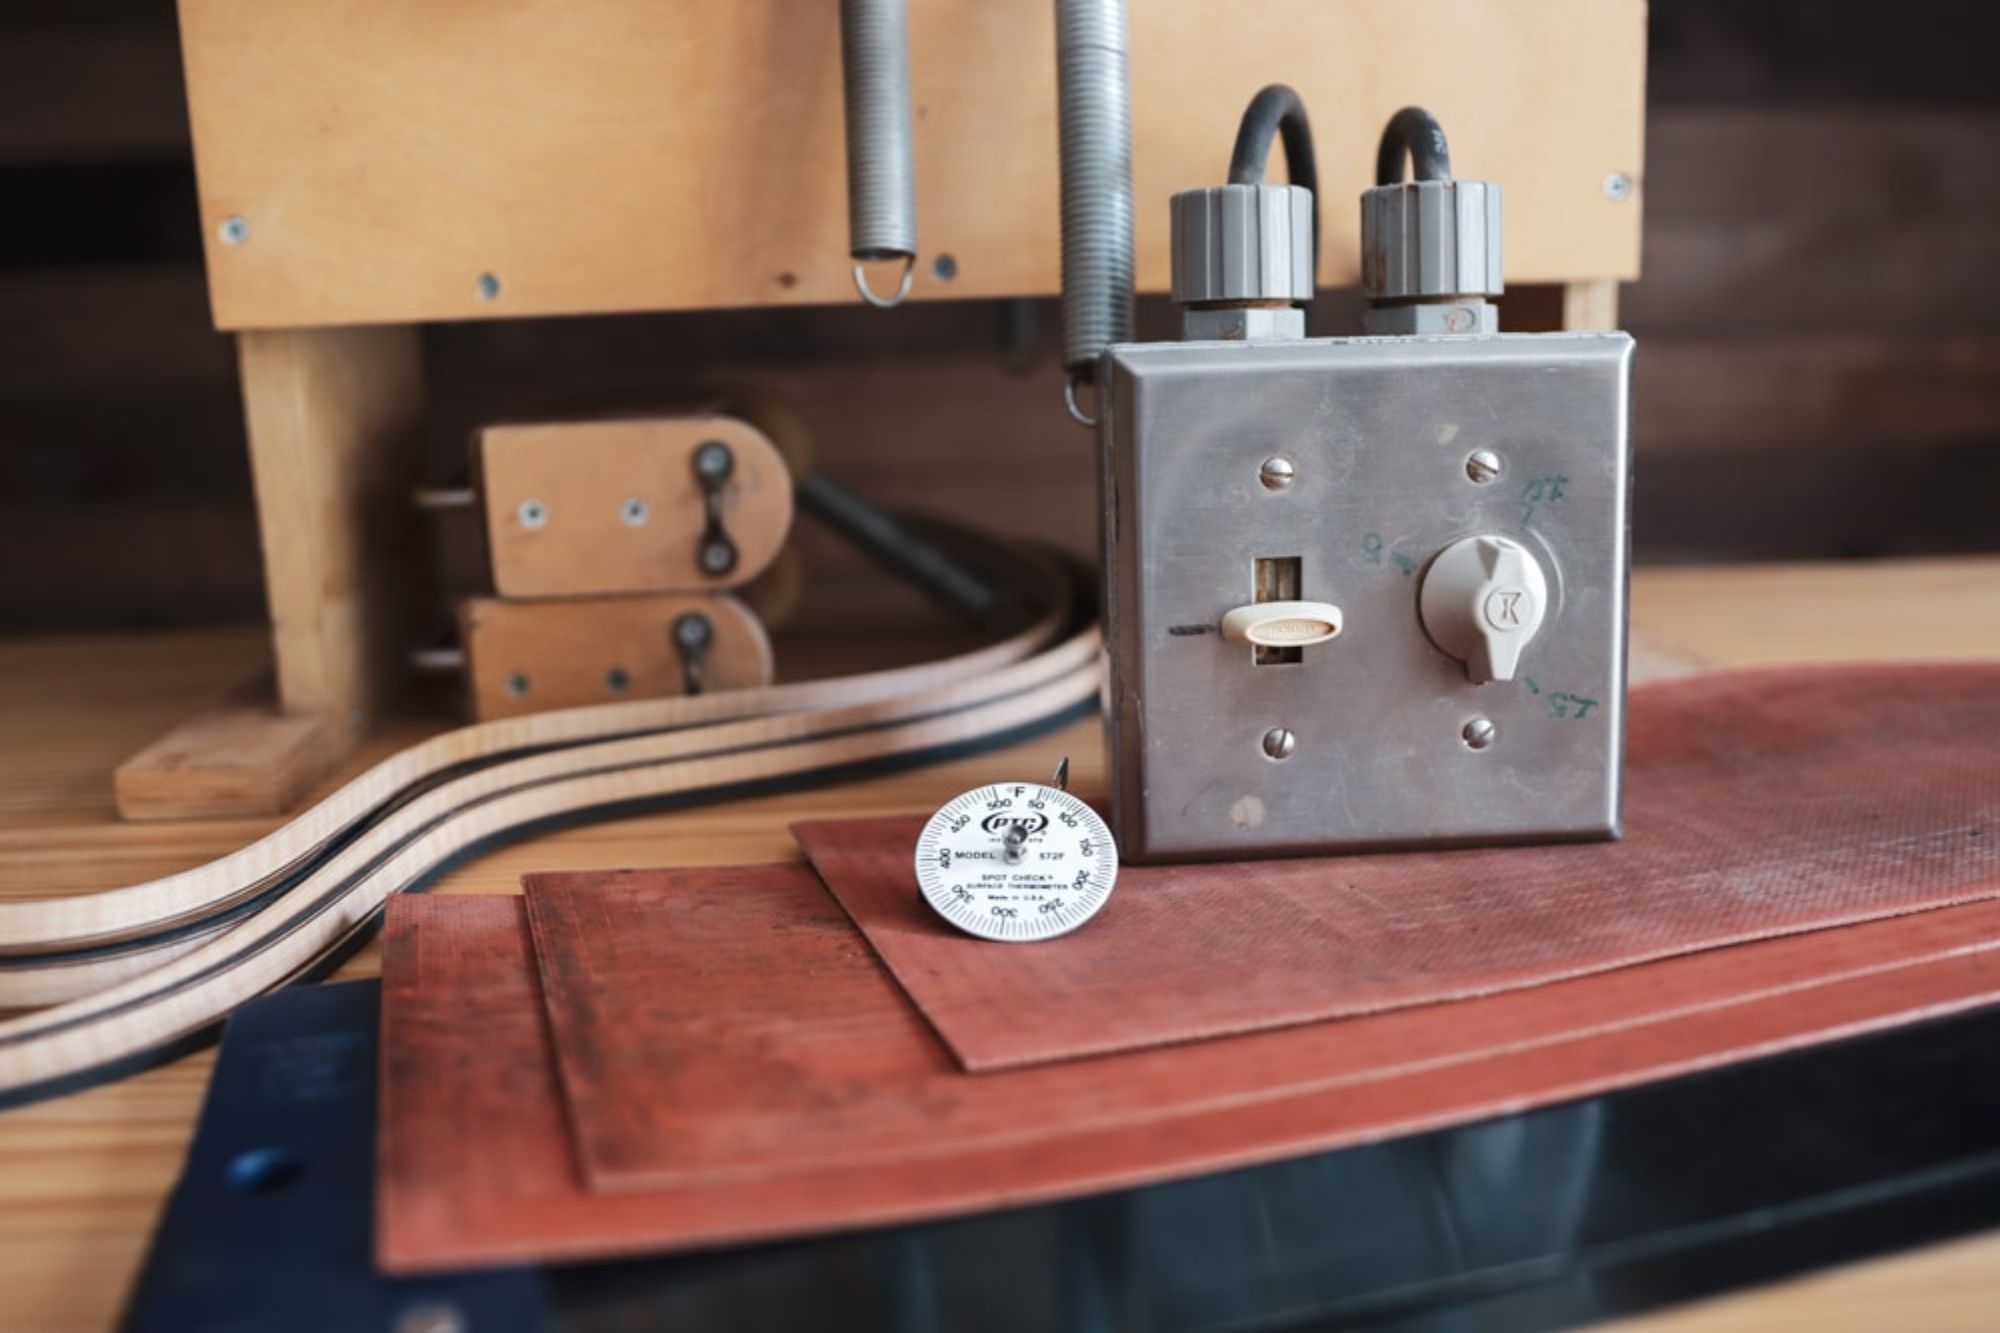
- Use Premade Components: Many side bending machine parts are available individually, so you can use some premade components to construct your bender, making it easier to build. Here are a few links to some good parts to consider: Bending Forms, Temperature Controller, Bending Blankets, Bending Slats, Blues Creek bending blankets, and slats.
Cons of Building Your Own Side Bending Machine:
- Time-Consuming: Constructing a side bending machine from scratch takes time and effort. If you’re eager to start bending, the build process may slow you down.
- Quality Variability: The quality of a DIY bender depends on your craftsmanship and the materials used. A homemade machine may not perform as consistently as a commercially available model.
- No Warranty or Support: Unlike buying a machine from a company like Stewmac or Blues Creek, a DIY machine won’t have a warranty or customer support. If something breaks or doesn’t work correctly, you’ll need to troubleshoot and fix it yourself.
Side Bending Machine Blueprints and Parts
- DIY Bending Machine Plans
- CNC Files For Side Bending Machine
- Bending Forms
- Temperature Controller
- Bending Blankets (Do Not Use Without Controller)
- Bending Slats
This option will take more time and effort to build, but with the kits and blueprints that are now available, you can build a solid bending machine and save a lot of money, too.
Which Side Bending Machine Option Is Right for You?
Choosing the best side bending option depends on your experience level, budget, needs, and personal preferences as a luthier.
But, whichever option you choose, each can help you produce beautifully bent guitar sides—you just need to decide which aligns best with your workflow and goals.
Then, you’ll need to dedicate some time to learning the quirks of your machine and develop a system you can rely on to get consistent results.
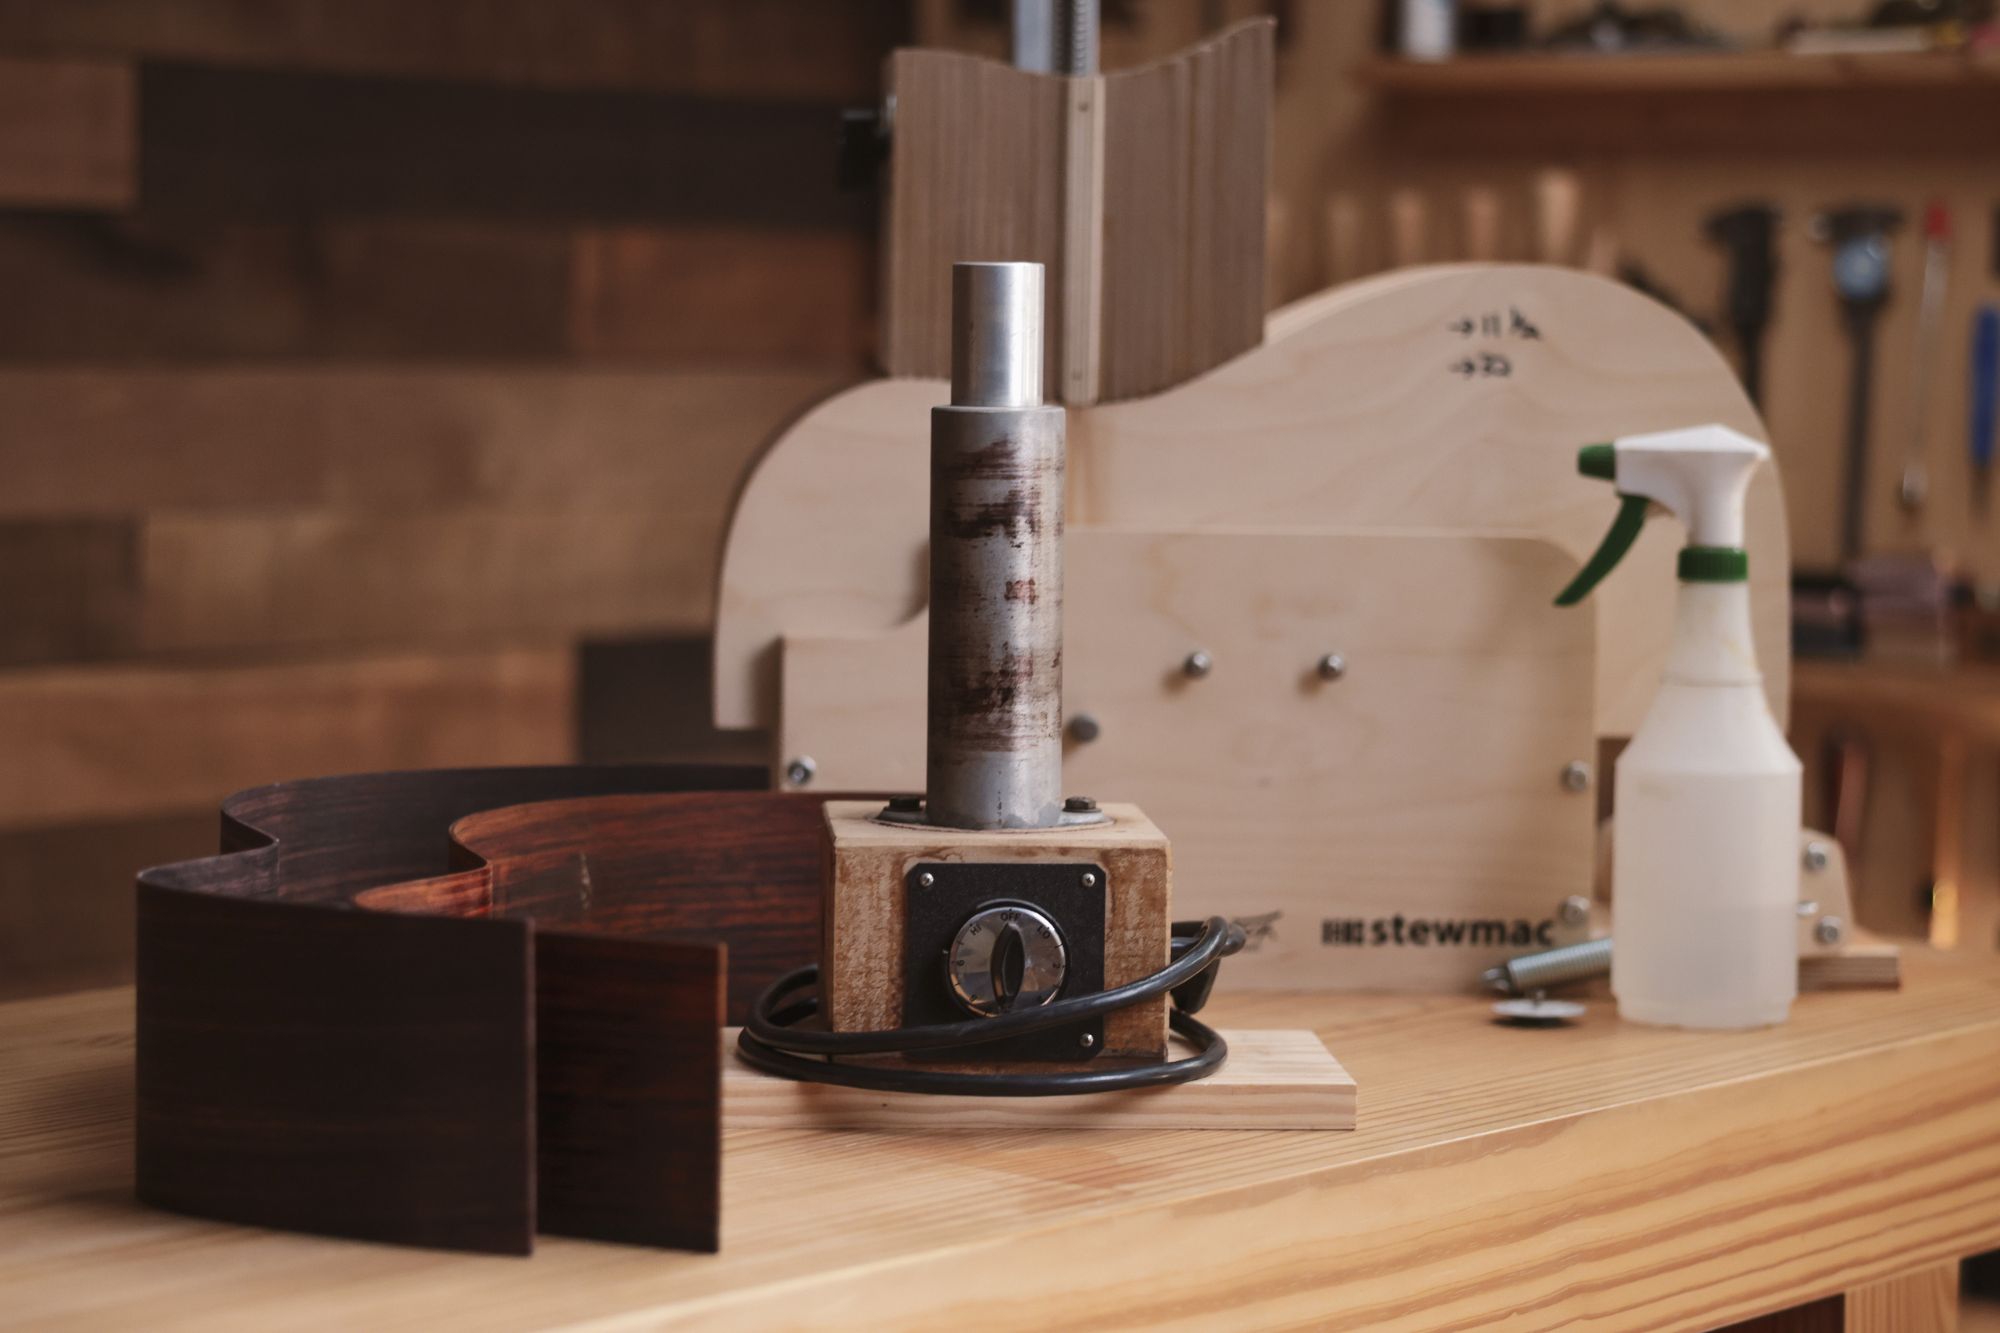
Next, I’ll share a few tips to help kickstart that part for you.
Final Thoughts & Next Steps
Bending guitar sides is a skill that takes time to master, but having the right tools from the start makes the process so much easier. Whether you prefer the hands-on feel of a bending iron or the repeatable precision of a side bending machine, the key is finding the setup that best fits your workflow, budget, and experience level.
Here are the biggest takeaways from this guide:
There’s no “one-size-fits-all” tool
Every luthier works a little differently, so the best bending tool for you depends on your approach, comfort level, and the types of guitars you build.
Quality matters
A well-built bending iron or side bending machine will last for years and provide more consistent results—saving you frustration and wasted materials in the long run.
Start where you are
If you’re just getting started, a bending iron can teach you a lot about working with wood. If you’re ready for more efficiency and precision, go for the side bending machine.
The next step is to learn to master your tools—here’s how I can help:
While this guide is all about helping you find the right guitar side bending tools, the next step is learning how to use them effectively to get **consistent, professional-quality results.**
That’s where my course, The Art of Guitar Side Bending, comes in.
Inside Luthier’s EDGE, I take you through the entire process—from setup to execution—so you can avoid common mistakes, troubleshoot issues, and bend sides with confidence.
When you’re ready to move beyond just picking the right tools and start mastering the art of side bending, I’d love to see you in the course!
Click Here To Learn More About The Course
I hope this guide has helped you feel more confident in choosing the right tools for your setup!
If you have any questions, feel free to reach out—I’m always happy to help.
Side Bending Tools FAQ
Do I need a side bending machine, or can I bend sides with a bending iron?
A bending iron is a great tool for learning side bending by hand and gives you more control over the process. A side bending machine is useful if you want more consistency, precision, and efficiency—especially for repeat builds.
What’s the best temperature for bending guitar sides?
Can I make my own side bending machine?
Yes! Many luthiers build their own machines using heating blankets, molds, and a press system. It’s a great way to save money, but precision and consistency depend on how well it’s built. See this section here for more on building your own.
What’s the difference between a cheap bending iron and a high-quality one?
A good bending iron has even heat distribution, adjustable temperature control, and the right shape for different curves. Cheap irons often have inconsistent heating, poor build quality, and fewer shape options.
Do I need a bending strap when bending guitar sides?
A bending strap helps support the wood, reduces breakage, and distributes heat more evenly. It’s especially useful for highly figured woods but not always necessary for straight-grain woods.

