Have you ever been working on a guitar, completely in the zone, only to look down and see a dent in your spruce top? That stomach-dropping feeling is one I know all too well. It’s like seeing police lights in your rearview mirror – an instant shot of dread.
But here’s the good news: that dent doesn’t have to ruin your day or your guitar.
In fact, I’m going to share a technique that has literally saved my life as a luthier on multiple occasions. (Well, not “literally,” I guess, but it felt that way!)
Anyway, the technique is simple, inexpensive, and easy to do, and in this article, I’m going to walk you through the whole process fixing a guitar dent.
The best part is that it’s based on a deeper understanding of how wood and water interact at a cellular level, and getting familiar with this relationship between wood and moisture can help you save your guitars from things much worse than dents and dings in the long run (like instability, warping, cracking, and more).
Table Of Contents
Tools & Materials You’ll Need
I’m excited to show you the process I’ve used countless times when faced with an unexpected dent in a guitar top, but first, we need to take a quick look at the tools and materials we’ll need to get the job done right.
What You’ll Need:
- A basic soldering iron (25 watts is perfect)
- Distilled water (important: only use distilled to avoid mineral stains)
- Paper towels (I prefer and trust the Bounty brand)
- About 5 minutes of your time
With all the right tools and materials in hand let’s get started and go through this simple process step-by-step.
How To Fix A Guitar Dent Step-By-Step
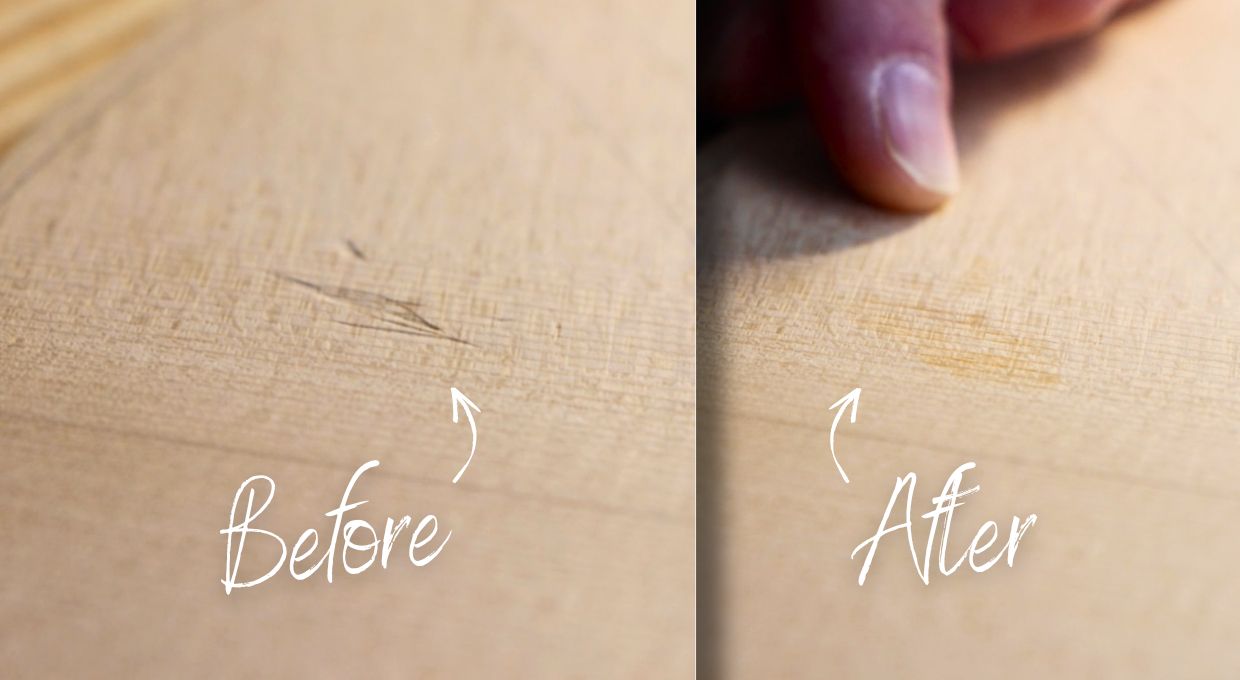
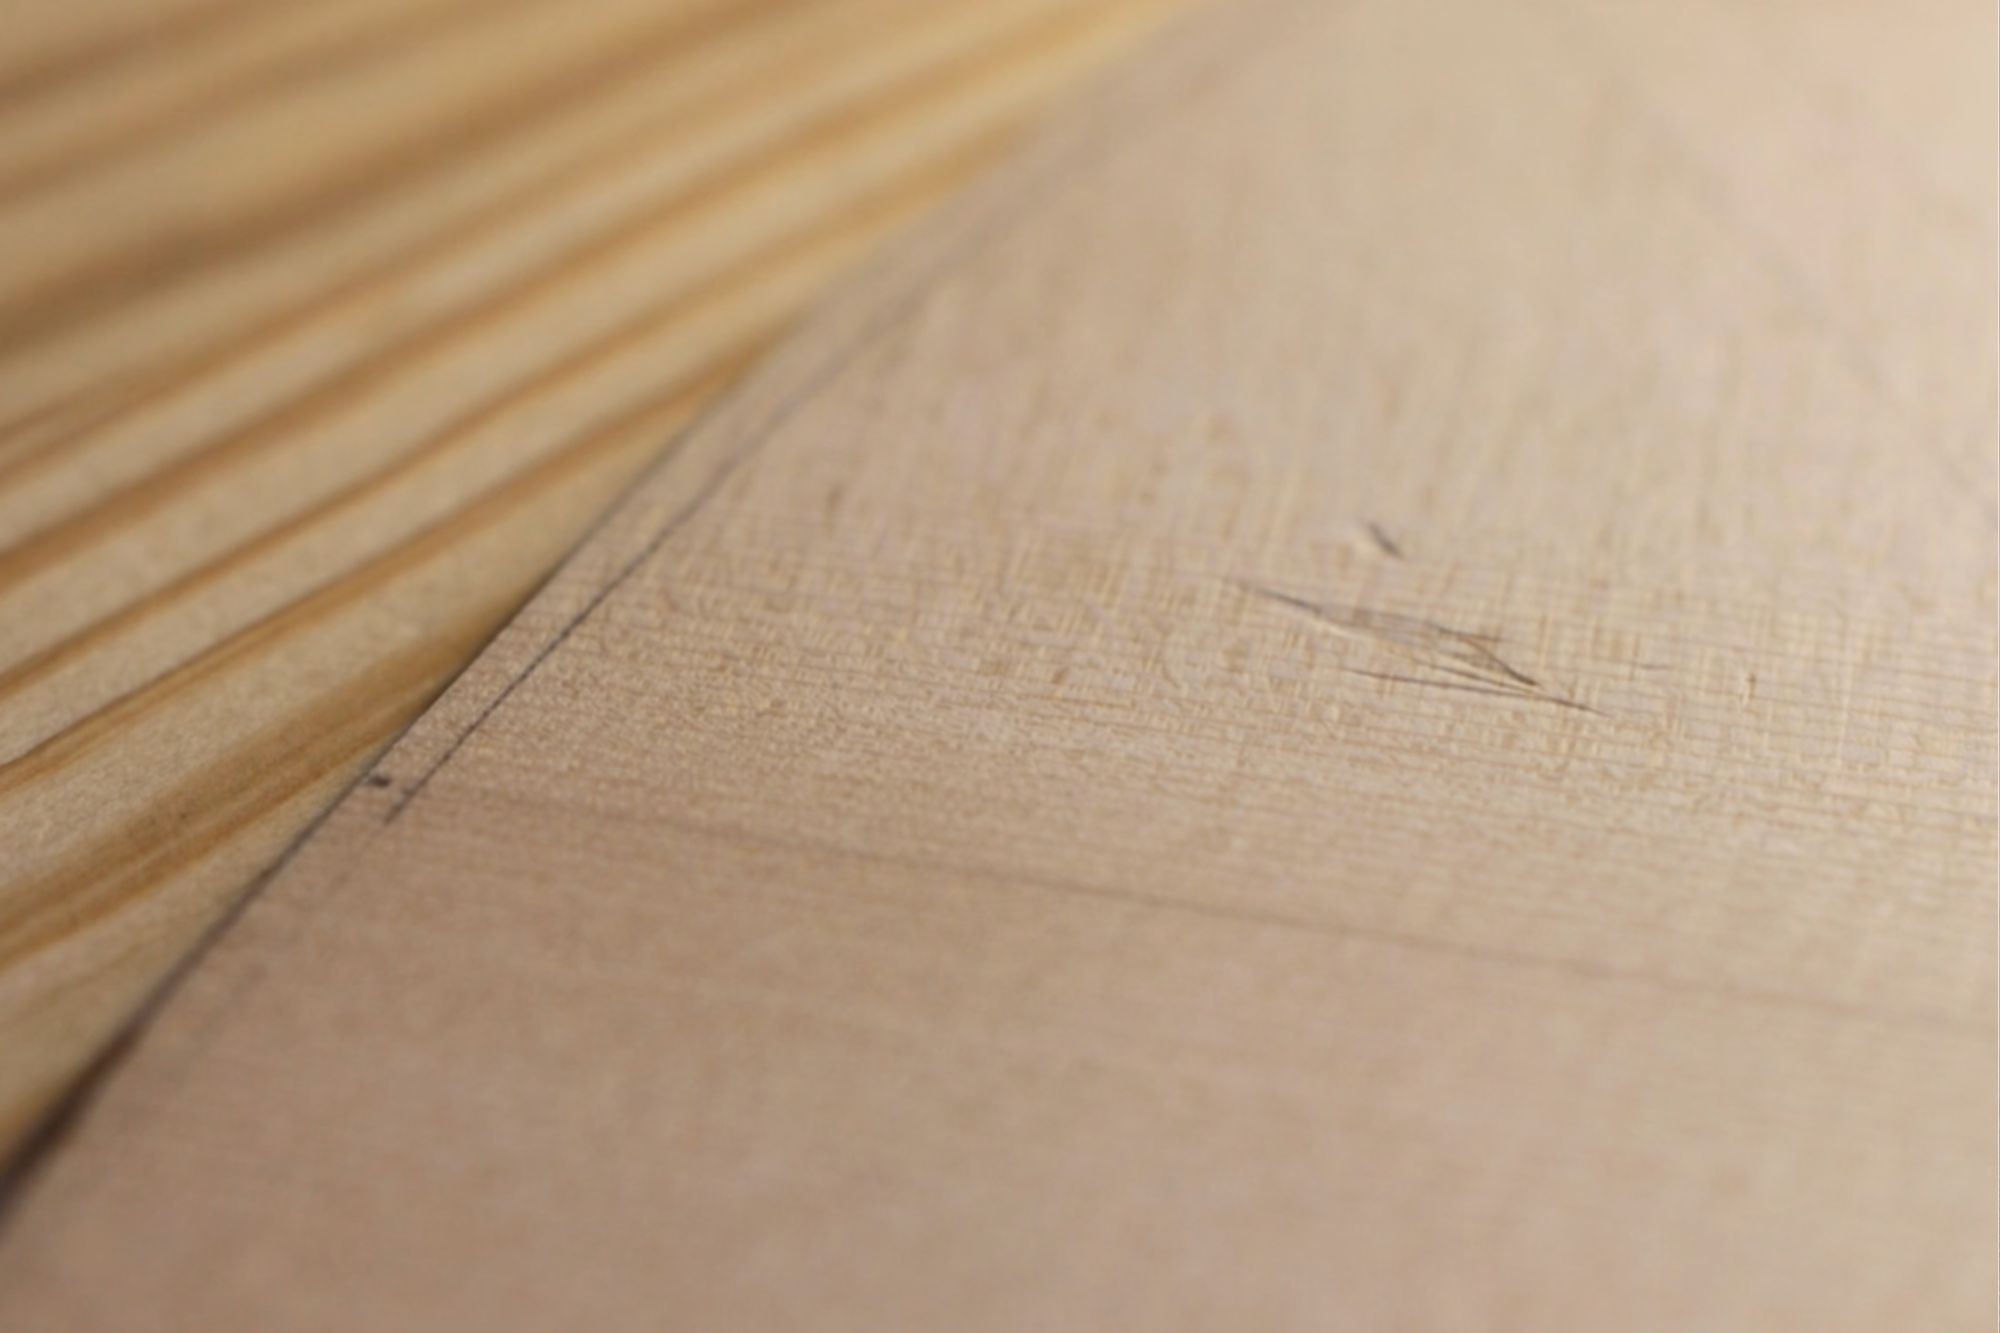
As you can see below, there is a pretty big fingernail mark and some dents that need to be removed from this spruce guitar top. This example is bare wood, but this will work through most finishes and works very well through a French Polish shellac finish.
There are only three simple steps to making it look like it never happened, so let’s get started.
Step 1 – Wet The Area With Distilled Water
Apply a drop of distilled water directly to the dent, letting it pool slightly in the depression. Let it soak for just a few seconds (not too long – we don’t want water just sitting on the wood)
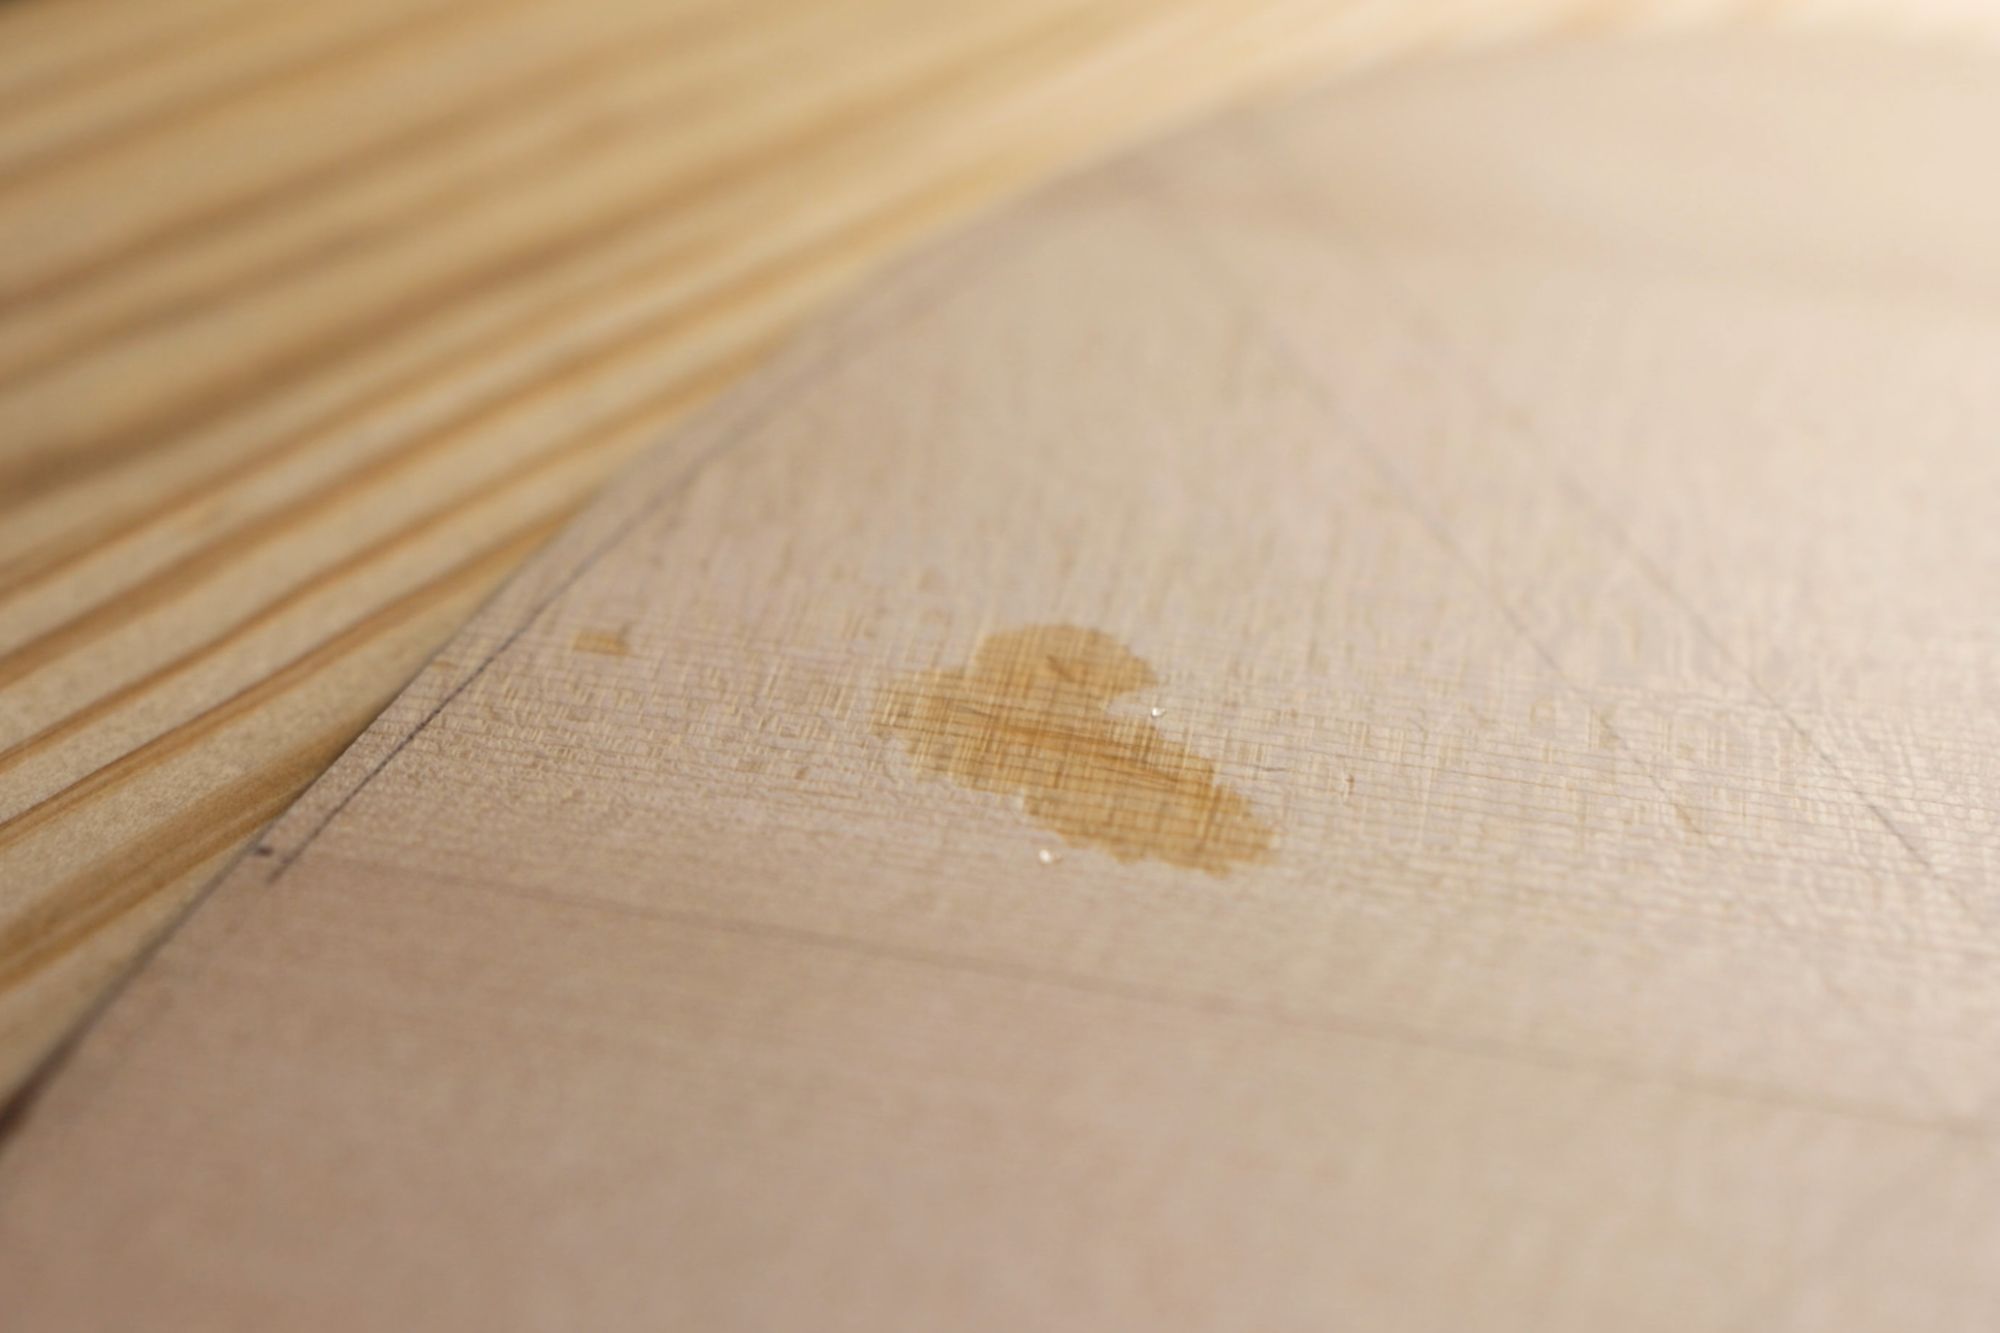
Step 2 – Use Steam Pop The Dent Back To Its Original State
Fold a paper towel a couple of times and dampen it with distilled water. Briefly touch the hot soldering iron to the damp paper towel directly over the dent. Listen for the sizzle as steam is created and forced into the wood. Continue working in short bursts to inject steam into the wood cells without burning or marking the wood.
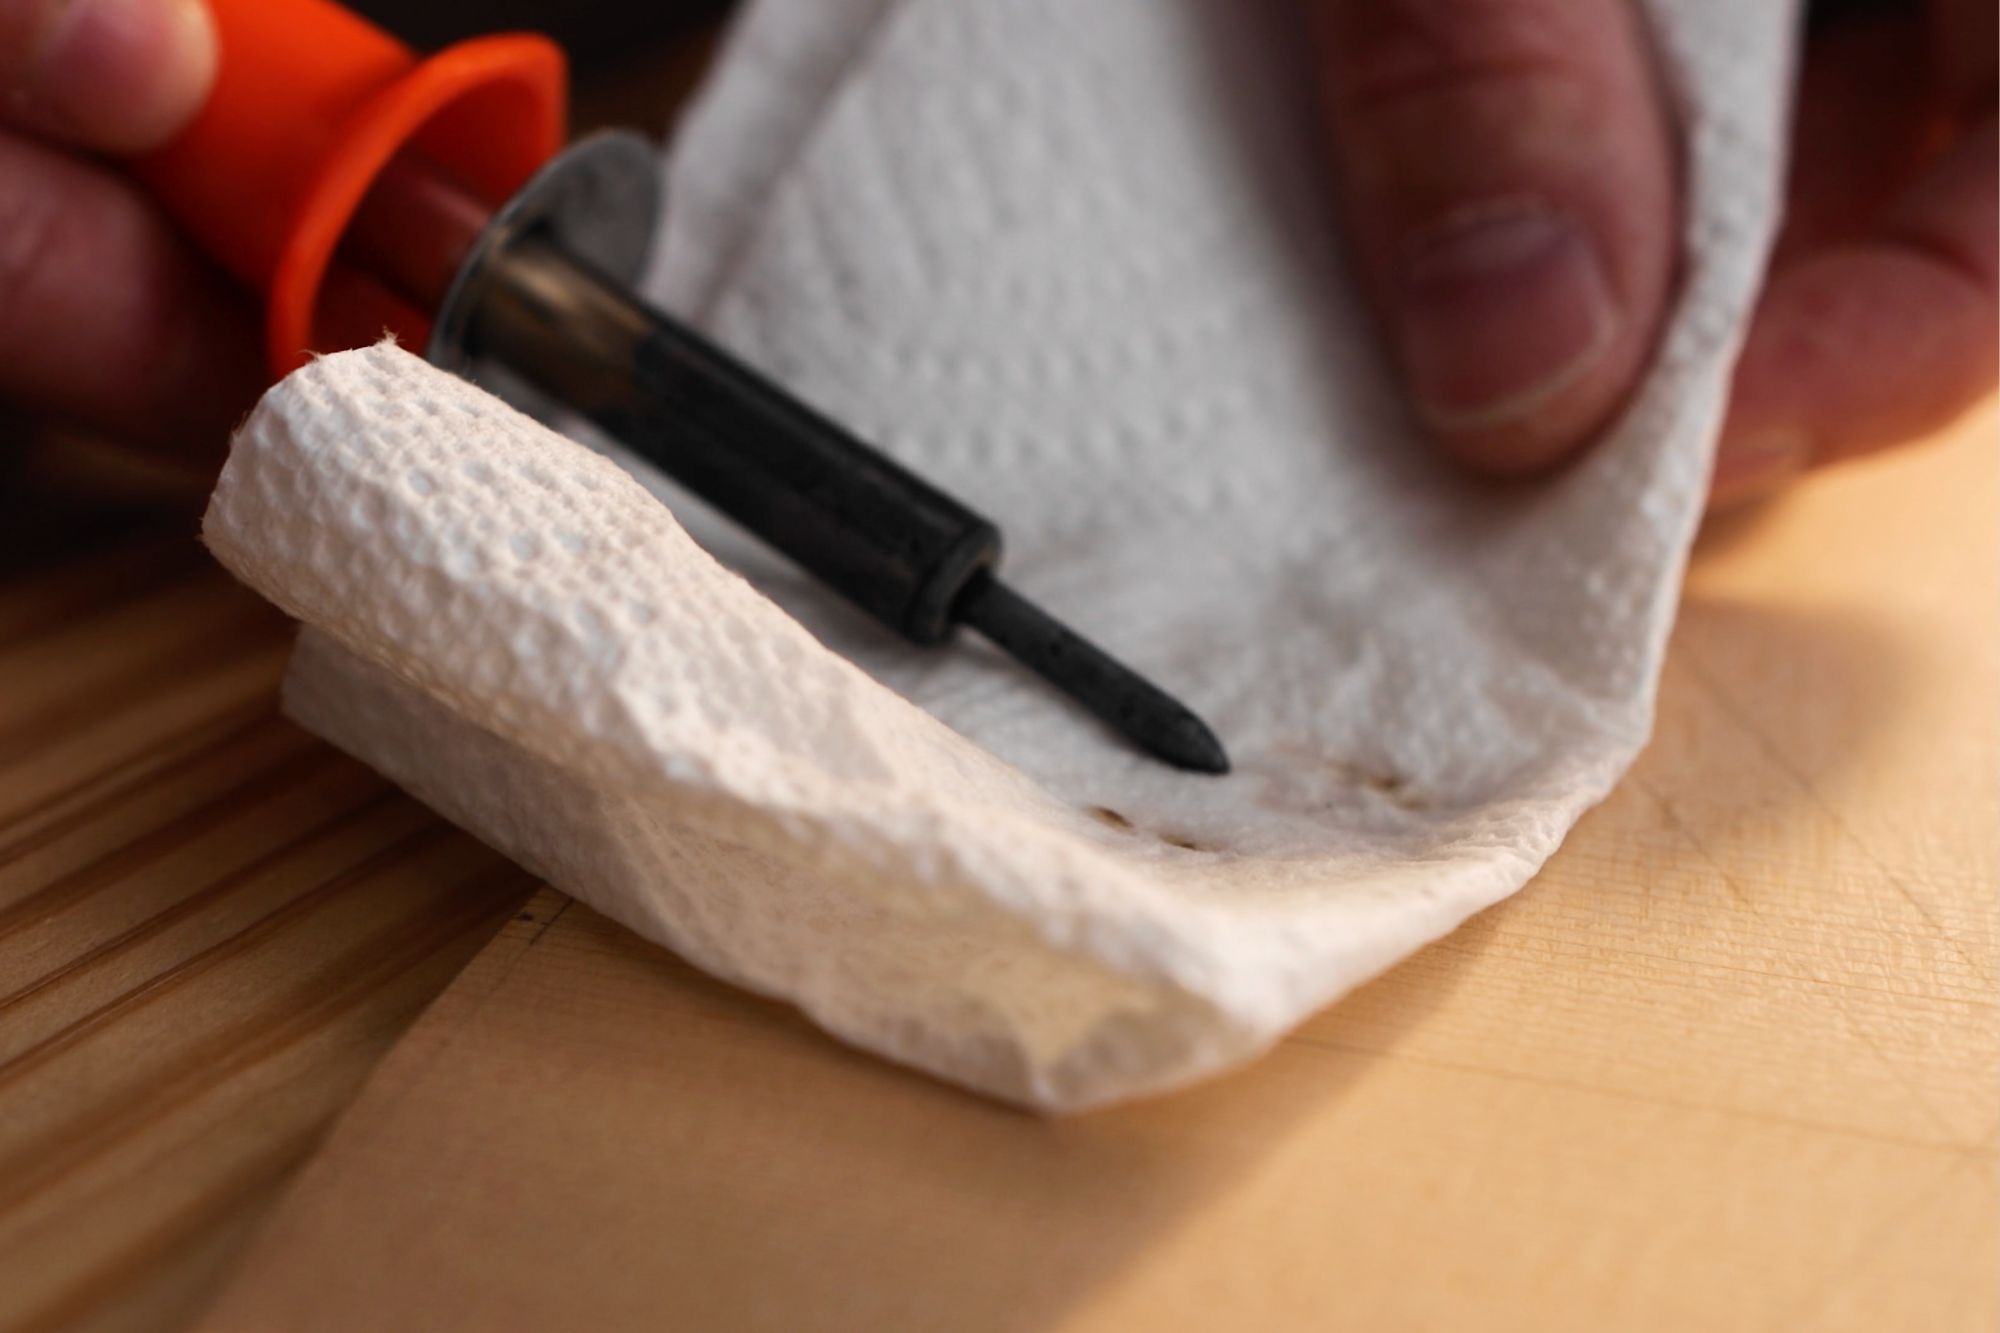
Step 3 – Let It Dry And Do A Light Sanding If Needed
Wipe the wood dry with a new paper towel, and if needed, follow with a light sanding in the direction of the grain, using a flat sanding block.
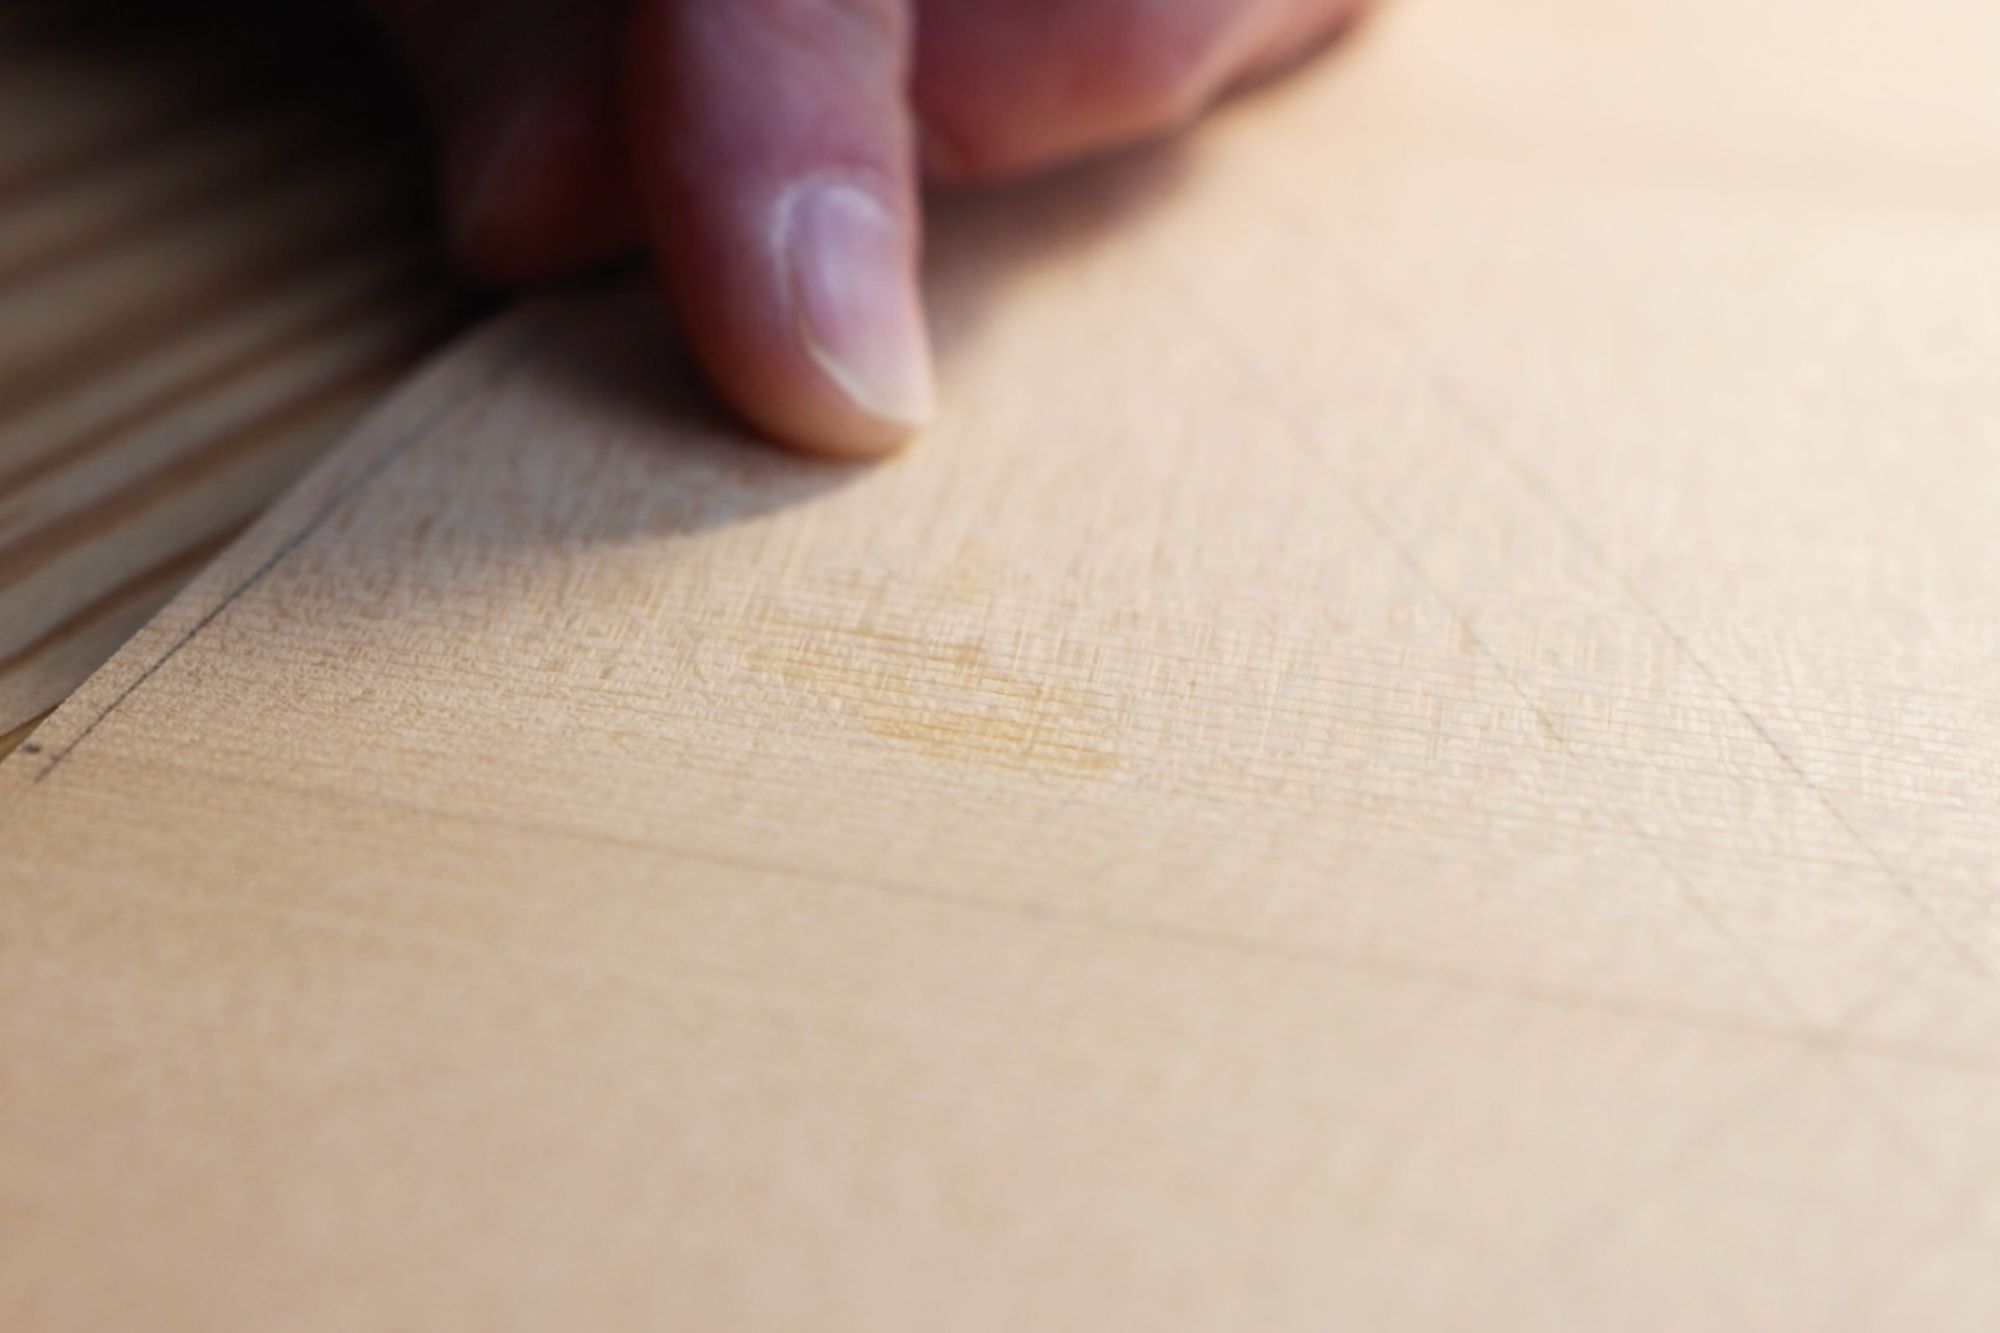
What’s also amazing about this technique is that it can work right through most finishes, and is especially great for fixing dents through a shellac finish.
Here’s an important tip: When fixing a dent through a finish, you’ll need to take special note of working in short bursts so you don’t melt or burn the finish (or the wood). The goal is to quickly inject small bursts of steam through the finish and into the wood cells underneath. A little patience goes a long way here.
So, with this simple dent-fixing technique now in your bag of tricks, whether your still working on bare wood or if you’ve already begun finishing your guitar and notice a dent, you can still save it – or at the very least, get most of it out, making it much easier to drop fill if needed.
The Science Behind the Magic
So why does this work? It’s all about understanding what happens to wood at a cellular level.
Wood cells shrink when they lose water. There are two types of water in wood: the free water in the cell cavities and the bonded water in the cell walls. When both types of water leave, those cell walls shrivel and shrink, which is why wood changes dimension as it dries.
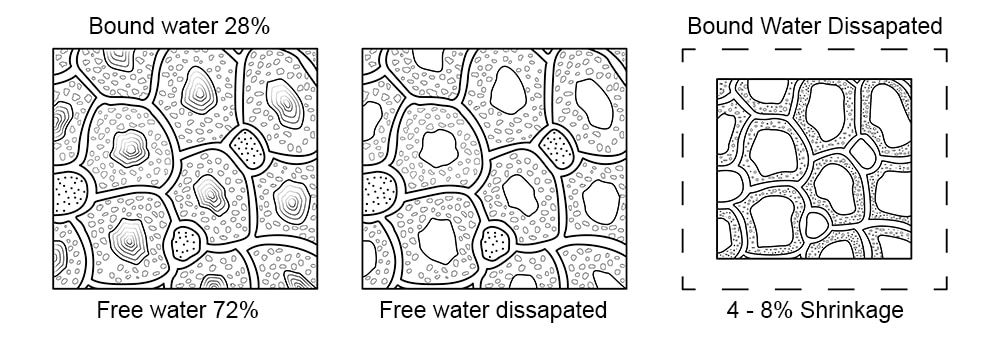
When we apply steam to a dent, we’re essentially forcing water back into those compressed cells. The heat and moisture cause them to swell back to their original position – quite literally “reinflating” the wood cells that were compressed when the dent was created.
The water we’re adding through this technique is temporary – it will dry out quickly. But it’s enough to pop those cells back to where they were before the dent occurred. Once dry, a light sanding is often all that’s needed to make the repair virtually invisible.
Beyond Dent Repair: Why This REALLY Matters
This little trick is more than just a handy fix – it’s a window into the fascinating relationship between wood and water that affects every aspect of guitar making.
Understanding how wood cells respond to moisture is crucial for:
- Preventing cracks and structural failures
- Creating stable joints that will last decades
- Getting better results when bending guitar sides
- Designing guitars that can withstand environmental changes
- Predicting and controlling how wood will move as humidity fluctuates
The truth is, wood loves water. It’s always seeking equilibrium with its environment. As luthiers, we’re not just craftspeople – we’re also stewards of this living, breathing material that continues to respond to its environment long after our work is done.
That’s why I can’t think of a more important thing to do than spend time deeply understanding the tone wood that we craft our guitars from. It’s more than just understanding relative humidity, it’s quirky and interesting, and its relationship with water affects everything from the sound to the longevity of the instruments we create.
Mastering Wood & Water: Your Next Steps
If you’ve found this dent repair technique valuable, you’re just scratching the surface of how understanding wood-water interactions can transform your guitar building.
In my workshop, I’ve developed systems for guitar shop humidity management that have dramatically improved the stability of my guitars. Over the years, I’ve discovered the best ways to store and prepare wood that enhances its tonal qualities while preventing future problems. I’ve learned how to apply this understanding to my workshop and every aspect of the building process—from design decisions to joinery techniques.
If you want to build more stable and better-sounding guitars that remain that way after leaving your workshop, I’ve created a comprehensive course called “Humidity: Fundamentals and Advanced Applications.”
In this course, we take a deep dive into how wood responds to different types of moisture, exploring everything from cellular structure to practical workshop management.
The course builds from foundational concepts to advanced applications, including:
- How different cuts of wood respond uniquely to humidity changes
- Best practices for wood storage and preparation
- Workshop humidification and dehumidification strategies
- Advanced design concepts for more stable guitars
- Joinery techniques that accommodate wood movement
- Troubleshooting and repair techniques
My hope is that this course will give you not just technical knowledge, but a more intimate acquaintance with the personality of wood – because what could be more important than truly understanding the material at the heart of our craft?
From Quick Fix to Deep Understanding
So, the next time you see a dent in your guitar top, don’t panic. Grab your soldering iron and distilled water, and remember that this simple fix is just one example of how understanding wood’s relationship with water can save your work and improve your craft.
But more importantly, I hope it sparks your curiosity about the deeper relationship between wood and water, and how that understanding can elevate every guitar you build.
After all, that’s what the art of lutherie is all about – not just following techniques, but understanding the “why” behind them, and using that knowledge to create instruments that will bring joy for generations to come.


